Drywall repair Lauderhill – drywall finishing

[post_name drywall contractors 

Drywall Repair Considerations

drywall repair in bathroom

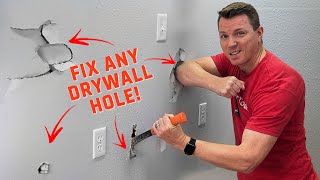
It's a normal scenario you're taking a seat stairs seeing the TELEVISION or reading a book, and afterwards you listen to a loud bag from upstairs. Shocked, you run upstairs to see just what is taking place, and also you see your child's leg, arm or head sticking from the wall surface. Nevertheless the dust gets rid of, you see to it that every person is alright, as well as the correct punishments are divvied out, it's time to take care of the gaping hole that is left in your wall.Now depending

on the size of the opening that remains in the drywall. depends upon exactly how it is mosting likely to be dealt with. If you have a little door deal with dimension opening it's mosting likely to be much easier to do it one way (which ill discuss later). However if you have a bigger opening it might be simpler to install a large brand-new piece of drywall that ranges from one stud to one more. I'll explain that also.Now with a

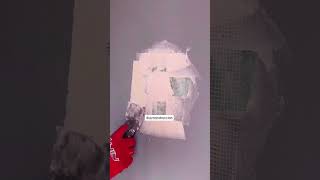
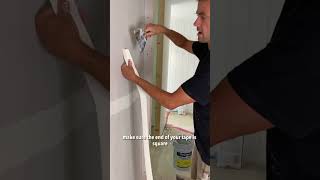
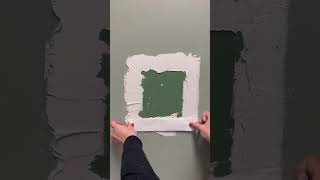
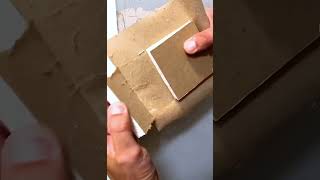
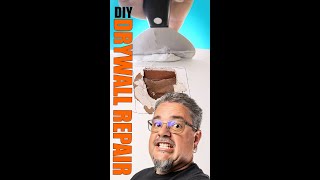
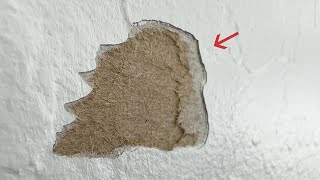
smaller opening Initially we should remove the fragments that are hanging all over the place. We will do this with a drywall saw as well as an utility blade. After that when we have a good clean area to deal with, we wish to remove about 1/2inch to 1 inch strip of paper off the drywall to make sure that it resembles torn cardboard. After that we wish to reduce a piece of drywall that is somewhat bigger compared to the opening that is mosting likely to be taken care of. Then begin to carve away at the back side of the piece up until the piece fits the opening and the paper is left. This item is called a "patch hat".

Now placed drywall mud on the edges of the patch hat as well as place it in the red. Then as soon as in area apply a layer of mud over the patch, allow dry. Once completely dry, chip off any kind of pieces and also sand smooth, and also then mud again. Let that completely dry, and also do the exact same thing. Do this till the patch is good as well as smooth and also all set to be painted.That's the best ways to fix a small opening in drywall. Currently to repair a bigger opening it's basically the same thing other than that we are mosting likely to wish to eliminate the opening completely. Take the drywall saw as well as cut till you struck a stud, now determine to the mark as well as minus & frac34; of an inch to ensure that you will certainly be half on the stud. Make 2 marks and break a line, or with a level edge draw the line via the 2 marks, that's the line you want to reduce. Now that you have actually that done we intend to make use of the saw to cut to the stud on the other side of the hole. Take a dimension from the very same location that you did for the various other mark and add & frac34; of an inch to it. That will certainly get you half on the other stud. Make 2 marks a draw the line with it. With a framing square, utilize the line to earn a square line at the top as well as below the opening. You ought to have a square opening now. Currently you wish to reduce out the item that you have marked. Step the opening that you have and cut a piece to fit in it. Once cut place the piece in the red and also nail to 2 edges where the studs are with some drywall nail. After that mud it like in the various other example as well as you are prepared. These are some examples of just how to repair an opening in your wall.

Drywall Repair Questions Answered by a Professional

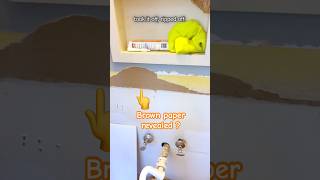
Drywall Plastering is usually replaced with various other kinds of standard plastering since it is labor extensive as well as costly also. The old made plaster on wood needs three layers of plaster and it may not be within the skill of many individuals to do it, and also needs experts the majority of the time to do even the repair work work.In lots of brand-new residences today drywall plastering is most certainly the favorite wall covering product. It sets you back relatively much less and executes well in a lot of applications. It is also very easy to set up as well as the completed appearance is additionally good, especially after it is painted properly.There is paperless DP

as well. Considering that there is no paper surface area the drywall is covered with fiberglass. The favorable features of the fiberglass surface area are water-resistance and reduction in the spread of mold.The material made use of to patch the plaster for the holes is special. It is not too tough to patch plaster walls, however it depends upon the size of the openings to be covered. Nevertheless, it is suggested not to utilize drywall joint compound as patching material.There are various types of devices for this sort of plastering, as well as they have different levels of top quality.

If you are interested in doing a whole lot of drywall tasks, it is worth buying some devices like a variety of joint blades, stilts, a taping banjo or some other special tools.Drywall plastering is used to complete interior wall surfaces. However you have to take care to choose the ideal sort of plastering for the right location, as

there are various kinds. For damp areas there is an unique kind of plastering which is moisture-resistant. If you utilize routine drywall in such places, it could fall apart.Sometimes even if the plastering is done properly, it gets cracks. In such situations the joint substance could hold way too much water and after that fracture when it runs out. Or, due to some movement of the walls splits can develop.But actually DP also calls for ability. It seems fairly simple, however it has to be practiced a couple of years, before it could obtain a best appearance. There are Do It Yourself's devices readily available in the marketplace. Attempt and also avoid the 2 usual errors made.

Never ever collaborate with lumpy joint compound and also you need to cope with the idea that you can not come to be a nit-picker in DP after having actually applied just a second coat.Drywall ending up methods could help you to obtain an expert coating. They are not as straightforward as they seem to be on TELEVISION or in the Do It Yourself's guidebook. You need to get sufficient method working with joint substance and also drywall insulation. Really it needs a great deal of hand-eye co-ordination as well.There are

some typical problems related to drywall plastering and also these are blisters on the plastering, and also the tape likewise has the tendency to diminish at locations. The blisters take place normally when there isn't really adequate joint substance between the tape and also the drywall surface. Right here again your hand-eye co-ordination is necessary. Besides that the mixing of the joint substance is essential, due to the fact that it should have the right consistency. And also you must also have the right devices to stop the blisters. drywall repair tips

Drywall Repair Tips

drywall contractors

Best Drywall Repair Services Florida

Drywall repair Coconut Creek – drywall prices

[post_name drywall patch 

How to Find the Perfect Drywall Repair Services

drywall repair on textured wall

Drywall Plastering is usually replaced with other kinds of traditional plastering because it is labor extensive as well as costly too. The old fashioned plaster on timber needs three layers of plaster as well as it may not be within the skill of several people to do it, and also needs specialists a lot of the moment to do even the repair service work.In many brand-new homes today drywall plastering is most certainly the favorite wall surface covering material. It sets you back reasonably much less and performs well in most applications. It is additionally simple to set up and also the ended up look is likewise excellent, especially after it is paintinged properly.There is paperless DP

too. Since there is no paper surface the drywall is covered with fiberglass. The favorable features of the fiberglass surface area are water-resistance as well as reduction in the spread of mold.The material made use of to patch the plaster for the openings is unique. It is not also difficult to spot plaster wall surfaces, yet it depends on the dimension of the openings to be covered. Nonetheless, it is recommended not to utilize drywall joint compound as patching material.There are different kinds of tools for this sort of plastering, and also they have various degrees of top quality.

If you are interested in doing a great deal of drywall jobs, it is worth buying some devices like a variety of joint knives, stilts, a taping banjo or a few other unique tools.Drywall plastering is used to complete indoor walls. However you need to beware to pick the ideal kind of smudging for the right location, as

there are different kinds. For damp locations there is an unique sort of gluing which is moisture-resistant. If you utilize routine drywall in such places, it could fall apart.Sometimes even if the plastering is done properly, it gets fractures. In such instances the joint substance could hold way too much water and afterwards crack when it runs out. Or, due to some movement of the wall surfaces fractures could develop.But in fact DP likewise requires ability. It appears to be rather simple, yet it requires to be practiced a number of years, before it can obtain a best look. There are DIY's tools available on the market. Attempt and also stay clear of both typical errors made.

Never deal with bumpy joint substance and you need to deal with the suggestion that you can not end up being a nit-picker in DP after having applied only a second coat.Drywall finishing methods could help you to obtain a specialist coating. They are not as easy as they seem to be on TV or in the DIY's guidebook. You have to obtain enough practice collaborating with joint substance and drywall taping. Actually it requires a lot of hand-eye co-ordination as well.There are

some typical problems related to drywall plastering and these are sores on the plastering, and the tape additionally has the tendency to drop off at areas. The sores happen normally when there isn't sufficient joint compound in between the tape and the drywall surface. Here once again your hand-eye co-ordination is essential. Besides that the mixing of the joint compound is necessary, because it should have the best uniformity. And also you ought to likewise have the right devices to avoid the blisters.

Does Your Concrete Foundation or Drywall Have Cracks?

An opening in drywall might show up to many people to be hard to repair, however in reality it is an easy solution that the majority of house owners could fix themselves. The repair work technique outlined in this short article takes a few hrs, yet if done properly will leave you with a flat, seamless wall surface. There are seven steps that you should adhere to in order to attain a wonderful repair on your drywall.1.

Mark off the location to be patched. Make use of a square to mark off an area a little larger than the hole that you are fixing.2.

Utilizing a drywall knife, reduced around the 4 sides that you have currently noted off, leaving you with a square hole in the wall surface.3.

Prepare an item of wood to enhance the spot. To do this, cut a slim strip of 1x2 or 1x4 a little bigger than the height of the hole. Slip the timber right into the opening as well as placement it so that the timber prolongs just as above and below the opening. Connect the timber making use of drywall screws connected through the bordering drywall.4.

Produce a drywall spot for the hole. Utilizing a measuring tape, energy blade and also a square cut an item of drywall to fit within the opening.5.

Safeguard the patch using drywall screws affixed via the reinforcement board that you have already mounted. Screw down the patch until it is flush with the surrounding wall surface.6.

Spread a slim layer of joint substance on the spot utilizing a drywall knife. If needed, use drywall tape around the border and spread on an additional thin coat of joint compound. Allow the location dry then sand the area making use of a fine grit sandpaper.7.

After the joint compound is entirely dry, use one more coat of joint substance making use of the drywall knife, blending in the fixed location with the surrounding wall surface. Allow to dry entirely and sand once again with fine grit sandpaper. As soon as you have completed the actions, you need to have a smooth patch.All that is

delegated do currently is painting the fixed location and also your work is total. To do this you have to prime the freshly repaired area initially. You could make use of a latex based guide to do this such as Kilz or Zinsser. After primarying the repaired area as well as enabling it to dry, you are prepared for the surface layer. If you have touch up paint it might not match flawlessly because even interior paint will certainly fade over an amount of time. If your paint does not match, there are two different options. The first option is to repaint the whole area which is one more task completely or you could repaint from edge to corner of the fixed wall. I would recommend you to attempt and also painting from edge to edge of the fixed wall initially as well as if it does not match with the remainder of the area you can always repaint the entire room.So the following time you have some damage to your sheetrock, if you follow these actions you should have no worry fixing it to its original state. All the best.

drywall repair or replace

How to Find the Perfect Drywall Repair Services

drywall patch

Best Drywall Repair Services Florida

Drywall repair Cutler Bay town – sheetrock repair

[post_name drywall prices 

How About That Drywall Repair?

drywall repair tips

By the time you finish reading this post, you will certainly be able to do standard repair services to damaged drywall. There are some basic tools that you should maintain around your home, if you have an active household and also are prone to obtain dings in the walls. This post will certainly not provide adequate info to do major repair services to drywall. Significant fixings are easy, however you should learn the basics first.Here is a listing of some devices you will certainly require. Your regional big box could provide you with some basic tools. They run in rate variety from economical to specialist high quality. They have plastic putty knives for less than a dollar all the method as much as stainless steel that with treatment, will last a lifetime. If you anticipate a really handful of repairs, the plastic will be sufficient. Also, get a carriage screw, a tiny hammer, a could of drywall joint compound, 150 to 220 grit sandpaper as well as a paint brush. These basic devices will repair most small dings and also dents in drywall.An example of a ding would certainly be where the locking

button on a door knob has left a perception in the wall behind it. This is regular of a fast and easy repair work. Look at the damages. Is there anything extending over the wall surface area? If so, utilize the carriage bolt to press the protrusion listed below the wall surface area. Make use of the hammer in order to help convince the outcropping to go below the surface of the wall surface and also round the edges. Next, take the putty blade as well as some joint compound or as it is frequently called, drywall mud, as well as fill up the opening. Wait up until the mud dries, sand gently as well as load the hole once more to bring the material to the very same degree as the wall. Sand the surface again up until the wall surface is smooth and level. Do not over sand. This will certainly rough up the drywall permitting the paper to battle royal and needing even more mud to secure the rough surface. There should not be any type of differences in the surface. Several tiny applications will last a lot longer compared to one huge application and also offer you better results.Is every little thing smooth? If not, use some more drywall mud to also the wall surface surface areas. Sand once more. When the wall is smooth, apply the paint guide. When the paint guide is dry, apply your regular wall paint. The paint primer is to seal the wall surface so the new paint does moist also quickly enabling the patch to be visible.That is the basic method of fixing damaged drywall.

Drywall Repair Questions Answered by a Professional

Nowadays screws are considered much better for connecting drywall, but there are still locations where nails are predominantly utilized. This article describes just what you could do to repair the problem when nails start to pop out of the surface.The most common locations to find popped nails are along the bordered of ceilings on outdoor wall surfaces. The reason is that temperature distinctions tend to turn products regardless of whether it's steel or wood. Likewise, condensation on the top of nails can cause discoloring of the product made use of to cover them as well as sometimes it will also fall off completely.In other situations nails may pop if the house has cleared up to some level in time. Homes could occasionally work out also rapid as well as way too much, and also if you assume this may be the situation with your residence it's a smart idea to speak to a home inspector and have that person examine it out and also see if they can see just what the problem is. Clearly, if there is an architectural problem in your house, it truly does not make much feeling to attend to aesthetic concerns such as stood out nails.Merely tapping a stood out nail right into the wood again won't deal with the problem. The factor the nail stood out in the initial

location will not go away and it's only an issue of time before the nail pops right back out once again. Commonly, the nail hole has actually raised and you require something to maintain the nail securely protected. Commonly, the very best way is by utilizing one more nail.This is ways to do it: point the brand-new nail at the timber behind the drywall as well as drive it in alongside the old nail. See to it the brand-new nail overlaps the top of the various other nail and own the nail till it produces a tiny dimple. Check to see that the nail has actually been owned in adequately by dragging a stiff things across the surface( it can be anything really-a leader, a putty blade, as long as it's rigid). If the nails hasn't already been driven in much sufficient you'll feel a pull as well as the nail ought to be driven in more till there's no resistance.With today's color-changing filler it has come to be very simple to fill out the dimple that you made

. Brilliant pink is a preferred selection as it changes to white when it dries. You probably won't need greater than a few coats, maybe three, with simply a light and quick sanding in between applications.Of course, you could opt to utilize a screw next to the old nail and if you wish to go in this instructions see to it to

countersink the screw sufficient that the nail ends up being covert listed below the surface. Other than that the actions are the same as currently defined. drywall repair average cost

DIY Versus Professional Drywall Installation and Repair

drywall prices

Best Drywall Repair Services Florida

Drywall repair Lauderdale Lakes – ceiling texture

[post_name drywall patch 

Is It Time To Do Some Repair Work On Your Drywall?

drywall repair on textured wall

For small burrow to approximately & frac12;" you can just make use of spackling substance and also a putty knife. Apply the spackle, wait until it dries after that sand smooth. Spackling substance will shrink a little bit so sometimes you will certainly require to use a second coat after the very first coat dries out, you will then require to sand it once more before touching up the paint.For medium

openings 1/2" to 3" you will require to get a drywall spot (there are numerous other approaches to fix a hole this size but a drywall spot package is the most basic). Many of these sets have a spot that is self adhesive. Just cut the spot so that it is larger than the dimension of the hole by regarding 1" and also stick it over the opening (some packages in fact allow you to stick the patch through the opening after that draw it tight behind the rear of the hole enabling you to fill out just the hole).

Then you will certainly need drywall substance (which could be discovered in smaller sized containers than a gallon) or spackling compound. Utilizing a large blade putty knife (3" or broader), apply the substance over the spot as well as a few inches surrounding the opening, after that after it dries, sand it smooth. You will certainly should duplicate this step a few times up until you can no more see where the patch is, fining sand after each layer dries out. Ultimately, retouch the paint.For larger

holes 3" and bigger it is normally best to change a section of the drywall. Locate where the closest stud is, after that reduced out a rectangle around the opening including fifty percent of the width of the stud. Then, making use of the removed piece as a design template cut a fresh piece of drywall to fit the hole. Area the drywall in the red as well as usage drywall screws to affix it to the stud. (It is also better if you removed an item that is big sufficient to expose half of two studs to make sure that the drywall is even firmer in position. Studs are normally positioned 18" apart however might be anywhere between 12" to 24" apart.)

Utilizing you "mudding knife" (or large putty blade), use a slim layer of drywall mud to cover the whole joint. Next off, use paper drywall tape over the mud and utilizing your blade, embed the paper strongly right into the mud, scuffing off any kind of excess mud. After this dries apply one more 2 to 3 coats of drywall mud over the joint tape extending roughly 6" on either side of the joint, fining sand between each coat. Once the fixing job is smooth you could retouch the paint.

Drywall Plastering - A Great New Method

I do not care what your drywall water damage in fact is, the first point that were mosting likely to should do is to learn where the water damage is really originating from. One of the most typical wrongdoer, will certainly be a roofing system leak or a pipes water system pipeline that is dripping. Allow's obtain down to the bottom, literally. That's where a lot of the drywall water damage fixings will need to be done.If you have water dripping from your roofing, there's a great chance that the drywall ceiling will certainly be harmed as well as if it has an acoustical or snacks kind ceiling structure on it, a large location of the ceiling appearance will have to be removed or gotten rid of then re-sprayed after the water damages repairs have actually been made.If your ceiling is smooth, this will be the simplest ceiling fixing that you can make, a lot of the time. Often people get the illusion that a smooth water damaged ceiling from a roofing leak, will certainly be easier to fix as well as their right. The trouble is, after the repair work has actually been made, if it isn't done correctly, the repair work will stand out like an aching thumb.Now what about a water damage ceiling that has a light appearance or a heavy texture. This will typically be the hardest ceiling repair to earn. It's challenging to match some sorts of ceiling structures. The heavier the structure, the harder it will be to fix. If you have a lightly sprayed orange peel kind structure, you could count yourself fortunate. This repair service will normally be easier to end up than a smooth ceiling repair.You repair service the water damage ceiling, as well as you do not such as exactly how it looks. Right here's the finest means to fix this problem. You will should smooth out the whole ceiling, using drywall joint substance, up until it is totally flat or smooth or scratch all the acoustic old ceiling structure off and also start from scratch.Once the entire ceiling is smooth, you could use your brand-new structure or acoustic ceiling. Some specialists will really figured the task by doing this, just to save themselves a view of frustrations later.If there is various other water damages to the ceiling, you might even consider removing every one of the drywall, changing it as well as re-texturing the entire ceiling. drywall repair or replace

How to Patch Holes in Dry Wall

drywall patch

Best Drywall Repair Services Florida

Drywall repair Sebastian – general labor

[post_name how to patch drywall 

Drywall - Methodologies and Benefits

drywall repair dent

Fixing fractured drywall joints can be frustrating at finest. If there is just a very, really small fracture existing, you may be able to scratch out the fracture to a larger size and afterwards simply use new spackling compound. Using a sharp, sharp device such as an old fashioned can opener (church trick), scrape placed a groove bigger and also somewhat longer than the fracture. It has to go to least 1/8" deep yet deeper is better. There are patching substances offered today made just for patching fractures but are not intended for huge locations. If this is a paintinged wall surface some amount sanding will certainly additionally be needed. Spackle will not adhere to a smooth painted coating. Sand the location around the split at the very least a few inches bigger compared to the fracture and afterwards go ahead and also use the patching substance ensuring you require the spackle down right into the crack. Right after applying the spackle, re-wipe the area with your blade to eliminate any excess spackle from the area leaving a flat surface area. Depending after exactly what sort of compound you acquired the drying times vary rather a little bit from mins to hours. After the spackle is entirely dry usage a 100 or 120 grit drywall fining sand paper to smooth area so it is flush with the existing wall. Prime the drywall and also install the final paint.In a case

where the fractures are much bigger along the seams, it might triggered by the drywall tape pulling loose, physical damage or probably also excess wetness. Meticulously eliminate any kind of and all loose products at taped locations. You could not as well as I repeat, could not re-spackle old tape. The drywall tape has minute holes that allows the spackle to travel through as well as anchor the tape to your joints. The spackle "wets" the tape aiding it not only to adhere to the drywall but allows the spackle to create a bond on both sides to the drywall. Once it is utilized, the openings are filled up thus making the tape pointless. Attempting to brief cut will just trigger the joint to re-crack later.After removing all loose materials, lightly sand the damaged areas taking care not to tear or sand through the paper layer of the drywall beneath. When the location is smooth to the touch see to it you have fined sand uniformly onto the surrounding location so as not to leave a side that will certainly show with the completed work. Making use of a six inch wide spackle blade, install an even layer of new spackle over the joint. Put your brand-new drywall tape over the joint and also using the knife, press the tape strongly onto the drywall getting rid of all excess spackle as it ejects from under the tape and sides of the knife. Do not eliminate way too much spackle so as to leave the paper completely dry. Once the area is as smooth as you can make it, apply a second lighter layer over the same area ensuring the brand-new tape is entirely embedded in fresh spackle.After drying out for eventually to ensure all the spackle is dry, re-sand the

whole location to once again obtain a smooth feel to the entire fixed area. Using your twelve inch blade, spread a 2nd layer to the entire repair making certain you blend smoothly onto the adjoining wall surface surfaces. Do not leave any type of ridges or sharp edges where you meet the old wall surface finish.Once this 2nd layer of spackle is dry, which will certainly be a lot less compared to the base layer as it is much thinner, use, utilizing your twelve inch knife, a 3rd really slim layer of fresh spackle. You will certainly virtually have the ability to translucent this coat as it is made use of to fill little indents or scrapes left by sanding the 2nd layer. Once again after the 3rd layer dries, extremely lightly sand the repair work for the last time to ensure a completely smooth completed area. Use a layer of drywall primer to secure the freshly repaired drywall location then repaint your wall.If the drywall joints have actually completely split or divided open there might be an architectural trouble that needs to be re-mediated prior to you fix the drywall joints. Structure settlement, foundation troubles or other products could impact the drywall completes so make sure they are fixed first.Once you make certain there are nothing else issues existing, as in a small repair service, get rid of all loose or damaged materials. If the drywall itself is fractured, reduced the drywall back to a stud and install a brand-new item of drywall. The fixing is the very same as a minor split just on a much larger scale.Installing tiny items of drywall for patching develops what are called butt joints which are much more challenging to conceal. You will be required to spread your spackle over a much bigger location to

get a smooth look and not a bump in the wall surface. With method you could do this job as well as conserve on your own a fantastic deal of money.If you remain in a hurry and also the repair work is reasonably small, there fast drying out materials available such as Durobond 90 which when included in spackle makes the spackle rock hard in ninety minutes. There is additionally a forty-five min kind available but just actual pros should try and utilize it. Forty-five minutes flies by truly quick. When I say it dries rock hard, it is nearly impossible to sand when dried out so any tiny problems left in the surface area with your blade will certainly show later on. Be careful.Remember to maintain your tools tidy, do not tear open coulds or covers with your knives as it will dent or chip the edges of the knives as well as work as tidy as you can to prevent exhausting cleaning later on.

Repairing a Hole in Drywall

Sheetrock is a kind of drywall and also is made and a trademarked product by US Gypsum Company, among the leading providers of drywall worldwide. It is additionally referred to as plaster wallboard. Sheetrock is a mix of natural plaster, water, and also sand that is pressed between 2 heavy sheets of paper. It is a construction material that is made use of around the world to construct architectural aspects like ceilings and wall surfaces. It was developeded in 1916 however it took one more thirty to forty years prior to it caught on with building contractors, that had actually traditionally built wall surfaces from plaster.Benefits of sheetwork vs plaster & bull; It is quicker to mount sheetrock than it is to

• mount plaster & bull; Sheetrock can be paintinged or primed right away after• it has been mounted so the structure of the office or home can be proceeded without any type of hold-up. With plaster it requires days and even weeks to totally dry & bull; Plaster considers more compared to sheetrock so there is much less wear and also tear on the
• structure's foundation and structural systems & bull; There is a greater level of fire-resistance with sheetrock compared to there is with platter. This could provide the ones in the building even more time to leave the building securely in an emergency like a fire.Size of sheetrock The standard sheet of sheetrock measures 4 feet by 8 feet yet for structures with specialized needs

or have high ceilings the contractor can get bigger sections. Generally, the interior wall surfaces of a building are created from drywall that is one-half inch thick. If the structure's walls are going to undergo even more damage, the building contractor could find thicker sheets of five-eights thick. If there is a curved wall surface, a building contractor can make use of sheetrock that is quarter inch thick. The sheets of sheetrock could be formed because they are reasonably flexible.Types of sheetrock There are several kinds of sheetrock that can be utilized for different applications. & bull; Traditional-it is naturally fireproof yet the contractor could choose Type-X,

which is fire-rated sheetrock. This sheetrock is enhanced with vermiculite and perlite to boost its resistance to flames and warm.

• Builders utilize Type-X drywall in industrial structures, which has fire-rated scores from twenty to one hundred eighty minutes. & bull; Greenboard-this obtains its name from its environment-friendly paper covering, which is a product that is moisture-proof as well as is utilized in washrooms as well as kitchens. & bull; Blueboard-this is the kind that a builder would certainly choose if the owners desire the wall surfaces to have the appearance of plaster. & bull; Soundboard-this kind of sheetrock is built to block the transmission of noise between various spaces.
• It can be mounted in numerous layers making sure that the levels of sound could be kept. drywall repair or replace

Drywall Finishing and Critical Lighting Problems

how to patch drywall

Best Drywall Repair Services Florida

Drywall repair Palm Springs village – drywall patch

[post_name drywall patch 

Introduction to Drywall Repair Materials

drywall repair tips

If you have been a residence painter for very lengthy you have certainly entered some kind of drywall repair service on every indoor painting task. As a matter of truth, if you do not get great at understanding drywall repair, your painting tasks will not be as specialist as they can be.In this post I intend to disclose exactly how small drywall repair service works could indicate huge profits for you. I am speaking about making $350 to $500 on average for just 7 - 10 hours of job. Each task is different of course and might become simply a $200 fixing or maybe a $1,500 repair.The reality is that when it pertains to drywall fixing people constantly call a person to do the job. As a residence painter I understand that the majority of people think they recognize ways to paint and also the search phrase right here is "believe ". Yet when it comes to things like drywall fixing they go running house to momma.And this is why you can make great money doing little repair service jobs like plumbings and also electrical contractors do. The things that lots of people are inexperienced to do themselves are simple and also very easy for us that make a decision to focus on them.Some individuals have the cash however lack the time and prefer to have somebody else do the job anyhow. 99 %of the moment though, individuals just do not know the profession. Drywall repair is a secret art. As for the ones that try to repair their very own drywall themselves, the task always ends up lousy.Where is the target audience for obtaining business? The answer is residential, light commercial, rental residential or commercial properties, and so on. As a residence painter you can be limited to a greater end market if you want to make expert painters incomes. But no so with drywall repair service. Your market could be reduced end to high-end merely as a result of the incredible revenues in smaller sized tasks that the majority of people could afford.Most of the moment you get calls from people when they have water damages. Often it is from careless teens roughhousing.

I had one job where ate a hole in the ceiling. I would claim that 95 %of drywall repair is from water damages as well as fifty percent of that could be from bad pipes, a leaky shower that requires to be re-grouted, and so on. A leaking roof covering is generally the various other reason.Sometimes you can obtain jobs hanging and taping small tasks like a garage or component of a cellar. You don't need to take on these bigger tasks though. Often times people intend to sell their residence so they are encouraged to repair their wall surfaces or ceilings finally.You may ask yourself, if drywall repair services are so simple just how can I obtain proficient at doing them? First, You require to discover ways to duplicate a couple of typical structures, which is simple once you find out which

tool was used to earn it. You will certainly also get repairs for typical drywall openings of all dimensions, that includes plaster( slim collection and also turret). And you will certainly have to understand the best ways to fix loose tape seams.And think it or otherwise, that has to do with all there is to effective drywall repair service. These methods are hidden to the general public however simple for you as well as I. If you ever before have seen just what homeowners aim to do to fix their very own drywall you will recognize instantly that this is an easy successful business.Here is the fantastic part. A lot of drywall repair services that I see look awful. Yet the homeowner appears pleased with it. The task resembles somebody was available in and spilled a little mud on the ceiling and also left. Yet the repair service person ran off with something like$200 as well as the property owner for some weird reason normally assumes the job was done O.K. I have seen this too often.On a serious note though, doing great specialist looking working from cost effective costs will offer you bunches of references and also repeat business. If you can learn the essentials of proper drywall repair work or even do a little repair painting afterward you will certainly do simply great. You can indeed gain$30 -$70 each hr as a result of the nature of the work.How can I get organisation? Buyer guides, classified ads in locations like Craig's List, regional on the internet advertisements, little Yellow Pages ads, word-of-mouth, and so on. Why should I begin a little drywall repair work business? Is there a large future in it? Yes for 2 factors. Initially, self-employment is coming to be the brand-new job force

as well as second of all, home repair work will always be with us.Who can do this kind of work? Anyone that likes to bring back things could do well. Individuals who are talented in your home repair works, home painters, drywall, etc. Any individual who discovers a few tricks to successful drywall repair.

Drywall Issues at Home: DIY Fixes Vs Professional Drywall Repair

It is not uncommon to find cracks in a concrete foundation of a house. This opts for brand-new homes in addition to older ones. While some splits can show a significant concern with the house, lots of are thought about regular shrinkage fractures. Allow's talk about the issue of splits in a foundation and also what it implies to you.Minor shrinkage splits prevail in new as well as older home foundations. Put concrete shrinks as it remedies, or settles. As the concrete diminishes, small vertical or 45 degree splits may develop over time at cellar windows, door openings, or corners. We call these stress or surface fractures. These cracks are 1/4"large or much less and do not affect the framework of the building. If you see small splits in a new structure, or an old structure for that matter, don't panic. The worry below is moisture breach right into the cellar or crawlspace. This is a fairly very easy solution with epoxy insertion or concrete caulk. On older residences these fractures may return, specifically if the wall surfaces are made from lath and plaster. But, don't be startled, it's simply the home remaining to settle.The exact same could be real of splits in the drywall of the home. Stress and anxiety or settling cracks will be tiny in width, concerning a 1/4 inch, as well as go at a 45 degree angle from the edge of the door framework or home window. Once again, don't panic as this is not a structural problem yet more cosmetic. Fixing of the crack include easily carried out drywall repair, which could be accomplished in little time.More severe fractures in the structure or walls do require the focus of a certified contractor to investigate and correct. The type of crack that deems interest is the horizontal crack. These splits are usually gone along with by bowing, structure, or leaning of the foundation wall surface. These types of cracks might indicate a structure concern, which might be costly to fix or if it could be corrected.There are likewise additional sorts of cracks that might be related to structural movement. Included in the serious split group are fractures that have deflection. By this we suggest that a person side of the split is greater or beyond the opposite side of the split. Additionally cracks that run diagonally across a wall, or in a stair step style. As well as finally, splits on the indoor surface (drywall or turret and plaster )that are in the very same location as cracks on the exterior of the home.Repair of these architectural activity or architectural damage cracks could consist of a number of different avenues. A number of them will include repair of the exterior along with to the interior portion of the

home.That in short is a discussion of structure or wall surface fractures in a house. If you see these kinds of cracks, it may be best to have actually a certified professional check

the cracks. The expert could after that offer you a suggestion if they are normal working out splits or among an extra extreme nature. drywall repair self adhesive wall patch

Drywall Issues at Home: DIY Fixes Vs Professional Drywall Repair

drywall patch

Best Drywall Repair Services Florida

Drywall repair New Port Richey – drywall installation

[post_name repairing drywall 

DIY - How to Repair Drywall Seams

drywall repair or replace

Repairing fractured drywall joints can be irritating at ideal. If there is just an extremely, very tiny split existing, you may have the ability to damage out the crack to a bigger size and after that simply use new spackling substance. Making use of a sharp, sharp device such as an old fashioned could opener (church secret), scrape put a groove broader and a little longer compared to the split. It has to go to least 1/8" deep yet deeper is much better. There are covering substances available today made simply for patching cracks but are not meant for huge areas. If this is a repainted wall surface some quantity sanding will likewise be called for. Spackle will certainly not adhere to a smooth paintinged coating. Sand the location around the split at the very least a few inches broader than the split and then proceed as well as apply the patching compound seeing to it you force the spackle down into the split. Right after applying the spackle, re-wipe the area with your knife to remove any type of excess spackle from the area leaving a flat surface area. Relying on just what type of compound you bought the drying out times differ a fair bit from mins to hours. After the spackle is completely dry usage a 100 or 120 grit drywall fining sand paper to smooth location so it is flush with the existing wall. Prime the drywall and mount the last paint.In an instance

where the splits are much bigger along the joints, it could triggered by the drywall tape pulling loose, physical damages or maybe even excess wetness. Meticulously get rid of any and all loose products at taped areas. You can not and I repeat, can not re-spackle old tape. The drywall tape has minute openings that enables the spackle to pass through as well as secure the tape to your joints. The spackle "damps" the tape assisting it not just to stick to the drywall but allows the spackle to create a bond on both sides to the drywall. Once it is utilized, the openings are filled thereby making the tape pointless. Trying to short cut will only cause the joint to re-crack later.After removing all loosened products, lightly sand the harmed areas taking care not to tear or sand with the paper layer of the drywall below. Once the location is smooth to the touch see to it you have sanded equally onto the bordering area so as not to leave an edge that will reveal via the completed job. Using a six inch broad spackle knife, set up an also layer of new spackle over the seam. Position your new drywall tape over the seam as well as making use of the blade, push the tape strongly onto the drywall removing all excess spackle as it ejects from under the tape as well as sides of the knife. Do not eliminate also much spackle so regarding leave the paper completely dry. When the area is as smooth as you can make it, use a 2nd lighter layer over the exact same area ensuring the brand-new tape is totally embedded in fresh spackle.After drying for one day to assure all the spackle is dry, re-sand the

whole area to when again acquire a smooth feel to the whole fixed area. Utilizing your twelve inch knife, spread out a second coat to the entire repair making certain you mix smoothly onto the adjacent wall surface surface areas. Do not leave any type of ridges or sharp sides where you fulfill the old wall finish.Once this second coat of spackle is completely dry, which will certainly be a lot less compared to the skim coat as it is much thinner, apply, using your twelve inch blade, a 3rd really thin layer of fresh spackle. You will certainly nearly be able to see via this layer as it is used to load small indents or scrapes left by sanding the 2nd layer. Once again after the third coat dries out, very gently sand the repair for the last time to assure a completely smooth ended up location. Use a layer of drywall guide to secure the recently fixed drywall location and after that paint your wall.If the drywall seams have completely fractured or split open there may be an architectural issue that has to be re-mediated before you take care of the drywall joints. Structure negotiation, foundation troubles or various other products could effect the drywall finishes so be sure they are repaired first.Once you are sure there are no other troubles present, as in a minor repair work, eliminate all loosened or damaged materials. If the drywall itself is fractured, cut the drywall back to a stud and also mount a brand-new piece of drywall. The repair work is the very same as a minor fracture only on a much bigger scale.Installing little items of drywall for patching produces exactly what are called butt joints which are much harder to hide. You will certainly be compelled to spread your spackle over a much larger location to

get a smooth appearance as well as not a bump in the wall surface. With technique you could do this work as well as conserve on your own a lot of money.If you remain in a hurry and also the fixing is fairly small, there are quick drying materials available such as Durobond 90 which when added to spackle makes the spackle rock hard in ninety minutes. There is also a forty-five minute type offered yet only masters ought to attempt and use it. Forty-five minutes zips actually quick. When I claim it dries out rock hard, it is nearly difficult to sand when dried out so any kind of little defects left in the surface with your blade will certainly reveal later on. Be careful.Remember to keep your devices clean, do not pry open containers or covers with your knives as it will dent or chip the sides of the blades and also work as tidy as you could to prevent strenuous cleanup later on.

How to Find the Perfect Drywall Repair Services

Drywall patching calls for persistence and determination. I am going to damage the procedure down conveniently so you will be a lot more notified before you start your following completely dry wall patch.One thing you should consider when collaborating with drywall is the DIRT. If you are sensitive to the drywall dust or plaster you may intend to get a fragment mask, safety and security goggles or handwear covers as well as use a long sleeve t-shirt for defense. Always remember to safeguard any type of furnishings that you want to keep dirt complimentary, too!Step1: prep the

opening or location to be patched.If the hole or location to be covered has loosened wall board paper you will certainly have to remove the loosened paper as well as gypsum. Now if the wall board paper wants to proceed wrecking the side of the wall, a method to quit this is the take a razor blade and also reduced from the loosened area regarding an inch or so. Exactly what you are doing is scoring the wall surface so when you tear of the loose paper it will involve the scored line as well as not tear further causing a bigger area to require spot job. If after you have removed the loose paper as well as the gypsum board underneath is fallen apart as well as hardly hanging to the wall, you require to knock senseless all the loose gypsum. Loosened paper and also gypsum will create the drywall compound to not bond highly and may produce a bubble you will certainly see just after layer with compound. As component of the prep, you could intend to settle up the hole so you could extra conveniently reduce the item of sheetrock that will load the void.OK so the location is prepped and also now we will should transfer to tip 2, which will certainly advise you on

ways to effectively attach a piece of sheetrock cut to load the hole in your wall or ceiling.Step 2: back framing the hole to attach the sheetrock you will certainly reduce to load the void.Just like with new building and construction you will require to have wood framing to screw the sheetrock into. To describe, I will use an instance

patch location of one foot by one foot. You will have to cut a 2x4 into two 16 "lengths. You will certainly have to collect a cordless or electric drill and also regarding a loads 1 1/4" timber screws. Take one of the 2x4's you have reduced and also move it in the red and behind the existing sheetrock, along one side of the hole. The reason the 2x4 is much longer(16 ")compared to the 12"opening is since we will certainly expand it a few inches past the top as well as base. So currently you have a 2x4 inside the wall surface on one side, the 2x4 requires to be laying flat versus the within the wall surface, it will not be transformed so the 4 "size of the 2x4 is level versus the in, this will offer us a larger surface area for add-on as apposed to the basic way of framing which would certainly be with the 2"size facing the sheetrock. You will certainly intend to eyeball, best as feasible the 2x4 and also split the difference of the board size in between the existing sheetrock and where you will affix the piece of sheetrock you will reduce for the patch. Since the 2x4 is kept in the correct placement you will have to screw the 2x4 into the existing drywall by holding securely to the board as well as screwing right into it with the face of the existing sheetrock. You will certainly place two screws along the edge as well as one on the top as well as bottom of the existing sheetrock to strongly protect the 2x4 to approve piece of sheetrock you will certainly cut. As soon as you have completed one side, repeat the exact same treatment beyond. So when you have actually ended up back framing you currently have a solid structure to connect the patch piece of sheetrock. * Note-if you have a hole to patch where there are mounting, electric or mechanical concerns in the method that maintain you from sliding the 2x4 behind the wall surface to screw down the side, you can screw in the top as well as bottom of the 2x4 and this will be sufficient. You could also take into consideration affixing the 2x4 back framing across the top and bottom of the opening as apposed to attaching the 2x4's on the sides, just utilize the same instructions of accessory for the sides or leading as well as bottom.Now that the prep as well as framework are full next we will reduce an item of sheetrock to put right into the framed opening in action 3. Step 3: take a measurement of the opening and cut a piece of sheetrock to

fit and secure it.It does not have to fit extremely tight however it will certainly should fit and be screwed to the

back framework you installed. You must place 2-3 screws down each side affixing the piece of sheetrock you cut to the framework. * Note-all the screws will certainly have to be "established"listed below the surface of the sheetrock but not deep sufficient that the screw head tears the paper face on the sheetrock, unset screws will reveal and also hinder the following step. ** Note sheetrock can be found in two thicknesses for most household building -1/ 2" and 5/8 ". 1/2"is normally on the interior walls/ceilings as well as 5/8"is utilized on underside of stairways and also in the garage.Well you're making development as well as you have filled up the void with sheetrock, currently we will certainly proceed to the

covering or completing phase of the dry wall surface compound(mud )discussed in step 4. Tip 4: finishing the spot with drywall substance (mud). As I was stating symphonious 3 the piece of sheetrock you reduced to load the opening does not need to fit very limited. If the sheetrock you reduced has a space around the

border/joint of it as well as where it fulfills the existing wall board, you ought to pre fill the area before applying the drywall tape. So just take a little compound and fill in the edges as well as smooth the excess level wit the wall, allow to completely dry. Following is to apply the drywall tape to make sure that after we are all finished there will certainly not be a split around the joint of the patched opening. For spot work I want to use a"mesh "or "fiber" tape, it offers a stronger hold as well as the mesh tape is much extra forgiving compared to normal drywall tape, in the given that you do not have to pre mud the wall to stick the tape. The mash tape has a sticky support, so all you do is cut the mesh tape to the length you need, stick it on the wall with the center of the mesh tape running right in accordance with the joint or fracture. The mesh tape need to always run past the joint a minimum of an inch. Repeat this process for all 4 sides of the patch. Following apply a coat of compound around the perimeter of the spot, over the mesh tape. The mesh will certainly be somewhat visible after only one layer. * Note-If you put on much substance(mud )you will certainly have a bulge in the surface area. Permit this layer to completely dry, sand gently, mainly to knock of any kind of blade borders that dried out in the compound as well as could trigger the next layer to develop to much. You do not wish to attempt and mud the spot in simply 1 coat, it is better to apply a moderate/thin layer permit to dry, sand and coat again. After all the layers( at least two) have actually dried and also you are satisfied that the surface is layered evenly, sand the mud to also the surface area. * Note -a much less compared to excellent coating work can be ravelled with sanding. Fining sand along the outside edge of the mud also, will blend the patched area much better into the existing surface area. An actually neat method seeks you have sanded the spot, take a wet sponge or cloth and"wash" the outside mud of the spot mixing it even better right into the existing surface, this method will assist you prevent seeing a mud line around the patch when it is completed. If your house has a smooth texture, this is the last step, your all set to painting. If you do not have a smooth structure you will have to check out on.Only one more action and the drywall component of your spot will be complete, texture. We will review different structures as well as just how to use the in step 5. Step 5: there are several appearances and you should first know the best ways to recognize your existing appearance prior to going forward.Older homes could have a swirl, crows foot, hand or smooth texture. More recent residences essentially use smooth, orange peel, knockdown and also hand appearances. For a crows foot you will need a crows foot or stomp structure brush. For swirl structure you may need to consult a completely dry wall vendor store for the correct appearance brush or experiment with a few various brushes. For a hand texture you could utilize a completely dry wall blade or trowel. All of the above mentioned appearances need a device or brush to use drywall compound to achieve the appearance. The following 2 appearances can be bought in a spray can, orange peel and tear down. * Note- with all textures it readies to obtain an old item of plywood or cardboard and experiment initially to find the appropriate amount of pressure, thickness of mud, technique and also established time to develop the right aim to best conceal that a repair was ever made. As constantly if you appearance the wall surface and are not happy with the results you could was the appearance of instantly with a wet sponge of rag, permit to dry and attempt texturing once more or sand of a poor structure if you are not pleased with it after it has actually been allowed to dry. * Note- Knockdown texture size could be controlled by allowing the sprayed on texture set up or completely dry for less or more time relying on the wanted look.We have actually talked about the 5 steps should skillfully repair a drywall spot. 1 )properly prep the location to be patched. 2)back frame the opening. 3 )size as well as cut the sheetrock to fill up the opening. 4 )apply mesh tape and also mud to smooth the surface. 5)pick and use proper texture.So go out and also" get your drywall on". You can take a look at my write-up on painting walls if you require aid with the paint. Don't hesitate to leave a comment concerning any kind of various other subject you would like me to write on relating to drywall. Please check out our internet site, dennardbloss.com, it

is about our building and construction coatings. drywall repair tips

Drywall Hole Repair Made Easy!

repairing drywall

Best Drywall Repair Services Florida

Drywall repair Palmetto – drywall supply

[post_name drywall installation 

How to Repair a Drywall Hole

drywall repair average cost

The intro of drywall has actually entirely changed the means indoor wall surface ending up was done. It finishes interior wall surface and minimizes building time considerably. Drywall is commonly referred to as wall surface board, plaster board or plasters board and also is made use of to make interior wall surfaces as well as ceilings. The most important specification which is taken into consideration while installing drywall is its size and thickness. In the area of indoor wall surface designs, a drywall is a revolutionized method.Drywall Setup The favored thickness dimensions

made use of for setting up drywall are 3/8 inch (0.952 cm), 1/4 inch(0.635 cm), 1/2 inch (1.27 cm), and also 5/8 inch(1.59 centimeters). Here, your architecture as well as your specialist are the very best people to speak with for selecting appropriate drywall density. When the drywall installation is full the following action is to repaint it. Drywall setup comprises of numerous steps such as preparing the website for drywall, mounting drywall, installing edge bead, taping as well as mudding, using the second coat of mud, applying the final coat of mud and Sanding.Drywall Cracks Drywall could be easily harmed when exposed

to water. The split in the sealing is extremely much annoying for the property owner. The numerous sources of drywall splits include temperature level modification, infiltration of water, and also physical damage because of require or shock.It requires a great deal of persistence to fix the drywall splits. The procedure is extremely simple and the tools called for is putty knife, sandpaper, paint brush, paint, joint tape, mud pan, mud trowel, and security glasses.Procedure for fixing drywall Step-1: Removing all the debris and also paint spending time the split portion.Step- 2: In case, crack is extending you need to get rid of weak particles by force.Step-3: Currently, make use of sandpaper to smoothen out the fractured portion.Step-4: Mix the plaster mix, utilizing the mud pan.Step-5: Currently make use of putty

blade to use the plaster.Step-6: Make a small strip and cover the fracture Tip -7: Currently use coat of plaster over the seam tape.Mould Development Drywall supports the growth of mould because

it is permeable and also lightweight compound. Nowadays in order to stop mould growth, the sheet of drywall is made from fiberglass, rather than paper. The growth of mould happens due to moisture and also

moisture. In prone individuals, mould can cause allergic reactions like asthma, sneezing,

or cold like symptoms.Key Benefits The setup of drywall is very simple. Its essential advantages are Versatility: It could be utilized in all inner areas.Flexibility: You can create as well as split the area according to your needs.Dry Construction: The work atmosphere is clean, completely dry and dirt free.Excellent Performance: The result is fruitful in terms of fire rating, thermal and audio insulation.Aesthetic allure: It permits simplicity of decor with tile, paints or wall

paper.Speed of installation: When compared to standard stonework system, it

is 3 to 4 times faster.Lightweight: When compared with the traditional stonework systems, it is 8 to 10 times lighter.Partitioning: Drywall is likewise liked for doing room partitioning.

Drywall Finishing and Critical Lighting Problems

Sheetrock is a sort of drywall as well as is manufactured as well as a trademarked product by United States Gypsum Business, among the leading providers of drywall on the planet. It is also described as gypsum wallboard. Sheetrock is a mix of all-natural gypsum, water, and sand that is pressed in between two heavy sheets of paper. It is a building and construction material that is utilized globally to construct architectural aspects like ceilings and also wall surfaces. It was designed in 1916 however it took another thirty to forty years prior to it captured on with building contractors, who had traditionally constructed wall surfaces from plaster.Benefits of sheetwork vs plaster & bull; It is quicker to mount sheetrock than it is to

• mount plaster & bull; Sheetrock could be painted or primaried right away after• it has actually been set up so the building of the home or workplace can be continued with no hold-up. With plaster it requires days or perhaps weeks to completely dry & bull; Plaster weighs greater than sheetrock so there is much less damage on the
• structure's foundation and also architectural systems & bull; There is a higher level of fire-resistance with sheetrock compared to there is with platter. This can give the ones in the building even more time to exit the structure safely in an emergency like a fire.Size of sheetrock The typical sheet of sheetrock procedures four feet by 8 feet but also for buildings with specialized demands

or have high ceilings the builder could obtain bigger sections. Normally, the interior walls of a structure are built from drywall that is one-half inch thick. If the building's wall surfaces are mosting likely to undergo even more wear as well as tear, the contractor could locate thicker sheets of five-eights thick. If there is a curved wall surface, a builder could make use of sheetrock that is one-fourth inch thick. The sheets of sheetrock could be shaped because they are reasonably flexible.Types of sheetrock There are several different sorts of sheetrock that could be utilized for different applications. & bull; Traditional-it is naturally fireproof but the building contractor can select Type-X,

which is fire-rated sheetrock. This sheetrock is improved with vermiculite and perlite to raise its resistance to flames and heat.

• Home builders make use of Type-X drywall in industrial buildings, which has fire-rated rankings from twenty to one hundred eighty minutes. & bull; Greenboard-this obtains its name from its environment-friendly paper layer, which is a product that is moisture-proof and also is made use of in washrooms and kitchen areas. & bull; Blueboard-this is the type that a builder would certainly choose if the proprietors desire the walls to have the look of plaster. & bull; Soundboard-this kind of sheetrock is built to block the transmission of noise in between various areas.
• It could be mounted in numerous layers making certain that the degrees of sound can be kept. drywall repair bradenton

Drywall Finishing and Critical Lighting Problems

drywall installation

Best Drywall Repair Services Florida

Drywall repair Miami Shores village – drywall sander

[post_name sheetrock repair 

Drywall Repairs Made Simple

drywall repair average cost

Drywall Plastering is commonly replaced with other forms of conventional plastering since it is labor extensive and expensive too. The old fashioned plaster on wood requires 3 layers of plaster and it may not be within the ability of lots of people to do it, as well as needs specialists a lot of the moment to do even the repair work.In several new homes today drywall plastering is certainly the favored wall surface covering product. It sets you back relatively less and also executes well in a lot of applications. It is additionally easy to mount as well as the completed look is additionally good, especially after it is paintinged properly.There is paperless DP

as well. Because there is no paper surface the drywall is covered with fiberglass. The favorable functions of the fiberglass surface area are water-resistance as well as decrease in the spread of mold.The product utilized to spot the plaster for the openings is special. It is not also hard to patch plaster wall surfaces, yet it relies on the size of the openings to be covered. Nevertheless, it is suggested not to utilize drywall joint compound as patching material.There are various sorts of devices for this type of plastering, and they have various levels of quality.

If you have an interest in doing a great deal of drywall jobs, it is worth purchasing some tools like an assortment of joint blades, stilts, a taping banjo or a few other special tools.Drywall plastering is utilized to finish indoor walls. Yet you need to be mindful to select the appropriate kind of gluing for the right place, as

there are different types. For damp locations there is an unique kind of smudging which is moisture-resistant. If you utilize normal drywall in such places, it can fall apart.Sometimes even if the plastering is done properly, it obtains cracks. In such cases the joint substance may hold way too much water and after that split when it runs out. Or, as a result of some activity of the wall surfaces fractures might develop.But in fact DP also requires ability. It shows up to be fairly easy, yet it has to be practiced a pair of years, before it can get an ideal look. There are Do It Yourself's devices available on the market. Try and also prevent both usual errors made.

Never collaborate with bumpy joint substance and also you have to deal with the suggestion that you can not end up being a nit-picker in DP after having applied just a second coat.Drywall finishing techniques could help you to obtain a professional finish. They are not as straightforward as they appear to be on TV or in the Do It Yourself's manual. You have to get sufficient method working with joint substance and drywall taping. Really it requires a great deal of hand-eye co-ordination as well.There are

some usual problems related to drywall plastering and also these are blisters on the plastering, and the tape likewise has the tendency to drop off at places. The sores occur generally when there isn't really adequate joint compound in between the tape as well as the drywall surface area. Below once more your hand-eye co-ordination is necessary. Besides that the blending of the joint substance is important, due to the fact that it should have the appropriate consistency. As well as you ought to also have the right tools to avoid the sores.

Repairing Chips and Scratches in Dryall and Wood Work

The strategy for exactly how to eliminate drywall appearance depends upon the product being eliminated and the problem of the wall. The most usual method for eliminating appearance from paintinged drywall needs fining sand off the high sections of the structure and filling it in with at the very least 2 thin layers of joint substance - called skim finish. An additional strategy for unpainted textured walls as well as ceilings, including snacks ceilings, is spraying water externally to loosen the appearance so you could scuff it off.When a wall has

comprehensive fractures, peeling off paint or water damage, it could be much easier to cover the existing wall with 1/4 -inch drywall or remove the existing wall completely and also change it.Whatever strategy you utilize to get rid of a textured surface from drywall, protect yourself from direct exposure to construction dust, lead as well as asbestos.Removing distinctive wall surface areas is a rigorous process that takes perseverance.

Right here's just how to tackle some usual troubles so your walls will be smooth as well as your work, profitable.How to eliminate drywall structure by skim finishing Trouble: Irregular surface.Solution To avoid producing an irregular wall when you're removing the texture, don't make use of a belt sander. It will certainly collect the texture.

Rather, get rid of high heights in the structure

utilizing a post sander with 120 grit or a 5-inch flooring scraper.Problem: Bulgy looking patches.Solution Remove any type of loose product with a rigid brush, scrape high locations and wipe with a moist towel. To use the initial coat of joint substance, start at the leading as well as job across and down.

"One of the most important point is not to make use of as well much

material

,"says Ivan Solis, head of state of Chicago-based Solis Building."If you utilize excessive joint substance, it will be tough to accomplish a smooth surface. You'll have to do a lot of sanding.

"Don't fret about ripples, simply attempt to cover the texture as well as obtain an even layer on the wall surface. Hold the joint knife at a 30-degree angle and press it in. "Maintain it tight and also smooth,"claims Solis, who recommends using a 10 -or 12-inch joint knife.Alternate the direction of the skimming strokes with each new layer of mud. If you use the initial coat horizontally, apply the 2nd layer up and down. Return excess mud from the surface area to the rim of the frying pan, keeping the blade of the knife clean.When the initial layer is dry, use the 2nd coat to fill out the surges. Once more, start at the top in the corner as well as job throughout and also down. As you work, blade off any big pieces of the initial layer, using your blade. If there are still reduced as well as high areas, you might need a third coat. When the coat is completely dry, surface

with a last sanding.Problem: Joint substance that establishes also rapidly or is too difficult to sand.Solution Pick the best compound for the job. When a wall surface appearance will require several coats of joint substance to smooth the surface area, use a setup compound like Sheetrock Easy Sand for the initial layer."Easy Sand 90 is a chemically setting compound that will provide you approximately

90 mins to work before it establishes,"states Jeff Hartin, item manager for

USG's Ready Mixed items. The product is suitable for heavy loads and sands quickly."The wonderful feature of a setup substance is that you can use the very first coat as well as begin a 2nd coat as quickly as the first one has set,"claims Solis.For the 2nd or last coat, Hartin and also Solis suggest a ready-mixed joint compound, such as Sheetrock And also 3. The light-weight item is much easier to spread, permits a thinner application, and is much easier to sand.Problem: Stains seep with the joint compound.Solution These troubles are often because of inappropriate adhesion and also are typical on lots of Do It Yourself paint tasks. If the distinctive wall is peeling or plaster and also distinctive joint substance are diminishing,

eliminate loosened product with a scrape, sand and also coat the surface area with primer/sealer prior to skim coating.Problem: Fractures as well as damages reappear.Solution Repair cracks and damages prior to skim coating. To repair them, tape over the cracks with drywall tape and also secure them with joint substance. When the wall surface is smooth, a drywall primer and also sealer will certainly secure the

wall and assistance prevent fractures and also damages from coming back. Primer additionally counteracts the pH of the wall for a more also appearance.Problem: Peeling paint and bubbling in the paint finish.Solution These problems are usually as a result of inappropriate adhesion. If the distinctive wall surface is peeling off or plaster and also textured joint compound are diminishing, get rid of loosened material with

a scraper, sand as well as coat the surface with primer/sealer before skim coating.Problem: Pitting.Solution Pits on the

surface of the drywall are air bubbles that were not effectively filled up or that were subjected during sanding. Air gurgles result from over -or under-mixing the joint compound. Apply pressure to the bubbles with the joint knife, till the pits are gone. If you do not discover them up until the wall is completely dry, cover them with joint compound and sand.Problem: Over-sanding; missing high and low

spots.Solution Sand as well much and also you take the chance of damaging the surface area paper. If that

takes place,

cover the area once more with joint substance. To stay clear of missing out on high and low spots, utilize a clamp-light or various other source of light near to the wall surface to discover problem areas. Sand systematically, working from the ceiling to the floor in narrow sections.How to eliminate a distinctive surface area from drywall by scraping

Problem:

Wall harmed by water and also scrapers.Solution Experts advise wetting wall structures with a spray bottle to loosen the material. Then use a scrape with a flat, wide blade to get rid of the structure. Use just adequate water to loosen the material or you can damage the drywall. If you note the sheetrock with the edge of your scratching blade, spot it with joint compound.How to eliminate a textured surface area from drywall by covering wall surfaces with drywall Issue: Re-installing trim.Solution "One point to keep in mind when using 1/4-inch drywall over an existing

wall surface is that not just will your baseboard, windows and door case look a 1/4- inch thinner yet all the "joints"will certainly need to be full of joint compound as well as caulked, "says Solis. You could need to eliminate trim as well as re-install it, and also electric outlets might require extensions to bring them flush to the wall. drywall repair tips

How to Remove Drywall Texture

sheetrock repair

Best Drywall Repair Services Florida

Drywall repair Indian Harbour Beach – drywall mud

[post_name drywall supply 

Drywall Finishing and Critical Lighting Problems

drywall repair large section

A hole in your roof is a lot even worse than one in the wall surface. When it comes time to repair a hole on the within your home, cool down, it's not all that negative or that hard to fix it if you have some tools and also the moment to persevere. Drywall repair service can appear unreachable to the homeowner, especially if you have actually never ever done it before. Allows placed with each other a fast check listing of items you will need to obtain this done ...

  • An item of drywall a little bigger than the opening itself, pay interest to the density
  • A drywall saw, a pointed type saw that you can push right into the wall to cut
  • Scrap piece of thin wood or other material to screw right into
  • Handful certainly drywall screws
  • A putty blade 2" - 4", metal or plastic
  • Drywall compound or 'Mud'
  • 100 grit sandpaper

Generally, repairing drywall is a several step procedure. Suggesting that the primary step is obtaining a replacement piece of drywall to fit over the opening size depending just how big it could be. That was the very first step ... seemed like a whole lot of work ...

The staying actions are utilizing drywall compound (mud) to putty blade over the screws that are sunk just listed below the surface as well as the seams of the repair piece. Use simply enough mud to a little fill up the dimples since you will mud over them once more after they dry ... typically over night (perhaps quicker).

When you make certain the holes are loaded you will need to sand the excess mud down flush with the wall. Slide your turn over your work ... does it feel smooth/ equivalent or does it have a bump to it? Get the surface to match the surrounding location as well as you are done with the exception of the paint to match your wall.This technique

takes a couple of times to get the knack but, it is absolutely do-able by the home owner. Larger holes are come close to similarly ... you are just covering more area and also you will have the structure in the wall to fasten the drywall to. I wish this was efficient in such a way that you may intend to try this kind of fixing on your own one day. For a much more in-depth check out this fixing, visit the internet site listed below.

Seven Simple Steps to Repair Drywall

An opening in drywall might appear to lots of individuals to be tough to repair, however in truth it is a straightforward repair that most of property owners can fix themselves. The repair work technique described in this short article takes a few hours, but if done properly will leave you with a level, smooth wall. There are 7 steps that you ought to comply with in order to achieve an excellent repair on your drywall.1.

Mark off the area to be covered. Make use of a square to note off an area a little larger compared to the hole that you are repairing.2.

Making use of a drywall blade, reduced around the 4 sides that you have actually already noted off, leaving you with a square opening in the wall.3.

Prepare a piece of wood to enhance the spot. To do this, reduced a slim strip of 1x2 or 1x4 a little larger compared to the height of the hole. Slip the wood right into the opening and placement it to make sure that the timber prolongs similarly above and also below the opening. Connect the timber making use of drywall screws affixed with the surrounding drywall.4.

Produce a drywall spot for the hole. Making use of a measuring tape, energy knife as well as a square cut an item of drywall to fit within the hole.5.

Secure the patch using drywall screws affixed via the reinforcement board that you have actually already mounted. Screw down the patch up until it is flush with the bordering wall.6.

Spread out a thin layer of joint compound on the patch making use of a drywall knife. If essential, use drywall tape around the boundary and spread on another slim coat of joint compound. Allow the location completely dry and then sand the location utilizing a great grit sandpaper.7.

After the joint substance is totally dry, use another coat of joint compound utilizing the drywall knife, assimilating the fixed area with the surrounding wall. Permit to completely dry entirely and sand once again with fine grit sandpaper. When you have completed the steps, you should have a seamless patch.All that is

delegated do currently is paint the repaired area and your task is full. To do this you need to prime the recently repaired area initially. You can use a latex based primer to do this such as Kilz or Zinsser. After priming the repaired area and enabling it to completely dry, you await the surface layer. If you have touch up paint it might not match completely because also indoor paint will certainly fade over a duration of time. If your paint does not match, there are two different alternatives. The first option is to paint the entire area which is one more project completely or you can painting from corner to edge of the fixed wall. I would suggest you to try and repaint from edge to corner of the fixed wall surface first and also if it does not match with the remainder of the room you can always repaint the entire room.So the next time you have some damage to your sheetrock, if you adhere to these actions you should have no issue fixing it to its initial state. All the best.

drywall repair tape

Drywall Repair - How to Make an Extra $300, $600 and More Per Week Specializing in Drywall Repair

drywall supply

Best Drywall Repair Services Florida