[post_name drywall finishing Drywall Issues at Home: DIY Fixes Vs Professional Drywall Repair

Drywall patching requires persistence and determination. I am mosting likely to break the process down quickly so you will certainly be extra informed before you start your next dry wall patch.One thing you must think about when working with drywall is the DUST. If you are sensitive to the drywall dirt or plaster you might intend to get a bit mask, safety goggles or handwear covers and use a long sleeve t shirt for security. Remember to shield any furniture that you want to keep dirt totally free, too!Step1: prep the
opening or location to be patched.If the opening or area to be patched has loose wall surface board paper you will should get rid of the loosened paper and also gypsum. Currently if the wall board paper intends to continue destroying the side of the wall, a means to stop this is the take a razor blade and also reduced from the loose location about an inch approximately. What you are doing is racking up the wall surface so when you tear of the loosened paper it will come to the racked up line and also not tear more creating a larger area to need spot work. If after you have actually gotten rid of the loosened paper and the plaster board underneath is crumbled and barely hanging to the wall surface, you need to knock senseless all the loose gypsum. Loose paper and also gypsum will trigger the drywall substance to not bond strongly as well as may develop a bubble you will see only after finish with substance. As component of the prep, you might desire to settle up the opening so you could much more quickly cut the item of sheetrock that will fill the void.OK so the location is prepped as well as currently we will have to relocate to tip 2, which will certainly instruct you on
how you can appropriately affix an item of sheetrock cut to fill the opening in your wall or ceiling.Step 2: back framing the hole to attach the sheetrock you will certainly reduce to fill up the void.Just like with brand-new building you will certainly have to have timber framing to screw the sheetrock right into. To clarify, I will utilize an example
spot location of one foot by one foot. You will have to cut a 2x4 into 2 16 "sizes. You will require to gather a cordless or electric drill as well as regarding a dozen 1 1/4" wood screws. Take one of the 2x4's you have actually reduced and glide it in the hole and behind the existing sheetrock, along one side of the hole. The factor the 2x4 is much longer(16 ")compared to the 12"hole is since we will certainly prolong it a couple of inches past the top and bottom. So currently you have a 2x4 inside the wall surface on one side, the 2x4 requires to be laying flat against the within the wall, it will certainly not be transformed so the 4 "size of the 2x4 is flat against the in, this will certainly offer us a bigger surface for accessory as apposed to the common method of mounting which would certainly be with the 2"size encountering the sheetrock. You will want to eyeball, best as feasible the 2x4 as well as split the difference of the board width in between the existing sheetrock as well as where you will connect the item of sheetrock you will cut for the patch. Currently that the 2x4 is kept in the correct placement you will require to screw the 2x4 right into the existing drywall by holding firmly to the board and also screwing into it with the face of the existing sheetrock. You will put two screws along the side as well as one on the top and base of the existing sheetrock to strongly protect the 2x4 to accept piece of sheetrock you will certainly reduce. As soon as you have completed one side, repeat the exact same procedure beyond. So when you have actually ended up back mounting you currently have a strong frame to attach the patch piece of sheetrock. * Note-if you have a hole to patch where there are framing, electric or mechanical problems in the manner in which keep you from moving the 2x4 behind the wall surface to screw down the side, you can screw in the top and base of the 2x4 and also this will suffice. You may also consider affixing the 2x4 back mounting across the top and bottom of the opening as apposed to affixing the 2x4's on the sides, simply use the same directions of attachment for the sides or top as well as bottom.Now that the preparation and also framework are full next we will certainly reduce an item of sheetrock to put into the mounted opening in action 3. Step 3: take a dimension of the hole as well as reduced a piece of sheetrock to
fit and safeguard it.It does not have to fit extremely limited yet it will certainly require to fit and also be screwed to the
back framing you set up. You must put 2-3 screws down each side attaching the piece of sheetrock you reduced to the framing. * Note-all the screws will certainly should be "established"below the surface area of the sheetrock however not deep sufficient that the screw head splits the paper face on the sheetrock, unset screws will show as well as conflict with the next action. ** Note sheetrock is available in 2 thicknesses for many property building -1/ 2" and also 5/8 ". 1/2"is normally on the interior walls/ceilings and also 5/8"is used on bottom of stairways as well as in the garage.Well you're making progression and you have actually filled deep space with sheetrock, now we will go on to the
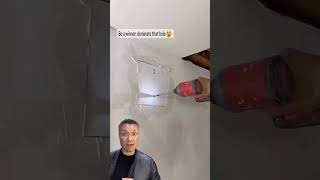
finish or finishing stage of the completely dry wall surface compound(mud )described symphonious 4. Step 4: covering the patch with drywall compound (mud). As I was stating in step 3 the piece of sheetrock you reduced to fill up the hole does not have to fit very limited. If the sheetrock you reduced has a void around the
border/joint of it and where it fulfills the existing wall surface board, you ought to pre fill the area prior to using the drywall tape. So simply take a little compound and fill in the edges as well as smooth the excess flat wit the wall surface, allow to completely dry. Next is to apply the drywall tape to make sure that after we are all finished there will certainly not be a fracture around the joint of the covered hole. For patch work I prefer to make use of a"mesh "or "fiber" tape, it gives a more powerful hold and the mesh tape is much more flexible than routine drywall tape, in the because you do not need to pre mud the wall to stick the tape. The mash tape has a sticky support, so all you do is cut the mesh tape to the size you require, stick it on the wall surface with the center of the mesh tape running right in line with the joint or fracture. The mesh tape must constantly run past the joint at the very least an inch. Repeat this process for all 4 sides of the patch. Following use a layer of substance around the boundary of the spot, over the mesh tape. The mesh will certainly be a little noticeable after just one coat. * Note-If you use to much compound(mud )you will have a bulge in the surface. Enable this layer to completely dry, sand lightly, primarily to knock of any type of knife edges that dried in the compound and can create the next layer to build up to much. You do not want to try as well as mud the patch in simply 1 coat, it is far better to apply a moderate/thin layer permit to completely dry, sand as well as coat once more. Nevertheless the layers( at the very least two) have actually dried and also you are completely satisfied that the surface area is coated uniformly, sand the mud to also the surface area. * Note -a much less compared to perfect finish work could be ravelled with sanding. Fining sand along the outdoors side of the mud as well, will blend the patched area better right into the existing surface. An actually neat trick wants you have actually fined sand the patch, take a wet sponge or rag and"wash" the outdoors mud of the patch mixing it even much better right into the existing surface area, this technique will certainly aid you prevent seeing a mud line around the spot when it is finished. If your home has a smooth texture, this is the last step, your ready to paint. If you do not have a smooth appearance you will certainly need to review on.Only one more step and the drywall part of your spot will be complete, texture. We will discuss numerous structures and ways to use the symphonious 5. Step 5: there are lots of appearances and you have to first recognize just how to identify your existing structure prior to going forward.Older residences could have a swirl, crows foot, hand or smooth structure. Newer homes generally utilize smooth, orange peel, knockdown as well as hand appearances. For a crows foot you will certainly need a crows foot or stomp texture brush. For swirl texture you might need to get in touch with a dry wall surface provider shop for the appropriate appearance brush or try out a few various brushes. For a hand texture you could make use of a dry wall surface knife or trowel. Every one of the above discussed structures need a device or brush to use drywall compound to attain the appearance. The next two textures can be acquired in a spray can, orange peel and also tear down. * Note- with all textures it readies to get an old piece of plywood or cardboard and also experiment first to find the right amount of stress, density of mud, method and also established time to produce the ideal appearance to best hide that a fixing was ever before made. As always if you appearance the wall surface and also are not delighted with the results you could was the structure of right away with a damp sponge of rag, permit to completely dry and also try texturing once again or sand of a poor appearance if you are not pleased with it after it has actually been permitted to dry. * Note- Knockdown appearance dimension can be manipulated by allowing the sprayed on appearance set up or dry for much less or even more time depending upon the preferred look.We have actually talked about the 5 steps had to properly repair a drywall patch. 1 )properly prep the area to be patched. 2)back mount the opening. 3 )size as well as cut the sheetrock to load the opening. 4 )apply mesh tape and mud to smooth the surface. 5)select and apply appropriate texture.So head out and" obtain your drywall on". You can inspect out my post on painting wall surfaces if you need aid with the painting. Do not hesitate to leave a comment concerning any various other subject you would like me to write on relating to drywall. Please have a look at our site, dennardbloss.com, it
is everything about our building and construction surfaces.
Repairing Chips and Scratches in Dryall and Wood Work
If your home is old or was created making use of less-than-stellar materials and also workmanship, you could see splits, openings, or water damage in your drywall. Some drywall repairs are very easy making on your own, if you have the right tools and also products as well as a little bit of residence improvement experience. However in various other instances, the issue may be serious or substantial enough to necessitate hiring a professional. When making a choice regarding Do It Yourself vs. expert repair works, think about the scope of the job, your experience degree, and exactly what you agree to spend to get the work done right.DIY Drywall Repair service Small splits and also nail openings are fairly very easy to take care of, if the issue is local and also not a symptom of a larger building and construction concern. Making use of drywall substance, drywall tape, as well as a drywall blade, you could patch over damaged areas. Generally, it's finest to use the drywall compound in numerous layers, letting each layer dry and also sanding it smooth before applying the following layer. Keep in mind that you might have to load in cracks and apply drywall tape prior to patching them over. If you don't have these tools and also products handy, however you're positive you can handle the wall repair service on your own, you can go to a neighborhood home improvement store for advice on what to utilize and also how you can proceed.Professional Drywall Repair work A huge, creeping split or a protruding location of drywall could suggest a deeper concern within your wall surfaces. Perhaps the drywall has shifted due to dampness or poor installment. Possibly the drywall was not securely screwed in when it wased initially installed. There could be lots of reasons for a significant drywall problem, and covering it over will only postpone needed repairs-and could make them much more extensive when the time comes. If you gradually proceeding down a wall, a tarnished area of ceiling, an unequal lump where there was not one before, or an actual hole in the drywall, it's time to call in a drywall repair work expert to analyze the scenario. These pros are experienced in diagnosing and also solving ceiling as well as wall issues. They can create a strategy of action that entails not just aesthetic repairs, but additionally architectural repairs, as needed.Health Factors to consider If you prefer to finish wall surface and ceiling repair work by yourself, you must recognize wellness considerations associated to dealing with drywall elements. Drywall sanding dust can be a breathing toxic irritant, so it is very important to always put on a mask throughout and after sanding. Drywall particles can remain airborne as well as on floorings as well as furnishings after the task is done, so be certain to allow everything clear up and to vacuum completely. Additionally, note that huge pieces of drywall are extremely hefty; maintain youngsters and also animals from rooms where drywall is being replaced or set up, in situation a piece of drywall tips over. Take all needed safety and security preventative measures to secure the wellness of yourself, your family members, and your animals.

How to Remove Drywall Texture
Drywall repair Marathon - how to patch drywall