[post_name drywall prices
Drywall Repair - How to Make an Extra $300, $600 and More Per Week Specializing in Drywall Repair

If you have been a residence painter for long you have actually certainly entered into some kind of drywall repair work on every indoor paint task. As an issue of reality, if you don't get proficient at understanding drywall repair, your painting jobs will certainly not be as professional as they can be.In this article I wish to reveal exactly how little drywall repair service tasks could indicate big revenues for you. I am speaking about making $350 to $500 typically for just 7 - 10 hrs of job. Each job is various of training course and also could turn out to be just a $200 repair work or perhaps a $1,500 repair.The reality is that when it concerns drywall fixing individuals constantly call somebody to do the job. As a house painter I recognize that most individuals believe they recognize ways to paint and also the search phrase here is "assume ". However when it concerns points like drywall repair they go running the home of momma.And this is why you can make great cash doing little fixing jobs like plumbing professionals as well as electrical contractors do. Things that many people are inexperienced to do themselves are simple and simple for us that determine to concentrate on them.Some individuals have the cash however do not have the time and would rather have somebody else do the work anyhow. 99 %of the moment though, individuals just aren't sure the profession. Drywall fixing is a secret art. When it comes to the ones that try to fix their own drywall themselves, the task constantly turns out lousy.Where is the target market for getting organisation? The response is household, light business, rental properties, etc. As a house painter you could be limited to a greater end market if you want to gain expert painters earnings. But no so with drywall repair work. Your market can be low end to luxury just as a result of the incredible revenues in smaller sized tasks that most individuals can afford.Most of the moment you get calls from individuals when they have water damage. Sometimes it is from careless teenagers roughhousing.
I had one work where bees consumed a hole in the ceiling. I would state that 95 %of drywall repair is from water damages as well as half of that can be from negative plumbing, a leaky shower that should be re-grouted, and so on. A dripping roof covering is typically the various other reason.Sometimes you could obtain works hanging and taping small tasks like a garage or part of a cellar. You don't need to handle these larger tasks though. Several times people wish to market their residence so they are encouraged to repair their walls or ceilings finally.You may ask yourself, if drywall repairs are so simple just how can I get proficient at doing them? Initially, You have to find out how you can duplicate a couple of common structures, which is very easy once you find out which
device was made use of to make it. You will certainly also obtain repairs for usual drywall openings of all sizes, which includes plaster( slim set as well as lathe). And also you will certainly should know how to repair loosened tape seams.And think it or otherwise, that's about all there is to successful drywall repair. These methods are hidden to the general public but easy for you and also I. If you ever have actually seen just what homeowners attempt to do to repair their very own drywall you will certainly recognize promptly that this is a very easy rewarding business.Here is the fantastic part. Many drywall repair works that I see look awful. Yet the house owner appears happy with it. The work resembles a person was available in and slopped a little mud on the ceiling and left. Yet the fixing man ran off with something like$200 as well as the house owner for some strange reason generally assumes the task was done O.K. I have actually seen this as well often.On a major note though, doing excellent specialist looking working from budget friendly rates will give you lots of referrals as well as repeat company. If you could discover the basics of proper drywall repair work or even do a little retouch painting later you will do just fine. You can without a doubt gain$30 -$70 each hour due to the nature of the work.How can I obtain business? Consumer overviews, classified ads in position like Craig's Listing, regional on-line ads, little Telephone directory advertisements, word-of-mouth, and so on. Why should I start a little drywall repair work company? Is there a huge future in it? Yes for two factors. First, self-employment is ending up being the new work pressure
and secondly, residence repair will constantly be with us.Who can do this sort of job? Anyone who loves to recover things can do well. Individuals who are gifted in the house repair works, residence painters, drywall, etc. Anybody who finds out a few keys to effective drywall repair.
Drywall Installation and Repair Mechanism
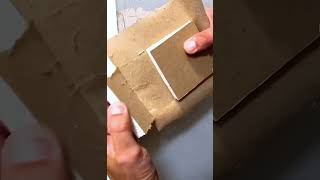
Repairing split drywall seams could be discouraging at best. If there is only an extremely, really tiny split present, you might have the ability to scratch out the crack to a broader dimension and then just use new spackling compound. Using a sharp, pointed device such as an old made could opener (church key), scratch placed a groove broader as well as a little longer compared to the crack. It needs to be at least 1/8" deep but further is much better. There are patching substances offered today made simply for covering cracks but are not planned for huge locations. If this is a paintinged wall surface some amount sanding will certainly also be called for. Spackle will certainly not stick to a smooth paintinged surface. Sand the area around the fracture at least a pair of inches bigger than the fracture then proceed and also apply the patching substance seeing to it you compel the spackle down right into the crack. Right after applying the spackle, re-wipe the area with your knife to remove any type of excess spackle from the area leaving a level surface. Depending upon exactly what sort of compound you acquired the drying times vary quite a bit from mins to hours. After the spackle is completely dry usage a 100 or 120 grit drywall sanding paper to smooth area so it is flush with the existing wall. Prime the drywall as well as set up the final paint.In a case
where the fractures are much bigger along the joints, it could created by the drywall tape pulling loose, physical damages or possibly even excess dampness. Thoroughly eliminate any and all loose materials at taped areas. You can not and also I repeat, can not re-spackle old tape. The drywall tape has minute openings that allows the spackle to pass through as well as secure the tape to your seams. The spackle "damps" the tape aiding it not just to stay with the drywall however allows the spackle to create a bond on both sides to the drywall. Once it is used, the holes are loaded consequently making the tape useless. Aiming to short cut will only create the seam to re-crack later.After eliminating all loose materials, lightly sand the harmed locations taking care not to tear or sand via the paper layer of the drywall underneath. As soon as the area is smooth to the touch make certain you have sanded evenly into the surrounding location so as not to leave a side that will certainly show with the completed work. Utilizing a 6 inch vast spackle knife, mount an even coat of new spackle over the seam. Position your brand-new drywall tape over the joint as well as making use of the blade, press the tape firmly onto the drywall getting rid of all excess spackle as it squeezes out from under the tape as well as sides of the knife. Do not get rid of way too much spackle so regarding leave the paper dry. Once the location is as smooth as you can make it, apply a second lighter coat over the very same area ensuring the brand-new tape is totally installed in fresh spackle.After drying out for eventually to assure all the spackle is dry, re-sand the
entire location to as soon as again get a smooth feel to the entire fixed location. Using your twelve inch blade, spread out a second layer to the entire fixing ensuring you mix efficiently into the adjacent wall surfaces. Do not leave any kind of ridges or sharp edges where you fulfill the old wall surface finish.Once this second coat of spackle is completely dry, which will be much less than the base coat as it is much thinner, use, using your twelve inch blade, a third extremely thin layer of fresh spackle. You will nearly have the ability to translucent this coat as it is made use of to load small indents or scratches left by sanding the 2nd layer. Once more after the third coat dries out, very gently sand the repair for the last time to guarantee an entirely smooth ended up location. Apply a coat of drywall primer to seal the newly repaired drywall location as well as then painting your wall.If the drywall joints have completely split or split open there may be a structural issue that has to be re-mediated prior to you repair the drywall seams. Structure negotiation, foundation troubles or other products might impact the drywall ends up so be sure they are repaired first.Once you make sure there are no various other issues present, as in a small repair, get rid of all loose or broken materials. If the drywall itself is cracked, cut the drywall back to a stud as well as install a new piece of drywall. The repair is the same as a minor split just on a much bigger scale.Installing little pieces of drywall for patching produces exactly what are called butt joints which are much harder to hide. You will certainly be compelled to spread your spackle over a much bigger location to
obtain a smooth look and also not a bump in the wall. With technique you can do this job as well as conserve yourself a terrific offer of money.If you are in a rush and the repair work is reasonably tiny, there fast drying out products readily available such as Durobond 90 which when contributed to spackle makes the spackle rock hard in ninety minutes. There is likewise a forty-five min type available yet just masters need to attempt and utilize it. Forty-five minutes flies by actually rapid. When I claim it dries out rock hard, it is nearly difficult to sand when dried out so any small issues left in the surface area with your blade will show later on. Be careful.Remember to maintain your devices clean, do not tear open canisters or covers with your blades as it will certainly dent or chip the sides of the knives and also job as tidy as you could to avoid exhausting cleaning later on.

Drywall - Methodologies and Benefits
Drywall repair DeBary - general labor