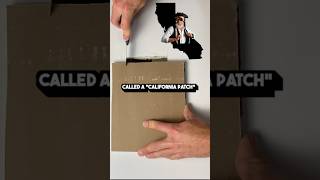
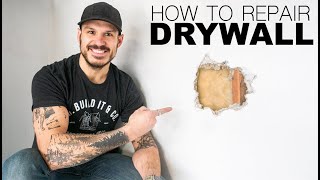
[post_name drywall contractors

These tips are regarding how you can repair scars and also repaint chips around your home. Regular damage develops chips, nicks, and also contusions on the walls and wood work when they are run across. These tips will assist prolong the life of your interior paint, as well as extend the life of the paint to ensure that you do not need to entirely paint the interior of the residence as often. Right here you will certainly locate some ideas on repairing paint chips around your home.How Deep is the
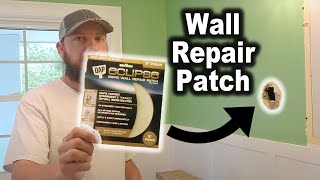
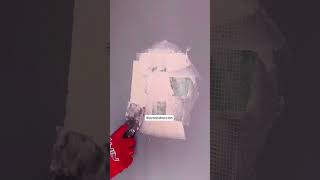
Chip You need to analyze
the deepness of the chip before you simply repaint over it. Deep gouges will certainly be almost as noticeable whether it has matching paint in it or not. There are a number of products on the market that you could utilize to fill cuts in drywall or plaster on your walls and also ceilings. If your gouge is under 1/4 deep use a light weight spackle, roll the item into the grove seeing to it the spackle boasts of the existing drywall. When the spackle is completely dry sand the damaged location with a fining sand block, concerning 150 grit. There are also basic spots that are offered if there is a huge opening in the wall (greater than 1 inch in size) that could be applied, layered with joint substance, sanded then textured. Usually you will certainly want to make use of either spackle or joint substance to fill up these acnes. Joint substance dry's slower and also shrinks when completely dry but it is less costly and works better with bigger spots. Sand them to the degree of the remainder of the wall. As soon as the spot is level you could structure with one of those appearance in a container. Make use of the latex one it will certainly make your life a whole lot easier with your companion if you do, the other one has a great deal of awful solvents in it and also could make your house very unpleasant. Ensure you drink it well before you use. Use also strokes as well as make several lite passes rather of one hefty pass.Paint chips
in wood job has to have the paint that is damaged removed then fined sand down, feather the sides to make sure that there is no ridges from the paint chip. Make sure not to sand as well deep, one method is to make use of a sanding backer board, this will spread the sanding over a more comprehensive location and also it will not "recipe" the location that is being dealt with. Prime with a oil base guide, when dry, sand with 220 grit paper till smooth and also level. Wipe clean with a tack towel and paint the coating coat on the timber job. If your patch requires a second layer sand with 220 grit and also recoat.Matching Shade Paint keeps for many years, so when you do
repaint buy an extra gallon when you are acquiring your paint and wait for repair. Most property owners will maintain extra paint, so even if you acquired your house with the existing color on the walls, take a look around for added paint. An additional means of having the ability to recreate your paint is by duplicating down the color code that is placed on the side of paint can. When you go as well as obtain the new paint blended see to it you get the exact same shine, and manufacture. Different codes for various produces, they do not constantly cross recommendation the various colors. You could use this paint to repair chips and dings in the paint around the home. If you do not have accessibility to matching paint, pull a paint chip off the wall regarding the size of a silver buck and also take it to your neighborhood paint shop or residence enhancement store. They will, generally, be able to match the paint shade virtually exactly, or at least close sufficient that any difference is not noticeable. One of the benefits of taking in a sample is that the shade of your walls will certainly change with time, the sun discolors the wall surface and tiny hands have a tendency to darken them.Old Repaint While paint does maintain for an extended period of time, you may have to doa little work with
the paint making it useful once more. Initially, you will wish to thoroughly stir the paint. A mixer utilized with your drill or perhaps an inexpensive hand mixer could finish completely mixing the paint and remixing any type of components that have divided. If you have swellings and dried bits in the paint, pour it with a cheese fabric to stress out lumps.Brushes and Rollers When paint and also priming drywall and also plaster make use of a roller, bristle brushes regularly
leave brush strokes where ever before you usethem, as well as this might be an indicator that there has been a repair job done. Use a great PVA primer on any type of drywall spots that you have actually made. The bare drywall takes paint at a different rate compared to the unpainted area. PVA primer enables the coating paint to be taken in at the same price. A little paint roller or a sponge brush will leave a structure that will a lot more easily mix in with any type of bordering texture, much more efficiently hiding any flaws. After the primary part of the spot has actually been paintinged use the roller, without including anymore paint to it, to dry present around the patch. This will mix the shades right into the existing wall paint and further hiding your patch.Paint your wood deal with a high quality bristle brush, brush with the grain, not versus it. For the very best results a spray coating is required, but that is for an additional article.Good luck on your patching and also paint, as well as remember, if you do not such as the results you can constantly call an expert to do the work.
The method for the best ways to remove drywall appearance depends on the product being removed and the condition of the wall. The most usual method for removing appearance from paintinged drywall calls for sanding off the high portions of the texture as well as loading it in with at the very least two thin layers of joint compound - called skim finishing. Another technique for unpainted textured walls as well as ceilings, consisting of popcorn ceilings, is spraying water on the surface to loosen up the texture so you can scrape it off.When a wall has
substantial fractures, peeling paint or water damages, it could be simpler to cover the existing wall surface with 1/4 -inch drywall or get rid of the existing wall surface completely and also replace it.Whatever strategy you utilize to remove a textured surface from drywall, secure on your own from direct exposure to building dirt, lead as well as asbestos.Removing distinctive wall surface areas is a rigorous process that takes patience.
Below's how you can tackle some usual troubles so your walls will certainly be smooth as well as your work, profitable.How to get rid of drywall appearance by skim covering Problem: Unequal surface.Solution To stay clear of creating an irregular wall surface when you're eliminating the appearance, don't make use of a belt sander. It will certainly collect the texture.
Rather, eliminate high heights in the structuremaking use of a pole sander with 120 grit or a 5-inch flooring scraper.Problem: Bulgy looking patches.Solution Eliminate any type of loose material with a stiff brush, scrape high areas and also clean with a wet fabric. To use the initial coat of joint substance, start on top and also job throughout and also down.
"One of the most crucial point is not to utilize as well much
product
,"states Ivan Solis, head of state of Chicago-based Solis Construction."If you utilize also much joint substance, it will be hard to achieve a smooth surface. You'll need to do a whole lot of sanding.
"Don't worry about surges, simply attempt to cover the appearance and obtain an also coat on the wall. Hold the joint blade at a 30-degree angle and press it in. "Maintain it limited and smooth,"claims Solis, that recommends utilizing a 10 -or 12-inch joint knife.Alternate the direction of the skimming strokes with each new coat of mud. If you use the very first coat horizontally, apply the second layer vertically. Return excess mud from the surface area to the rim of the frying pan, keeping the blade of the blade clean.When the very first coat is completely dry, apply the 2nd coat to complete the ripples. Once again, start on top in the corner as well as work across and also down. As you work, blade off any type of large portions of the very first layer, using your blade. If there are still reduced and also high spots, you may require a 3rd coat. When the layer is dry, coating
with a final sanding.Problem: Joint compound that sets as well swiftly or is too hard to sand.Solution Choose the appropriate compound for the task. When a wall structure will require several coats of joint compound to smooth the surface area, use a setup compound like Sheetrock Easy Sand for the very first layer."Easy Sand 90 is a chemically setting substance that will provide you around
90 mins to work before it sets,"states Jeff Hartin, product manager for
USG's Ready Mixed products. The product is optimal for hefty fills up and also sands easily."The wonderful point concerning a setting substance is that you could apply the very first layer and begin a 2nd layer when the first one has actually hardened,"states Solis.For the 2nd or last coat, Hartin and also Solis recommend a ready-mixed joint compound, such as Sheetrock And also 3. The lightweight item is less complicated to spread, permits a thinner application, as well as is simpler to sand.Problem: Stains seep via the joint compound.Solution These problems are frequently as a result of improper adhesion and also are common on many DIY painting jobs. If the distinctive wall surface is peeling or plaster and textured joint substance are diminishing,
get rid of loose material with a scraper, sand and coat the surface area with primer/sealer prior to skim coating.Problem: Splits as well as dents reappear.Solution Repair cracks and also dents before skim finishing. To repair them, tape over the cracks with drywall tape and also safeguard them with joint compound. When the wall surface is smooth, a drywall guide as well as sealant will certainly seal the
wall surface and also assistance prevent cracks as well as dents from reappearing. Primer also counteracts the pH of the wall surface for an extra even appearance.Problem: Peeling paint as well as gurgling in the paint finish.Solution These issues are frequently because of improper bond. If the textured wall surface is peeling or plaster as well as distinctive joint substance are falling off, eliminate loose material with
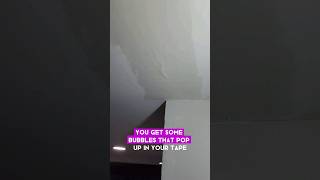
a scraper, sand and coat the surface area with primer/sealer prior to skim coating.Problem: Pitting.Solution Pits on thesurface of the drywall are air bubbles that were not appropriately loaded or that were revealed throughout sanding. Air bubbles result from over -or under-mixing the joint substance. Apply pressure to the bubbles with the joint knife, until the pits are gone. If you don't discover them up until the wall is completely dry, cover them with joint compound and sand.Problem: Over-sanding; missing out on low and high
spots.Solution Sand way too much and also you risk damaging the surface area paper. If that
takes place,
cover the location again with joint compound. To stay clear of missing low and high areas, use a clamp-light or various other source of light near the wall to discover issue areas. Sand methodically, functioning from the ceiling to the flooring in narrow sections.How to remove a distinctive surface area from drywall by scraping
Trouble:
Wall surface damaged by water as well as scrapers.Solution Specialists advise moistening wall surface textures with a spray bottle to loosen up the material. After that use a scraper with a level, wide blade to get rid of the texture. Use only sufficient water to loosen the product or you can damage the drywall. If you note the sheetrock with the edge of your scuffing blade, patch it with joint compound.How to eliminate a distinctive surface from drywall by covering wall surfaces with drywall Trouble: Reinstalling trim.Solution "One point to bear in mind when using 1/4-inch drywall over an existing
wall is that not just will your wall, windows and door covering look a 1/4- inch thinner but all of the "joints"will have to be filled up with joint compound and caulked, "says Solis. You may need to remove trim and re-install it, and electric outlets could need extensions to bring them flush to the wall surface.

drywall contractors
Best Drywall Repair Services Florida