[post_name patching drywall Drywall Issues at Home: DIY Fixes Vs Professional Drywall Repair

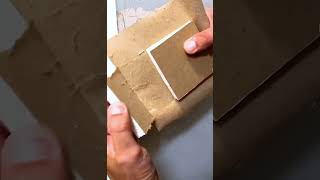
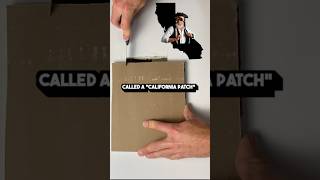
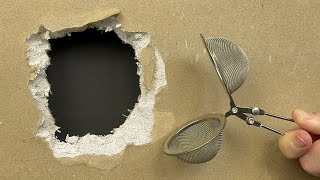
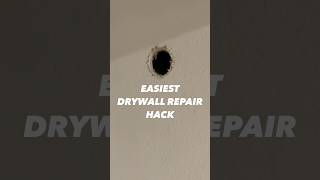
Should you attempt to diy or employ a drywall contractor? The solution relies on the dimension as well as kind of the needed fixing. If the job is large and calls for specialized expertise, devices and also a substantial financial investment of your time, you may wish to hire a drywall service provider. Nonetheless, scrapes, damages as well as small to medium sized hole repair works could be conveniently grasped by even the beginner.Drywall is genuinely among the best innovations ahead along within the last 80 years. As well as for some excellent factors; it is a low-cost wall covering that increases promptly. It is neutral and also can be decorated to individual preference. The invention of drywall saved contractors and also homeowners countless bucks in building and construction expenses and repairs.Drywall, or plaster board, is constructed from a crumbly fire resistant substance that is wrapped in a thick paper finish. It is really resilient as well as can be quickly reduced, sawed, pierced, curved, fingernailed, glued, screwed, paintinged on and also papered over. It even helps to appear proof and shield a space. However even as durable as it is, ultimately, you'll should spot some location of drywall in you home or business.Commonly, you will be handling several of 3 different sorts of wall surface openings-nail openings as well as damages, little doorknob size openings and larger openings brought on by clenched fists and also furniture. In this post I'll clarify an extremely easy repair work technique for a little drywall holes. This will certainly function great on holes less than 6 inches, such as doorknob holes.THE "HAT PATCH"REPAIR APPROACH Utilizing a keyhole saw, reduced a square around the hole(the opening is now square ). Maintain it as small as feasible. Sand the sides to the hole gently to get rid of burrs from the sawing. From a new piece of drywall, cut a square piece of drywall about 3 inches larger than the opening that you're attempting to cover. (Currently follow me very closely below, because in this following action you're mosting likely to get rid of several of the drywall support from your brand-new patch.)TRANSFORM THE NEW PATCH OVER as well as cut 1-1/2 inches on each side with a razor knife. Be very mindful not to cut totally through the face paper (you wish to leave the dealing with paper undamaged). Now thoroughly peal the 1-1/2 inch pieces off the face paper and throw out. Tidy the back of the face paper on the spot to get rid of small little bits still attached.Place joint substance around the edges of the hole for at least 2 inches on each side. Make certain to mud the raw edges of the old drywall. Insert the patch into the hole and also drag mud down each side. Now cover the whole area with a really thin coat of mud and also allow it dry. When completely dry sand the location really lightly.If essential, apply a 2nd layer and also allow it to completely dry. Sand the location gently and you prepare to paint.If this seems more complicated that you would certainly such as, your regional hardware store will sell you a drywall repair service kit. The kits come in various sizes and kinds for different applications. Merely comply with the maker's directions as well as you should be prepared.
Drywall Repairs
These pointers have to do with how you can repair scars as well as paint chips around your home. Regular deterioration produces chips, nicks, and also bruises on the wall surfaces and also timber work when they are encountered. These ideas will certainly help lengthen the life of your indoor paint, as well as prolong the life of the paint so that you do not have to entirely repaint the inside of the residence as frequently. Here you will discover some ideas on repairing paint chips around your home.How Deep is the
Chip You should examine
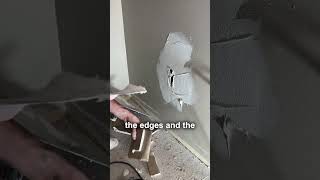
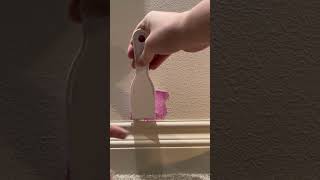
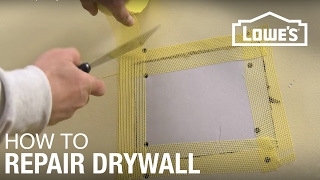
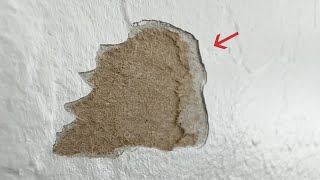
the deepness of the chip before you simply repaint over it. Deep gouges will certainly be virtually as noticeable whether it has matching paint in it or otherwise. There are a number of products on the marketplace that you could make use of to fill up cuts in drywall or plaster on your wall surfaces and ceilings. If your gouge is under 1/4 deep usage a lightweight spackle, roll the item right into the grove seeing to it the spackle takes pride in the existing drywall. As soon as the spackle is completely dry sand the damaged location with a fining sand block, regarding 150 grit. There are also simple patches that are readily available if there is a huge hole in the wall surface (more than 1 inch in size) that can be used, layered with joint substance, sanded then textured. Usually you will wish to use either spackle or joint substance to fill up these acnes. Joint compound completely dry's slower and also reduces back when dry but it is less expensive as well as functions better with larger patches. Sand them down to the degree of the remainder of the wall. As soon as the spot is level you can texture with one of those texture in a container. Make use of the latex one it will certainly make your life a whole lot simpler with your friend if you do, the other one has a great deal of unpleasant solvents in it and also could make your home really unpleasant. Make certain you tremble it well before you apply. Usage even strokes and make several lite passes as opposed to one heavy pass.Paint chips
in wood job requires to have the paint that is harmed eliminated and also then fined sand down, plume the edges so that there is no ridges from the paint chip. Make sure not to sand as well deep, one technique is to use a fining sand backer board, this will spread the sanding over a broader area and it will certainly not "meal" the location that is being dealt with. Prime with a oil base primer, when dry, sand with 220 grit paper up until smooth as well as flat. Wipe clean with a tack cloth as well as painting the coating layer on the wood work. If your patch needs a second coat sand with 220 grit as well as recoat.Matching Shade Paint maintains for several years, so when you do
painting purchase an added gallon when you are acquiring your paint and conserve it for retouch. The majority of home owners will maintain extra paint, so also if you acquired your residence with the existing color on the walls, take a look around for added paint. Another method of having the ability to recreate your paint is by copying down the shade code that is placed on the side of paint can. When you go and also obtain the new paint combined make certain you obtain the very same sheen, and manufacture. Various codes for different makes, they don't always cross reference the different shades. You could utilize this paint to touch up chips and also dings in the paint around the house. If you do not have access to matching paint, pull a paint chip off the wall surface regarding the size of a silver dollar and also take it to your regional paint store or residence enhancement shop. They will, normally, have the ability to match the paint color nearly specifically, or at the very least close sufficient that any kind of difference is not noticeable. Among the benefits of absorbing a sample is that the color of your wall surfaces will transform with time, the sunlight fades the wall surface and little hands tend to dim them.Old Painting While paint does keep for an extended period of time, you might need to doa little deal with
the paint to make it usable again. Initially, you will intend to extensively mix the paint. A mixer made use of with your drill or also an affordable hand mixer could finish thoroughly mixing the paint as well as remixing any type of components that have divided. If you have swellings as well as dried out bits in the paint, put it with a cheese fabric to stress out lumps.Brushes and also Rollers When painting as well as priming drywall and plaster make use of a roller, bristle brushes often
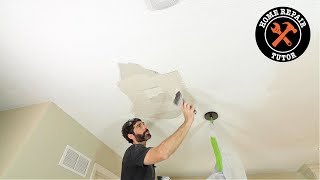
leave brush strokes where ever before you use them, as well as this could be a dead giveaway that there has actually been a touch up task done. Make use of an excellent PVA guide on any type of drywall patches that you have actually made. The bare drywall takes paint at a various price than the unpainted area. PVA primer permits the surface paint to be soaked up at the exact same rate. A small paint roller or a sponge brush will certainly leave an appearance that will certainly much more conveniently blend in with any type of surrounding texture, better hiding any imperfections. After the major part of the spot has been paintinged make use of the roller, without adding anymore paint to it, to dry present around the spot. This will certainly blend the colors into the existing wall surface paint and also further concealing your patch.Paint your wood job with a good high quality bristle brush, brush with the grain, not against it. For the very best results a spray finish is called for, but that is for another article.Good luck on your patching and painting, and also keep in mind, if you don't such as the outcomes you could always call a specialist to do the work.

Drywall - Methodologies and Benefits