[post_name drywall sander Drywall Water Damage Ceiling Repairs

By the time you complete reading this write-up, you will be able to carry out standard fixings to damaged drywall. There are some basic tools that you must maintain around your home, if you have an active family and also are vulnerable to obtain dings in the wall surfaces. This article will certainly not give sufficient information to do significant repair works to drywall. Major repairs are straightforward, however you have to find out the essentials first.Here is a checklist of some tools you will certainly need. Your neighborhood large box could supply you with some fundamental tools. They run in price variety from affordable to professional top quality. They have plastic putty blades for much less than a dollar all the way up to stainless-steel that with treatment, will last a lifetime. If you anticipate an extremely handful of repairs, the plastic will certainly be enough. Likewise, obtain a carriage bolt, a little hammer, a could of drywall joint substance, 150 to 220 grit sandpaper and also a paint brush. These fundamental devices will certainly fix most small dings as well as dents in drywall.An example of a ding would certainly be where the locking
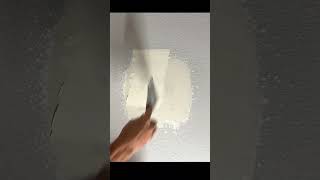
button on a door handle has actually left an impact in the wall behind it. This is typical of a quick and very easy repair work. Take a look at the damages. Exists anything extending over the wall surface? If so, make use of the carriage bolt to press the outcropping below the wall surface. Use the hammer in order to help persuade the projection to go listed below the surface area of the wall as well as round the edges. Next, take the putty knife as well as some joint compound or as it is typically called, drywall mud, as well as fill the hole. Wait up until the mud dries, sand lightly and load the hole once again to bring the material to the same level as the wall. Sand the surface once more until the wall is smooth and also degree. Do not over sand. This will certainly rough up the drywall enabling the paper to fray and calling for more mud to seal the harsh surface area. There ought to not be any differences in the surface. Numerous tiny applications will last a lot longer compared to one large application as well as offer you better results.Is whatever smooth? Otherwise, use some even more drywall mud to also the wall surface surface areas. Sand once again. When the wall is smooth, use the paint guide. When the paint primer is completely dry, apply your regular wall surface paint. The paint guide is to seal the wall so the new paint does not completely dry too promptly permitting the spot to be visible.That is the fundamental method of fixing damaged drywall.
How to Install Your Own Drywall
Should you try to do-it-yourself or employ a drywall specialist? The response relies on the dimension as well as kind of the required repair. If the work is big and calls for specialized knowledge, tools and also a substantial investment of your time, you might desire to work with a drywall contractor. Nevertheless, scratches, damages and little to medium sized hole repairs can be easily understood by also the beginner.Drywall is absolutely one of the best innovations to come along within the last 80 years. And for some great factors; it is an affordable wall covering that goes up promptly. It is neutral and can be decorated to individual taste. The development of drywall conserved specialists as well as homeowners thousands of bucks in construction expenses and repairs.Drywall, or plaster board, is made of a crunchy fire resistant substance that is covered in a thick paper finish. It is very long lasting and could be conveniently reduced, sawed, drilled, curved, nailed, glued, screwed, painted on and papered over. It even assists to sound proof as well as protect a room. Yet even as long lasting as it is, at some point, you'll have to spot some location of drywall in you home or business.Commonly, you will certainly be handling one or even more of 3 various sorts of wall surface openings-nail openings and also dents, tiny doorknob dimension holes and also larger holes brought on by hands as well as furniture. In this short article I'll explain an extremely simple repair work method for a small drywall holes. This will certainly work fantastic on openings much less than 6 inches, such as doorknob holes.THE "HAT PATCH"REPAIR WORK METHOD Making use of a keyhole saw, reduced a square around the opening(the hole is currently square ). Maintain it as tiny as feasible. Sand the edges to the hole gently to remove burrs from the sawing. From a new piece of drywall, reduced a square piece of drywall about 3 inches larger compared to the opening that you're attempting to cover. (Currently follow me closely below, because in this next step you're mosting likely to get rid of some of the drywall backing from your new spot.)TRANSFORM THE BRAND-NEW SPOT OVER and also cut 1-1/2 inches on each side with a razor blade. Be really cautious not to reduce entirely with the face paper (you intend to leave the facing paper undamaged). Now meticulously peal the 1-1/2 inch pieces off the face paper as well as dispose of. Clean the rear of the face paper on the patch to remove smidgens still attached.Place joint compound around the edges of the opening for at least 2 inches on each side. Be certain to mud the raw sides of the old drywall. Place the spot right into the hole and drag mud down each side. Now cover the entire area with an extremely slim coat of mud as well as let it dry. When completely dry sand the area extremely lightly.If required, apply a 2nd layer and also allow it to completely dry. Sand the area lightly and you prepare to paint.If this sounds much more complicated that you 'd like, your neighborhood equipment store will certainly offer you a drywall repair service package. The packages are available in various dimensions and also kinds for different applications. Merely follow the maker's instructions and you should be ready.

How to Repair Popped Nails in Drywall
Drywall repair Pinecrest village - drywall finishing