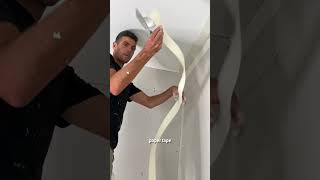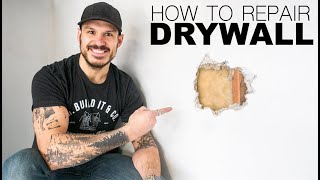
[post_name drywall supply How to Repair Popped Nails in Drywall

So you have a brand-new house as well as whatever looks superb. Someday, late in the afternoon, you are late to fulfill a buddy. You fast toss your layer on and begin toward the door. Coming down the lengthy hallway you discover that the sunlight is establishing as well as the light is coming with the home window which makes you so grateful you have such a nice home, yet you additionally notice something that you have not noticed prior to; the wall surfaces look rougher and also uneven in some areas. On your means house you begin to think of exactly what you had noticed as you were leaving for your meeting, and you desire to take a more detailed consider it when you obtain back.As you get here home as well as look for the harsh areas of wall surface that you had discovered, to your amazement, you can't discover them.Were you picturing things?Not truly;
these are issues that newer houses have currently. With the more recent larger windows situated often from flooring to ceiling, and more as well as brighter lighting, the possibilities of this taking place is much greater.Welcome to the globe of
drywall ending up and important lighting problems. A designer may create a wall or ceiling surface for a specific style impact, or just by coincidence you might find sections of your home or office that fall under just what is called severe critical lights locations. These areas lie in areas such as a long corridor, an entrance hall wall surface, or smooth ceiling where the light from any resource comes streaming throughout the face of the wall surface or ceiling at simply the ideal angle.The combination of any type of kind of gloss paint and smooth wall surfaces will make these imperfections also more exaggerated. This may make the regarded look unacceptable to the customer, or property owner, also after the most effective workmanship. Source of light, structure of wall surface, and also shine of paint are vital elements impacting the appearance of drywall and also surface. Just like any structure guy develops, with a quality installation and also correct painting procedures completion result usually turns out fine, however allow's think about this.The whole nature of drywall installment is unrefined at best. Four foot wide areas of drywall are butted together over the wood mounting members, then toenailed as well as screwed to the framing, as well as then drywall mud is applied to complete all the nails as well as joints. All this and also the wall surfaces are meant to end up appearing like one continuous smooth wall surface areas, devoid of visual problems. As we mentioned previously, for the most parts you will certainly not see issues, but we are speaking regarding critical illumination locations, in which instance you will see some defects, also from the ideal drywall surface work.So currently we recognize that walls are not perfectly right, and also there is truly no chance we can make them excellent in some lighting circumstances.
What can we do to make them look as smooth and flat as we can? 1. Move any lights located in the ceiling at the very least 3 feet away from any kind of converging wall surfaces.2. Wall surfaces and also ceiling in important light areas must have a percentage of structure externally such as orange peel, or brocade. This will damage up the reflection of light into several directions, permitting the wall surfaces to look smoother and also straighter.3. Wall surfaces must never be paintinged with any kind of sort of gloss paint, not even velvet, or eggshell luster.4. Include curtains that can limit, or transform the instructions of light coming in from large home windows.5. Usage plants to damage up long walls.6. Utilize a warm beige level sheen paint on ceilings. Paint produces make especially developed flat luster
paints for ceilings.7. Usage source of lights from several locations in the space to combat one big light source.These are
just a couple of pointers.
You will need to play around with how to separation the illumination in these areas. Bear in mind numerous resources of light in a room will certainly be much better that source. John Howell House Paint Vancouver, WA
Drywall Repair Tips
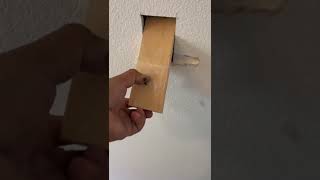
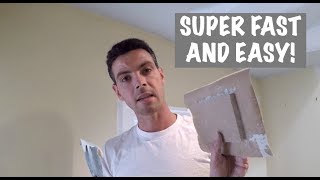
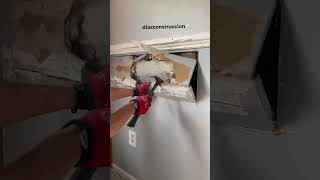
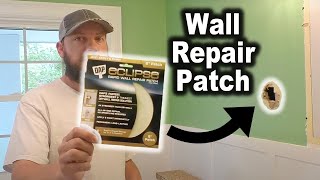
Drywall is the standard in wall surface construction for the majority of houses and also companies in the United States Its low expense, vast availability and ease of setup makes it a budget friendly choice for both builders and property owner. Although drywall has lots of advantages, it has some disadvantages too. In certain, the product does not hold up well to impacts and water leaks leave large, unsightly bubbles and also wrinkles. Depending upon the severity of the damage, house owners could usually do drywall repair works themselves. In various other instances, it makes sense to allow a drywall service provider do the work.DIY Drywall Repair works Conserving loan is the major factor that home owners try to repair drywall themselves. If the damage is minor, such as a small hole, many property owners could do the job well. Equipment shops even offer patching kits for these small works that include whatever you have to repair the drywall. Extra assistance can be obtained from Internet videos, and house fixing books.If the damaged area is bigger, such as from a broken water pipe, property owners must very carefully
think about the benefits and drawbacks of repairing it themselves. Those looking for to build a completely new home addition must also take into consideration the disadvantages of installing the drywall themselves. In these instances, employing a professional might be a far better selection. Experts are additionally a better choice for complicated or hard to get to locations, such as ceilings or around plumbing pipelines where reducing the drywall is required.Hiring an Expert Drywall Contractor Experts that help drywall business might cost you a lot more, but they provide lots of benefits over doing it on your own.
Primarily, a completely dry wall expert can complete the fixing much faster compared to a nonprofessional. On top of that, they already possess all the devices had to complete the work. Many house owners do not have the required tools, which results in expensive services or purchases. Another benefit is that experts are adhered and also guaranteed, which means that if they damage your house their insurance coverage spends for it. Fixing diy blunders appears of the resident's pocket.Prices Rates differ commonly when working with drywall firms to do repair services, with a lot of the price being labor. If the fixing is tiny, think about working with a handyman or a general repair person that could perform other house repairs also. For bigger jobs, such as new enhancements, ceiling fixings or full wall surface replacements, employ a drywall company that concentrates on just this sort of work.While drywall setup may look very easy, it could in fact be challenging to produce a smooth, seamless coating. While some home owners may delight in the satisfaction of taking on the job themselves, others may wind up creating additional troubles to take care of. In most cases, home owners ought to conserve themselves effort and time by hiring a specialist to get the task done right.

Drywall Finishing and Critical Lighting Problems