[post_name patching drywall Introduction to Drywall Repair Materials

So you have a brand-new residence as well as every little thing looks great. Eventually, late in the mid-day, you are late to meet a friend. You hurriedly throw your coat on and start toward the door. Boiling down the lengthy hallway you observe that the sun is establishing and also the light is coming through the home window that makes you so pleased you have such a nice home, but you also observe something that you haven't seen before; the walls look rougher and irregular in some locations. On your way residence you start to consider just what you had actually noticed as you were leaving for your meeting, and also you wish to take a closer look at it when you get back.As you get back as well as try to find the rough sections of wall surface that you had noticed, to your amazement, you can not discover them.Were you imagining things?Not really;
these are problems that newer residences have currently. With the more recent bigger windows located often from flooring to ceiling, and also even more and brighter illumination, the chances of this occurring is much greater.Welcome to the world of
drywall finishing and also vital illumination concerns. A developer may establish a wall or ceiling surface for a specific layout result, or simply by coincidence you may find sections of your office or home that fall right into just what is called severe critical illumination areas. These areas are located in locations such as a lengthy passage, a lobby wall surface, or smooth ceiling where the light from any type of source comes streaming throughout the face of the wall or ceiling at just the appropriate angle.The combination of any kind of type of gloss paint and smooth wall surfaces will make these blemishes also more exaggerated. This may make the regarded look unacceptable to the customer, or property owner, after the most effective handiwork. Light resource, appearance of wall, and luster of paint are essential elements influencing the look of drywall and surface. Similar to any framework male develops, with a top quality installation as well as correct painting treatments completion result normally ends up penalty, yet allow's think of this.The whole nature of drywall setup is unrefined at ideal. 4 foot large sections of drywall are butted together over the timber mounting participants, then toenailed as well as screwed to the framing, then drywall mud is related to load in all the nails and joints. All this as well as the walls are intended to finish up appearing like one continual smooth wall surface sections, totally free from visual flaws. As we specified earlier, for the most parts you will not see flaws, yet we are speaking about crucial lighting locations, where case you will certainly see some problems, even from the very best drywall finish work.So currently we understand that walls are not completely right, and also there is really no chance we could make them ideal in some lighting situations.
What can we do making them look as smooth as well as flat as we can? 1. Relocate any type of lights found in the ceiling at the very least 3 feet away from any converging wall surfaces.2. Wall surfaces and ceiling in essential light locations ought to have a tiny quantity of structure externally such as orange peel, or brocade. This will certainly separate the representation of light right into several directions, allowing the wall surfaces to look smoother as well as straighter.3. Walls ought to never ever be paintinged with any type of type of gloss paint, not also velvet, or eggshell luster.4. Include curtains that can restrict, or change the instructions of light can be found in from large windows.5. Usage plants to separate long walls.6. Make use of a cozy beige level sheen paint on ceilings. Paint produces make specifically designed flat sheen
paints for ceilings.7. Use source of lights from several areas in the space to neutralize one large light source.These are
just a couple of pointers.
You will certainly need to experiment with ways to separation the lighting in these areas. Bear in mind lots of resources of light in an area will certainly be better that resource. John Howell House Painting Vancouver, WA
How to Install Your Own Drywall
These suggestions are about exactly how to repair marks and painting chips around the home. Routine damage produces chips, nicks, and contusions on the walls as well as wood work when they are bumped right into. These tips will help prolong the life of your interior paint, and also expand the life of the paint to make sure that you do not have to entirely repaint the interior of the residence as regularly. Here you will certainly discover some ideas on fixing paint chips around your home.How Deep is the
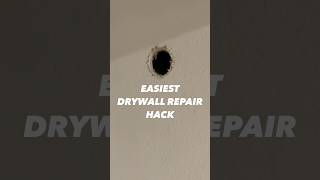
Chip You require to evaluate
the depth of the chip before you just repaint over it. Deep gouges will certainly be nearly as noticeable whether it has matching paint in it or not. There are a variety of items on the market that you could make use of to fill up cuts in drywall or plaster on your wall surfaces as well as ceilings. If your gouge is under 1/4 deep usage a light weight spackle, roll the product right into the grove ensuring the spackle is proud of the existing drywall. As soon as the spackle is dry sand the afflicted location with a sanding block, concerning 150 grit. There are also simple patches that are offered if there is a large opening in the wall surface (greater than 1 inch in diameter) that can be used, layered with joint compound, sanded then textured. Generally you will certainly intend to utilize either spackle or joint substance to load these imperfections. Joint substance completely dry's slower as well as shrinks when completely dry however it is less expensive and functions much better with bigger spots. Sand them to the degree of the remainder of the wall surface. As soon as the spot is level you could texture with one of those structure in a can. Utilize the latex one it will certainly make your life a great deal simpler with your friend if you do, the other one has a whole lot of nasty solvents in it and can make your house extremely unpleasant. See to it you shake it well prior to you use. Usage even strokes as well as make numerous lite passes as opposed to one hefty pass.Paint chips
in wood job should have the paint that is harmed eliminated and afterwards sanded down, plume the sides to ensure that there is no ridges from the paint chip. Take treatment not to sand too deep, one method is to use a sanding backer board, this will spread out the sanding over a wider location and also it will not "dish" the area that is being dealt with. Prime with a oil base guide, when dry, sand with 220 grit paper till smooth and also level. Wipe tidy with a tack cloth and also painting the finish coat on the wood work. If your patch needs a second coat sand with 220 grit as well as recoat.Matching Color Paint maintains for many years, so when you do
repaint get an additional gallon when you are purchasing your paint and save it for repair. The majority of house owners will certainly keep spare paint, so even if you bought your residence with the existing shade on the wall surfaces, look around for additional paint. Another means of having the ability to recreate your paint is by copying down the shade code that is placed on the side of paint can. When you go and also get the brand-new paint blended make certain you get the very same sheen, as well as manufacture. Various codes for different manufactures, they don't always go across recommendation the different colors. You can use this paint to retouch chips and dings in the paint around the home. If you do not have access to matching paint, draw a paint chip bizarre regarding the size of a silver buck as well as take it to your neighborhood paint shop or residence enhancement store. They will, normally, be able to match the paint shade practically exactly, or at the very least close enough that any distinction is not visible. One of the benefits of taking in a sample is that the shade of your walls will certainly transform with time, the sunlight discolors the wall and tiny hands have the tendency to darken them.Old Paint While paint does maintain for an extended period of time, you might have to doa little deal with
the paint to make it useful once again. Initially, you will intend to extensively mix the paint. A mixer made use of with your drill or perhaps an affordable hand mixer can make brief job of extensively stirring the paint and also remixing any type of components that have divided. If you have swellings and also dried out bits in the paint, put it via a cheese cloth to strain out lumps.Brushes and Rollers When paint and also priming drywall as well as plaster make use of a roller, bristle brushes often
leave brush strokes where ever you use them, and this could be an indication that there has actually been a touch up task done. Make use of an excellent PVA primer on any type of drywall spots that you have actually made. The bare drywall takes paint at a different rate compared to the unpainted location. PVA primer allows the coating paint to be absorbed at the same price. A small paint roller or a sponge brush will certainly leave a structure that will a lot more quickly blend in with any surrounding structure, better concealing any problems. After the almost all of the spot has actually been repainted make use of the roller, without adding anymore paint to it, to dry turn out around the spot. This will mix the colors into the existing wall surface paint and additional concealing your patch.Paint your wood collaborate with an excellent high quality bristle brush, brush with the grain, not against it. For the very best results a spray finish is needed, however that is for an additional article.Good good luck on your patching as well as painting, and also keep in mind, if you don't like the outcomes you could always call an expert to do the job.
Drywall repair Edgewater - general labor

Repairing Chips and Scratches in Dryall and Wood Work