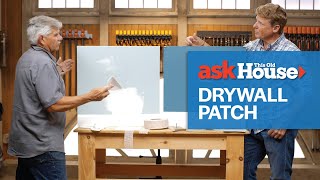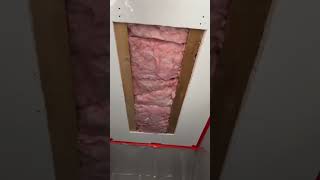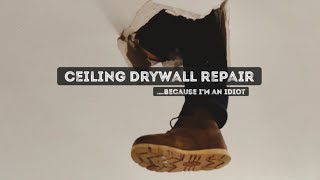
[post_name how to repair drywall How to Repair Wet Drywall

Repairing a big hole in your sheetrock wall is not as intimidating as one could think. Complying with is a quick and also simple way to do the repair work without a large headache.First, you'll desire to
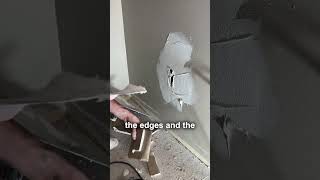
make the hole square if it isn't really already. It just needs to huge sufficient to cover the damaged area.The ideal way to do this is to utilize a 2 foot degree as well as make the two upright lines as well as 2 straight lines with a pencil to develop the square, no measuring is required. If you do not have a degree, than just gauge with a leader or determining tape equivalent distances to create the square.The following step is to reduce out along the lines to remove the damaged
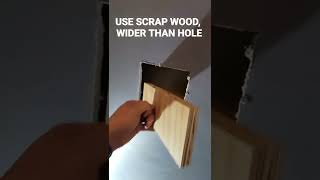
piece. A cost-effective keyhole saw is the most effective device for this work. An utility blade could likewise be made use of by making frequent passes up until you have punctured the sheetrock. If you discover on your own reducing over a stud, proceed the cut up until you have actually eliminated the whole square. Watch out for any type of circuitry that may be in the wall, particularly along studs. With the opening now cut, put a piece of scrap wood, ideally one inch thick material such as a 1x3 or 1x4 in the opening on the back side of the sheetrock and long sufficient to surpass each side about four inches.So if I made an 8 inch by 8 inch hole the item would certainly be 16 inches long.
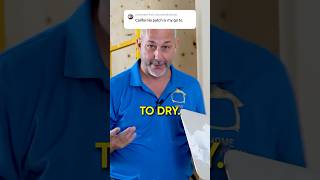
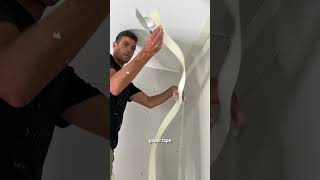
It could be positioned vertically or flat in the hole. If the cut overlooked a stud, the stud can be made use of as an anchor point as well as the scrap positioned on the opposite side. If the stud is in the middle, location two scraps on either side. Screw the wood items in place with a cordless screwdriver from the face of the sheetrock till the screw head is slightly listed below the surface. One on each end of the scrap should do.Next cut an item of sheetrock to fit the opening. Making the item one eighth of an inch smaller sized on the whole will certainly aid in setting it in. Screw this in position also with drywall screws. The next step is to use joint substance to the joints to get joint tape. Place sufficient to cover the width of the tape as well as a little over. Press the tape in the plaster with a six inch plaster knife. Make sure the tape remains in full call with the plaster or else the tape could bubble. Wherever the tape overlaps, place a little amount of joint substance over the underlying tape. When this is dry, position a second coat of substance. It's constantly best to use a 8 inch plaster knife yet a six inch will certainly do.Spread the compound over the joints as well as feather it out better than before. After this is dry, lightly sand the location to get rid of any ridges or flaws. The repair service could currently be primaried with a drywall guide and a layer of paint to match the wall surface.
Repairing Chips and Scratches in Dryall and Wood Work
By the time you end up reviewing this short article, you will have the ability to execute basic repair services to harmed drywall. There are some fundamental tools that you ought to maintain around the home, if you have an energetic household and also are susceptible to get dings in the wall surfaces. This short article will certainly not offer sufficient details to do significant repairs to drywall. Major repair services are simple, however you need to discover the basics first.Here is a checklist of some tools you will certainly need. Your neighborhood big box can supply you with some standard devices. They run in cost variety from economical to specialist quality. They have plastic putty blades for much less than a buck right as much as stainless-steel that with care, will certainly last a life time. If you expect a really tiny number of fixings, the plastic will certainly be enough. Likewise, obtain a carriage bolt, a tiny hammer, a canister of drywall joint substance, 150 to 220 grit sandpaper as well as a paint brush. These standard tools will fix most small dings as well as dents in drywall.An example of a ding would be where the securing
switch on a door handle has left an impression in the wall behind it. This is regular of a quick as well as easy fixing. Take a look at the damages. Is there anything protruding above the wall surface? If so, make use of the carriage bolt to press the projection below the wall surface area. Utilize the hammer in order to help persuade the outcropping to go listed below the surface area of the wall and round the edges. Next, take the putty knife and some joint substance or as it is frequently called, drywall mud, and fill up the hole. Wait until the mud dries, sand lightly and also load the hole again to bring the product to the very same degree as the wall. Sand the surface again till the wall surface is smooth and degree. Do not over sand. This will harsh up the drywall permitting the paper to fray and also requiring even more mud to secure the rough surface area. There should not be any type of differences in the surface area. Several tiny applications will last a lot longer compared to one large application and offer you better results.Is whatever smooth? If not, apply some even more drywall mud to even the wall surface areas. Sand once again. When the wall surface is smooth, apply the paint guide. When the paint primer is dry, apply your routine wall surface paint. The paint primer is to secure the wall so the new paint does not dry as well rapidly allowing the spot to be visible.That is the basic technique of fixing damaged drywall.