[post_name drywall installation Drywall Repair Considerations

For little openings up to approximately & frac12;" you can merely use spackling substance and also a putty blade. Use the spackle, wait till it dries then sand smooth. Spackling compound will reduce a little bit so in some cases you will require to apply a second layer after the first layer dries, you will after that should sand it once more prior to repairing the paint.For tool
openings 1/2" to 3" you will certainly should obtain a drywall spot (there are different other approaches to fix a hole this size but a drywall patch package is the easiest). The majority of these kits include a spot that is self adhesive. Just reduce the spot so that it is larger than the dimension of the opening by regarding 1" and also stick it over the opening (some packages actually allow you to stick the patch through the opening then draw it tight behind the back of the opening enabling you to complete just the opening).
After that you will need drywall compound (which can be discovered in smaller sized containers compared to a gallon) or spackling substance. Utilizing a large blade putty blade (3" or bigger), apply the compound over the patch and a number of inches surrounding the hole, then after it dries out, sand it smooth. You will should duplicate this action a few times up until you could no longer see where the spot is, sanding after each layer dries. Lastly, retouch the paint.For larger
holes 3" and also bigger it is usually best to replace a section of the drywall. Locate where the closest stud is, after that reduced out a rectangle around the opening including fifty percent of the size of the stud. After that, utilizing the reduced out item as a design template reduced a fresh piece of drywall to fit the opening. Area the drywall in the red and usage drywall screws to connect it to the stud. (It is even better if you eliminated a piece that is big enough to expose half of 2 studs so that the drywall is even firmer in area. Studs are normally placed 18" apart however might be anywhere in between 12" to 24" apart.)
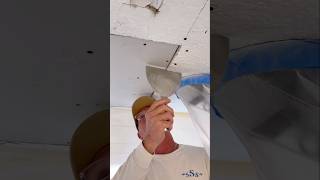
Utilizing you "mudding knife" (or huge putty knife), apply a slim layer of drywall mud to cover the whole joint. Next, use paper drywall tape over the mud as well as utilizing your blade, embed the paper securely right into the mud, scraping off any kind of excess mud. After this dries use an additional 2 to 3 coats of drywall mud over the joint tape extending approximately 6" on either side of the joint, sanding in between each layer. As soon as the fixing work is smooth you could touch up the paint.
How to Repair a Large Hole in a Sheetrock Wall
A hole in your roofing system is a great deal even worse than one in the wall surface. When it comes time to deal with an opening on the within your house, calm down, it's not all that bad or that tough to fix it if you have some devices and also the time to see it with. Drywall repair service can appear unreachable to the house owner, especially if you have actually never ever done it in the past. Lets placed together a fast check listing of products you will should obtain this done ...
- A piece of drywall a little bigger compared to the opening itself, take notice of the thickness
- A drywall saw, a pointed kind saw that you can press into the wall surface to reduce
- Scrap piece of thin timber or various other product to screw right into
- Handful naturally drywall screws
- A putty knife 2" - 4", metal or plastic
- Drywall compound or 'Mud'
- 100 grit sandpaper
Normally, fixing drywall is a numerous step process. Implying that the very first step is getting a substitute piece of drywall to fit over the opening size depending exactly how huge it may be. That was the first step ... seemed like a great deal of job ...
The staying actions are using drywall compound (mud) to putty knife over the screws that are sunk simply below the surface area as well as the seams of the repair work item. Use just sufficient mud to somewhat fill the dimples since you will certainly mud over them again after they dry ... usually over night (perhaps much faster).
When you make sure the openings are filled you will have to sand the excess mud down flush with the wall. Glide your turn over your work ... does it really feel smooth/ equivalent or does it have a bump to it? Obtain the surface area to match the surrounding location and you are done other than for the paint to match your wall.This strategy
takes a couple of times to obtain the hang of it but, it is certainly do-able by the homeowner. Larger openings are approached in the very same fashion ... you are just covering even more location and you will certainly have the structure in the wall to secure the drywall to. I hope this was reliable as though you may intend to try this kind of repair work on your very own one day. For a much more detailed consider this repair work, visit the internet site below.

Drywall Repairs Made Simple
Drywall repair Springfield - drywall repair