Drywall repair Lake Wales – drywall texture

[post_name sheetrock prices 

Drywall Repair Questions Answered by a Professional

drywall repair dent

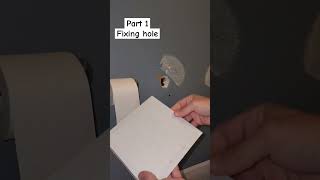
If your house is old or was constructed using less-than-stellar materials and also craftsmanship, you might see fractures, openings, or water damages in your drywall. Some drywall repair works are easy making by yourself, if you have the right tools and also products and a little bit of house enhancement experience. Yet in various other situations, the issue might be serious or comprehensive enough to warrant hiring a professional. When choosing regarding DIY vs. professional fixings, think about the scope of the project, your experience degree, and also exactly what you want to invest to obtain the work done right.DIY Drywall Repair work Small fractures and also nail openings are relatively easy to deal with, if the problem is local as well as not a signs and symptom of a bigger building and construction issue. Using drywall substance, drywall tape, and also a drywall knife, you can patch over damaged locations. In general, it's finest to use the drywall substance in a number of layers, letting each layer dry and sanding it smooth prior to using the following layer. Keep in mind that you could need to complete splits and also use drywall tape prior to covering them over. If you do not have these devices as well as products handy, yet you're confident you could manage the wall surface repair service on your own, you can check out a regional residence improvement store for advice on just what to make use of as well as ways to proceed.Professional Drywall Fixing A large, creeping crack or a protruding area of drywall can show a deeper concern within your walls. Maybe the drywall has changed as a result of moisture or poor installment. Probably the drywall was not safely screwed in when it was first mounted. There can be loads of reasons for a major drywall problem, and also patching it over will just hold off essential repairs-and can make them much more substantial when the moment comes. If you steadily advancing down a wall, a tarnished area of ceiling, an unequal lump where there was not one prior to, or a real hole in the drywall, it's time to call a drywall repair service expert to evaluate the scenario. These pros are experienced in diagnosing and addressing ceiling as well as wall problems. They can generate a strategy that includes not only aesthetic repair works, but also structural repair works, as needed.Health Factors to consider If you decide to finish wall and ceiling fixing by yourself, you need to know health considerations associated to collaborating with drywall parts. Drywall sanding dirt can be a respiratory system irritant, so it's essential to constantly wear a mask during and after sanding. Drywall particles can linger in the air and also on floors and furnishings after the task is done, so be sure to allow every little thing settle and to vacuum completely. In addition, note that large items of drywall are extremely hefty; maintain kids and animals out of areas where drywall is being changed or installed, in instance an item of drywall tips over. Take all required safety preventative measures to secure the wellness of yourself, your family members, and your pet dogs.

Drywall Installation and Repair Mechanism

Do it on your own drywall installation is one of the extra functional jobs you can take on as a homeowner. Whether you have actually obtained a ceiling that's been damaged by a leaking roofing or air conditioning system pan, or some brand-new walls that belong to a redesigning job, eventually, you'll require drywall service your residence. The excellent thing is; with the best expertise, the appropriate tools, as well as some practice; practically anybody can do it. The standard thing you should understand include:

Materials-This may appear pretty noticeable, yet there are a couple of different alternatives.

  • Density-Drywall or sheetrock comes in 1/4", 1/2", as well as 5/8" thicknesses. One of the most common in property is 1/2". 5/8" is a lot more generally utilized in commercial work and is a requirement of building ordinance in numerous areas as a result of it's greater fire resistant score. 1/4" is mainly used over other products such as paneling or plaster when a various kind of wall surface area is desired. If you're doing a spot or repair; check the thickness of the existing drywall before purchasing your brand-new material to guarantee that it matches.
  • Application-The majority of wall surfaces and ceilings will have basic gray sheetrock. Nevertheless, in high dampness areas, such as bathrooms and also kitchen areas; utilize the a lot more water immune eco-friendly rock. There is additionally, now, a drywall that consists of the very same kind of cement fiber materials made use of in ceramic tile backer boards for usage on walls that will finish with ceramic tile.
  • Joint Substance-Additionally called sheetrock mud, this is the crucial element to a successful do it yourself drywall setup. This will can be found in pre-mixed paste like form in boxes or containers or powdered, in bags, that must be blended with water. There are also fast drying out kwikset materials that can be made use of for patches and also repair services.
  • Joint Tape-This could be bought in the traditional paper kind, which need to be applied with joint substance or in fiber tape, which is frequently utilized in repair services since it eliminates one step of the procedure.
  • Nails or Screws-Commonly, nails have actually been used in household work and screws in industrial (due to the usage of metal studs. Nonetheless, screws have actually come to be a lot more in household due to the rate of screw weapons.
Tools-Simply a few fundamental tools will look after a lot of any kind of sort of of do it yourself drywall installation.

  • Drywall Knives-These types of blades are not utilized for cutting, but also for spreading the mud, taping the seams, and also floating and skimming; and also, really resemble a spatula greater than a knife. They are available in a variety of sizes from about 3" (used for taping joints) approximately 12" (for floating and skimming). You will, most likely, require at least 3 sizes for any work, as each skim coat gets a little larger.
  • Mud Frying pan-These lengthy rectangular frying pans can be found in steel or plastic and also are made use of for holding the joint substance. They're slim enough to accept one hand, while utilizing the blade with the various other.
  • Utility Knife/Sheetrock Saw-Many of the cutting of sheetrock is currently maded with energy blades with compatible blades. Adjustment them as often as required for a tidy very easy cut. Sheetrock saws are lengthy (concerning 10") triangular saws with little manages and are made use of mostly for cutting holes for plumbing and electric.
  • High Powered Drill & & Paddle Bit-If you're doing a small fixing; you can mix the mud by hand with a drywall knife. But also for bigger do it yourself drywall setup tasks, it's crucial that you have a strong enough drill to blend the mud with a paddle for the correct consistency as well as to remove swellings.
Hanging-This is pretty self informative. Toenail or screw it to the wall or ceiling. Just a pair of suggestions.

  • Protect it Good-Do not skimp on nails or screws. You do not want activity when somebody raids the wall. Cannot correctly secure it will cause cracks in the mud.
  • Look for Intermediaries-Maintain a close eye on buttons, plugs, and also phone jacks. They're very easy to cover and tough to discover later.
  • Have Sufficient Help-Sheetrock is hefty. Make certain you have somebody to aid you hold it while you obtain the screws or nails in. This is especially real when hanging ceilings.
  • Countersink the Bolts-See to it the nails or screws permeate past the surface to ensure that they could be covered with mud.
Completing-The process of completing drywall is called taping and also drifting as well as it's the most essential action of do it on your own drywall installment.

  • Tape the Seams-This could be done with either the paper or fiber tape. With paper, spread out a thin coat of mud over the seam, the, using a drywall blade; press the tape right into the mud as well as over the joint. After that utilize the blade to get rid of the excess mud. When this process is completed; you must wait for the mud to completely dry before applying the initial skim coat. The benefit of the fiber tape is; it sticks to the sheetrock without the demand for mud. So, you could immediately use a skim coat.
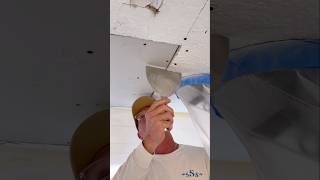
  • Float and also Skim-This could be performed in one coat or it might take 2 or 3. The concept is to have an even surface without increases, bumps, and also dips. Among the keys to a successful do it yourself drywall setup is mixing the mud to the best uniformity so it spreads out quickly. The other is just excellent old made practice. Some individuals require to it quicker compared to others. Yet, the extra you do it, the far better you'll be.

drywall repair or replace

How About That Drywall Repair?

sheetrock prices

Best Drywall Repair Services Florida

Drywall repair Key Biscayne village – sheetrock prices

[post_name ceiling texture 

Drywall Repair - How to Make an Extra $300, $600 and More Per Week Specializing in Drywall Repair

drywall repair franchise

Sheetrock is a type of drywall and also is produced as well as a trademarked product by US Gypsum Firm, among the leading providers of drywall on the planet. It is also referred to as gypsum wallboard. Sheetrock is a blend of natural plaster, water, as well as sand that is pressed between two heavy sheets of paper. It is a construction product that is utilized globally to construct building aspects like ceilings and wall surfaces. It was developeded in 1916 yet it took an additional thirty to forty years before it caught on with builders, who had actually traditionally created walls from plaster.Benefits of sheetwork vs plaster & bull; It is much faster to set up sheetrock compared to it is to

• install plaster & bull; Sheetrock can be paintinged or topped immediately after• it has been installed so the building of the office or home could be proceeded with no hold-up. With plaster it needs days and even weeks to entirely dry & bull; Plaster considers greater than sheetrock so there is less wear and tear on the
• building's structure and architectural systems & bull; There is a greater degree of fire-resistance with sheetrock compared to there is with platter. This could provide the ones in the structure even more time to leave the structure safely in an emergency situation like a fire.Size of sheetrock The basic sheet of sheetrock procedures four feet by 8 feet but also for structures with specialized requirements

or have high ceilings the building contractor can get larger sections. Generally, the interior wall surfaces of a structure are built from drywall that is one-half inch thick. If the building's walls are going to undergo more wear and also tear, the contractor can locate thicker sheets of five-eights thick. If there is a curved wall surface, a contractor can utilize sheetrock that is one-fourth inch thick. The sheets of sheetrock could be formed since they are reasonably flexible.Types of sheetrock There are several sorts of sheetrock that can be made use of for various applications. & bull; Traditional-it is naturally fireproof yet the building contractor could choose Type-X,

which is fire-rated sheetrock. This sheetrock is improved with vermiculite and perlite to raise its resistance to fires and also warm.

• Building contractors utilize Type-X drywall in business buildings, which has fire-rated rankings from twenty to one hundred eighty mins. & bull; Greenboard-this obtains its name from its eco-friendly paper coating, which is a material that is moisture-proof and is made use of in restrooms as well as cooking areas. & bull; Blueboard-this is the type that a home builder would certainly pick if the owners desire the walls to have the look of plaster. & bull; Soundboard-this type of sheetrock is constructed to obstruct the transmission of sound in between different spaces.
• It could be set up in multiple layers to make certain that the degrees of sound could be preserved.

How to Repair Popped Nails in Drywall

So you have a new home and whatever looks amazing. Eventually, late in the afternoon, you are late to fulfill a buddy. You hurriedly throw your coat on and also begin towards the door. Coming down the long corridor you discover that the sun is establishing as well as the light is coming via the home window that makes you so thankful you have such a great residence, however you additionally see something that you haven't noticed before; the wall surfaces look rougher and irregular in some areas. On your way house you begin to consider what you had actually seen as you were leaving for your meeting, as well as you desire to take a better check out it when you get back.As you show up residence and look for the rough sections of wall surface that you had seen, to your amazement, you can't discover them.Were you visualizing things?Not actually;

these are concerns that newer houses have now. With the more recent bigger home windows located in some cases from flooring to ceiling, as well as even more and brighter lighting, the opportunities of this occurring is much greater.Welcome to the world of

drywall ending up and critical illumination concerns. A designer could establish a wall surface or ceiling surface area for a particular style result, or just by coincidence you could locate areas of your residence or office that fall under just what is called severe vital illumination areas. These areas are situated in areas such as a long passage, a lobby wall, or smooth ceiling where the light from any source comes streaming across the face of the wall surface or ceiling at just the ideal angle.The combination of any sort of gloss paint as well as smooth walls will certainly make these blemishes even a lot more overstated. This could make the perceived appearance undesirable to the individual, or homeowner, after the most effective workmanship. Source of light, appearance of wall surface, and shine of paint are crucial factors affecting the appearance of drywall and surface area. Similar to any type of framework guy constructs, with a high quality installation and also proper paint treatments the end result usually transforms out penalty, but let's think of this.The whole nature of drywall installment is unrefined at finest. 4 foot wide sections of drywall are butted with each other over the wood framing members, then toenailed and also screwed to the framing, then drywall mud is related to load in all the nails and joints. All this as well as the walls are expected to wind up appearing like one continuous smooth wall areas, without visual defects. As we specified previously, in many cases you will certainly not see defects, but we are speaking concerning crucial illumination locations, where situation you will see some issues, also from the finest drywall surface work.So now we understand that walls are not flawlessly directly, and there is actually no way we could make them best in some lighting circumstances.

What can we do to earn them look as smooth and also level as we can? 1. Move any lights found in the ceiling a minimum of 3 feet away from any type of intersecting wall surfaces.2. Walls as well as ceiling in important light areas should have a percentage of appearance externally such as orange peel, or brocade. This will separate the representation of light into several directions, permitting the walls to look smoother as well as straighter.3. Walls must never be paintinged with any type of type of gloss paint, not even velvet, or eggshell shine.4. Include curtains that can restrict, or change the direction of light can be found in from huge windows.5. Usage plants to separate lengthy wall surfaces.6. Utilize a cozy beige level luster paint on ceilings. Paint produces make particularly created flat sheen

paints for ceilings.7. Use lights from many locations in the area to combat one huge light source.These are

just a few ideas.

You will need to play around with ways to break up the lighting in these areas. Keep in mind numerous resources of light in a space will be much better that a person source. John Howell Home Paint Vancouver, WA drywall repair in bathroom

Drywall Mudding and Taping - A Simple Process For Do-It-Yourself Homeowners

ceiling texture

Best Drywall Repair Services Florida

Drywall repair Lantana town – patching drywall

[post_name drywall prices 

Drywall Plastering - A Great New Method

drywall repair bradenton

So you have a brand-new residence and every little thing looks amazing. Eventually, late in the afternoon, you are late to meet a buddy. You hurriedly toss your layer on as well as begin towards the door. Boiling down the lengthy corridor you see that the sun is establishing and also the light is coming via the home window that makes you so thankful you have such a wonderful home, but you additionally notice something that you haven't observed prior to; the wall surfaces look rougher and unequal in some locations. On your way residence you begin to think of what you had actually observed as you were leaving for your conference, and also you want to take a better check out it when you obtain back.As you get back and also try to find the rough sections of wall surface that you had seen, to your wonder, you cannot find them.Were you picturing things?Not truly;

these are problems that newer homes have now. With the more recent larger home windows situated often from flooring to ceiling, and also more and also brighter illumination, the opportunities of this occurring is much greater.Welcome to the globe of

drywall completing as well as essential illumination concerns. A designer may establish a wall surface or ceiling surface for a particular design effect, or just by coincidence you may discover sections of your residence or workplace that come under just what is called extreme crucial lighting areas. These areas are situated in locations such as a long corridor, a lobby wall surface, or smooth ceiling where the light from any type of resource comes streaming across the face of the wall or ceiling at just the appropriate angle.The combination of any type of gloss paint and also smooth wall surfaces will make these blemishes much more overstated. This might make the perceived look undesirable to the user, or property owner, after the most effective workmanship. Source of light, structure of wall, and shine of paint are vital factors affecting the look of drywall and surface. Just like any kind of framework guy develops, with a top quality setup and also proper painting procedures the end result typically ends up penalty, however let's consider this.The whole nature of drywall setup is crude at ideal. 4 foot broad areas of drywall are butted with each other over the wood mounting members, then fingernailed as well as screwed to the framing, and after that drywall mud is related to complete all the nails as well as joints. All this and the walls are intended to wind up resembling one constant smooth wall surface sections, without aesthetic issues. As we stated earlier, most of the times you will not see problems, yet we are chatting about vital lights areas, in which situation you will certainly see some flaws, also from the most effective drywall coating work.So now we know that wall surfaces are not perfectly right, and there is actually no other way we can make them excellent in some lights scenarios.

What can we do to earn them look as smooth and also flat as we can? 1. Move any kind of lights situated in the ceiling at the very least three feet far from any kind of converging wall surfaces.2. Walls as well as ceiling in important light locations need to have a little amount of texture externally such as orange peel, or brocade. This will certainly damage up the representation of light right into many various directions, permitting the walls to look smoother as well as straighter.3. Walls should never ever be paintinged with any kind of type of gloss paint, not also velour, or eggshell shine.4. Include curtains that can restrict, or change the direction of light coming in from huge windows.5. Use plants to separate long walls.6. Make use of a warm off-white level shine paint on ceilings. Paint manufactures make particularly designed level luster

paints for ceilings.7. Usage source of lights from several areas in the room to combat one large light source.These are

just a couple of pointers.

You will have to play about with exactly how to breakup the lighting in these areas. Bear in mind many resources of light in an area will be much better that a person source. John Howell House Paint Vancouver, WA

Sheetrock - What Is It?

The strategy for the best ways to remove drywall appearance depends on the product being gotten rid of and also the problem of the wall surface. The most common technique for getting rid of texture from repainted drywall calls for sanding off the high parts of the texture as well as filling it in with at the very least 2 slim layers of joint compound - called skim finish. One more strategy for unpainted distinctive wall surfaces and ceilings, consisting of snacks ceilings, is spraying water on the surface area to loosen the structure so you could scrape it off.When a wall surface has

considerable fractures, peeling paint or water damage, it may be easier to cover the existing wall with 1/4 -inch drywall or eliminate the existing wall totally and also replace it.Whatever method you utilize to get rid of a distinctive surface from drywall, shield on your own from exposure to construction dust, lead and asbestos.Removing textured wall surface surface areas is an exacting procedure that takes patience.

Here's how you can tackle some usual troubles so your wall surfaces will certainly be smooth and your job, profitable.How to get rid of drywall texture by skim covering Issue: Uneven surface.Solution To avoid developing an irregular wall surface when you're getting rid of the structure, do not utilize a belt sander. It will certainly dig up the appearance.

Instead, get rid of high optimals in the texture

utilizing a post sander with 120 grit or a 5-inch flooring scraper.Problem: Bulgy looking patches.Solution Get rid of any loose material with a tight brush, scrape high locations as well as wipe with a damp fabric. To use the initial layer of joint substance, start at the top as well as job across and also down.

"The most essential point is not to make use of excessive

material

,"says Ivan Solis, head of state of Chicago-based Solis Construction."If you make use of too much joint compound, it will be hard to attain a smooth surface area. You'll have to do a great deal of sanding.

"Don't worry concerning surges, just aim to cover the structure as well as get an even coat on the wall surface. Hold the joint blade at a 30-degree angle as well as press it in. "Maintain it limited as well as smooth,"states Solis, that advises making use of a 10 -or 12-inch joint knife.Alternate the instructions of the skimming strokes with each brand-new coat of mud. If you apply the first layer flat, apply the second layer up and down. Return excess mud from the surface to the rim of the frying pan, maintaining the blade of the knife clean.When the very first coat is dry, use the second coat to complete the surges. Again, begin on top in the corner and job throughout as well as down. As you function, blade off any kind of big chunks of the initial coat, utilizing your blade. If there are still low as well as high areas, you may need a 3rd layer. When the layer is dry, finish

with a final sanding.Problem: Joint substance that sets as well quickly or is also difficult to sand.Solution Select the appropriate compound for the job. When a wall surface structure will need a number of coats of joint compound to smooth the surface, utilize a setting substance like Sheetrock Easy Sand for the initial coat."Easy Sand 90 is a chemically setting substance that will certainly give you roughly

90 minutes to function before it sets,"says Jeff Hartin, product manager for

USG's Ready Mixed products. The product is optimal for hefty fills and sands conveniently."The wonderful feature of a setting compound is that you could use the initial layer as well as start a 2nd coat as quickly as the initial one has actually solidified,"states Solis.For the 2nd or last layer, Hartin as well as Solis suggest a ready-mixed joint substance, such as Sheetrock Plus 3. The lightweight product is easier to spread out, allows a thinner application, and is less complicated to sand.Problem: Discolorations leach via the joint compound.Solution These troubles are usually as a result of incorrect attachment and prevail on many DIY painting jobs. If the distinctive wall is peeling or plaster and also distinctive joint substance are dropping off,

get rid of loose material with a scrape, sand as well as layer the surface with primer/sealer prior to skim coating.Problem: Fractures and also dents reappear.Solution Repair splits as well as dents before skim finish. To fix them, tape over the splits with drywall tape as well as protect them with joint substance. When the wall surface is smooth, a drywall primer and sealer will certainly secure the

wall surface and aid protect against cracks as well as damages from re-emerging. Guide likewise neutralizes the pH of the wall for an extra even appearance.Problem: Peeling paint as well as bubbling in the paint finish.Solution These problems are commonly due to inappropriate adhesion. If the distinctive wall surface is peeling off or plaster as well as distinctive joint substance are diminishing, remove loosened material with

a scrape, sand as well as coat the surface area with primer/sealer before skim coating.Problem: Pitting.Solution Pits on the

surface area of the drywall are air bubbles that were not properly filled up or that were subjected during sanding. Air bubbles arise from over -or under-mixing the joint substance. Apply pressure to the bubbles with the joint knife, till the pits are gone. If you don't observe them till the wall is dry, cover them with joint compound and sand.Problem: Over-sanding; missing high as well as reduced

spots.Solution Sand excessive and you take the chance of damaging the surface area paper. If that

occurs,

cover the location once more with joint substance. To avoid missing out on low and high places, utilize a clamp-light or various other light near to the wall surface to discover trouble locations. Sand methodically, functioning from the ceiling to the flooring in narrow sections.How to eliminate a textured surface from drywall by scuffing

Trouble:

Wall harmed by water and also scrapers.Solution Experts recommend wetting wall surface structures with a spray bottle to loosen the material. After that utilize a scraper with a level, broad blade to get rid of the appearance. Use only enough water to loosen up the material or you can damage the drywall. If you mark the sheetrock with the side of your scuffing blade, patch it with joint compound.How to get rid of a distinctive surface from drywall by covering walls with drywall Issue: Reinstalling trim.Solution "One thing to keep in mind when using 1/4-inch drywall over an existing

wall surface is that not only will your wall, windows and door casing look a 1/4- inch thinner however every one of the "joints"will certainly need to be loaded with joint substance and also caulked, "claims Solis. You could need to remove trim and also re-install it, and electric outlets might need expansions to bring them flush to the wall. drywall repair average cost

Sheetrock - What Is It?

drywall prices

Best Drywall Repair Services Florida

Drywall repair Quincy – drywall installation

[post_name hanging drywall 

How to Repair Popped Nails in Drywall

drywall repair tape

By the time you end up reading this post, you will certainly have the ability to perform standard repair works to harmed drywall. There are some basic tools that you ought to keep around your home, if you have an energetic household and also are prone to obtain dings in the wall surfaces. This article will certainly not offer adequate info to do major repair works to drywall. Significant repair works are easy, however you have to discover the fundamentals first.Here is a listing of some devices you will need. Your regional big box could supply you with some basic tools. They run in rate range from low-cost to specialist quality. They have plastic putty blades for much less compared to a dollar all the means up to stainless steel that with treatment, will certainly last a life time. If you anticipate an extremely small number of repair services, the plastic will certainly be enough. Likewise, obtain a carriage screw, a small hammer, a could of drywall joint substance, 150 to 220 grit sandpaper and a paint brush. These basic tools will fix most little dings and dents in drywall.An example of a ding would certainly be where the securing

switch on a door knob has actually left a perception in the wall surface behind it. This is normal of a fast as well as simple repair service. Look at the damage. Is there anything protruding over the wall surface area? If so, utilize the carriage bolt to push the outcropping below the wall surface. Use the hammer to assist persuade the outcropping to go below the surface of the wall surface as well as round the edges. Next off, take the putty knife and some joint compound or as it is frequently called, drywall mud, as well as fill up the opening. Wait until the mud dries out, sand gently as well as fill up the opening once again to bring the product to the exact same level as the wall surface. Sand the surface again until the wall is smooth and also level. Do not over sand. This will certainly harsh up the drywall allowing the paper to fray and calling for even more mud to secure the rough surface. There should not be any distinctions in the surface area. Numerous small applications will last much longer compared to one huge application and provide you far better results.Is everything smooth? If not, use some even more drywall mud to also the wall surfaces. Sand once again. When the wall surface is smooth, apply the paint guide. When the paint primer is completely dry, apply your normal wall paint. The paint primer is to secure the wall surface so the brand-new paint does not completely dry also swiftly enabling the spot to be visible.That is the fundamental approach of repairing harmed drywall.

It's Time to Fix That Hole in the Wall

Drywall patching requires perseverance and determination. I am mosting likely to break the procedure down quickly so you will certainly be extra educated prior to you begin your following dry wall patch.One point you should consider when working with drywall is the DIRT. If you are sensitive to the drywall dust or plaster you could wish to get a particle mask, safety goggles or gloves as well as put on a long sleeve t shirt for defense. Do not forget to safeguard any kind of decor that you desire to keep dirt free, too!Step1: prep the

opening or location to be patched.If the hole or area to be patched has loosened wall surface board paper you will certainly have to eliminate the loose paper and gypsum. Now if the wall surface board paper wishes to proceed destroying the side of the wall surface, a method to stop this is the take a razor knife and also reduced from the loosened area regarding an inch or so. What you are doing is scoring the wall so when you tear of the loosened paper it will certainly involve the racked up line and not tear more causing a bigger area to need patch work. If after you have actually removed the loose paper as well as the gypsum board below is collapsed as well as hardly hanging to the wall, you have to knock out all the loosened gypsum. Loosened paper and also gypsum will certainly create the drywall compound to not bond highly as well as could produce a bubble you will certainly see only after layer with substance. As part of the prep, you could wish to square up the hole so you could extra easily cut the item of sheetrock that will certainly load the void.OK so the area is prepped and also currently we will have to move to step 2, which will certainly instruct you on

how to effectively connect an item of sheetrock cut to load the opening in your wall surface or ceiling.Step 2: back framing the opening to attach the sheetrock you will certainly reduce to fill the void.Just like with brand-new building you will certainly have to have wood framing to screw the sheetrock right into. To describe, I will make use of an example

patch area of one foot by one foot. You will certainly have to cut a 2x4 right into two 16 "lengths. You will have to collect a cordless or electrical drill and also about a dozen 1 1/4" timber screws. Take one of the 2x4's you have actually cut as well as slide it in the red and also behind the existing sheetrock, along one side of the opening. The reason the 2x4 is much longer(16 ")than the 12"hole is since we will expand it a couple of inches past the top and base. So currently you have a 2x4 inside the wall on one side, the 2x4 should be laying flat versus the within the wall, it will certainly not be turned so the 4 "width of the 2x4 is flat versus the inside, this will certainly offer us a bigger surface for accessory as apposed to the conventional means of mounting which would be with the 2"width facing the sheetrock. You will certainly intend to eyeball, best as possible the 2x4 and divided the distinction of the board size in between the existing sheetrock and also where you will certainly connect the item of sheetrock you will reduce for the patch. Currently that the 2x4 is kept in the correct placement you will certainly require to screw the 2x4 right into the existing drywall by holding firmly to the board and screwing into it through the face of the existing sheetrock. You will place two screws along the edge and one on the top and also bottom of the existing sheetrock to highly secure the 2x4 to accept item of sheetrock you will certainly reduce. When you have actually completed one side, repeat the exact same procedure beyond. So when you have actually finished back mounting you currently have a solid framework to affix the patch piece of sheetrock. * Note-if you have a hole to patch where there are mounting, electrical or mechanical issues in the method that maintain you from sliding the 2x4 behind the wall surface to screw down the side, you could screw in the top as well as base of the 2x4 and this will suffice. You may also consider affixing the 2x4 back mounting throughout the top and also base of the hole as apposed to connecting the 2x4's on the sides, simply make use of the same directions of add-on for the sides or top as well as bottom.Now that the prep and also framework are full next we will reduce a piece of sheetrock to place right into the mounted opening in action 3. Action 3: take a dimension of the hole as well as reduced a piece of sheetrock to

fit as well as secure it.It does not have to fit super tight yet it will have to fit and be screwed to the

back framing you mounted. You need to place 2-3 screws down each side connecting the piece of sheetrock you cut to the framework. * Note-all the screws will certainly should be "set"listed below the surface area of the sheetrock however not deep enough that the screw head rips the paper face on the sheetrock, unset screws will show as well as interfere with the following action. ** Note sheetrock comes in two densities for most property building and construction -1/ 2" and also 5/8 ". 1/2"is typically on the interior walls/ceilings and also 5/8"is utilized on underside of stairs and in the garage.Well you're making development as well as you have actually filled up the space with sheetrock, now we will carry on to the

coating or completing phase of the dry wall compound(mud )discussed in action 4. Tip 4: covering the patch with drywall compound (mud). As I was claiming in step 3 the piece of sheetrock you cut to fill up the hole does not need to fit incredibly limited. If the sheetrock you reduced has a gap around the

border/joint of it as well as where it fulfills the existing wall surface board, you must pre fill the area prior to using the drywall tape. So simply take a little compound as well as fill in the edges and smooth the excess level wit the wall, allow to dry. Next is to use the drywall tape to ensure that after we are all completed there will certainly not be a crack around the joint of the covered hole. For patch job I want to utilize a"mesh "or "fiber" tape, it gives a more powerful hold as well as the mesh tape is far more flexible compared to regular drywall tape, in the because you do not need to pre mud the wall to adhere the tape. The mash tape has a sticky backing, so all you do is reduced the mesh tape to the size you need, stick it on the wall with the middle of the mesh tape running right in line with the joint or split. The mesh tape ought to always run past the joint at least an inch. Repeat this process for all four sides of the patch. Following use a layer of compound around the boundary of the spot, over the mesh tape. The mesh will be a little visible after just one coat. * Note-If you apply to much substance(mud )you will have a hump in the surface area. Enable this coat to dry, sand gently, mainly to knock of any kind of blade borders that dried in the compound as well as could create the next layer to develop to much. You do not wish to attempt and also mud the spot in simply 1 coat, it is better to use a moderate/thin layer allow to dry, sand and also layer again. Besides the coats( at the very least two) have actually dried as well as you are completely satisfied that the surface is covered evenly, sand the mud to also the surface area. * Note -a less than best covering work could be ravelled with sanding. Sanding along the outdoors edge of the mud too, will certainly mix the patched area much better into the existing surface. A really neat technique seeks you have sanded the patch, take a damp sponge or cloth and"clean" the outdoors mud of the spot mixing it also much better right into the existing surface, this technique will certainly aid you prevent seeing a mud line around the spot when it is completed. If your residence has a smooth texture, this is the last step, your prepared to painting. If you do not have a smooth appearance you will need to check out on.Only another action as well as the drywall component of your spot will be total, texture. We will certainly talk about various structures as well as how you can apply the symphonious 5. Step 5: there are lots of structures and also you must first recognize how you can determine your existing appearance before going forward.Older houses may have a swirl, crows foot, hand or smooth structure. Newer residences generally make use of smooth, orange peel, knockdown and also hand structures. For a crows foot you will certainly need a crows foot or stomp appearance brush. For swirl appearance you might need to get in touch with a completely dry wall vendor store for the right structure brush or try out a couple of different brushes. For a hand structure you can utilize a dry wall blade or trowel. All of the above pointed out appearances require a device or brush to use drywall compound to achieve the texture. The following 2 textures can be bought in a spray can, orange peel as well as tear down. * Note- with all appearances it is great to obtain an old piece of plywood or cardboard and experiment first to find the appropriate amount of stress, density of mud, technique as well as established time to create the ideal planning to best hide that a repair work was ever made. As always if you appearance the wall surface and are not delighted with the outcomes you can was the appearance of quickly with a wet sponge of dustcloth, enable to completely dry as well as attempt texturing again or sand of a poor structure if you are not happy with it after it has been permitted to dry. * Note- Knockdown appearance size could be adjusted by letting the sprayed on structure established or completely dry for much less or even more time depending upon the desired look.We have actually discussed the 5 actions had to professionally fix a drywall spot. 1 )appropriately prep the area to be covered. 2)back frame the opening. 3 )size as well as reduced the sheetrock to fill up the opening. 4 )use mesh tape and mud to smooth the surface. 5)select and use appropriate texture.So go out as well as" get your drywall on". You could take a look at my short article on paint walls if you require help with the paint. Really feel free to leave a remark concerning any various other subject you would certainly like me to compose on relating to drywall. Please have a look at our site, dennardbloss.com, it

is everything about our construction surfaces. drywall repair dent

How to Repair a Large Hole in a Sheetrock Wall

hanging drywall

Best Drywall Repair Services Florida

Drywall repair Macclenny – general labor

[post_name drywall patch 

How to Install Your Own Drywall

drywall repair large section

Drywall appearance is simple and also a cost effective method for wall decoration. Drywall is commonly referred to as gypsum board or plasters board as well as is used to earn interior wall as well as ceilings. It readies if greater than two people are entailed in the procedure of drywall installation, because it requires significant lifting of heavy material.Partitioning Drywall is

really much preferred for dividing. This is because a big number of advantages are connected with it like flexibility, adaptability, completely dry construction, superb performance, visual appeal, and fantastic rate in general process of installment. The installation of drywall needs practice and also virtuosity. Drywall can be found in huge sheet with a dimension of 4'x12'.

Taping Drywall

The installation of the drywall is extremely easy. It is just the taping of joints between panels which require some technique. As soon as the dangling of the drywall is total, the following step is the taping of drywall joints. There are two sort of tapes made use of for this purpose. One is the plane paper black tape and also the various other is self-adhesive fiberglass tapes. The fiberglass tape can be directly pasted over the drywall.Materials Required

For Taping The general equipments needed for the process of taping are: & bull; A banjo & bull; 12 inch trowel & bull; Roll of paper• tape & bull; Establishing substances & bull; 6 inch flexible putty knife & bull; 4 inch versatile putty blade Fining sand, Topping and Completing The primary step while preparing the surface area of drywall is to

examine the whole wall surface, since a lot of the moment there are small holes and lumps in the wall. If there is any kind of nail or obstacle, then with the aid of hammer touch them. Then procedure, you can go on with the sanding of the wall surface in order to acquire ideal drywall surface.The next crucial step is priming, which is done prior to painting.

Keying the drywall makes sure that paint lasts for longer duration and adheres well. To avoid leaking of the paint, work from the leading and also proceed towards all-time low. After finishing this, you could continue for painting.The final action is drywall finishing. It readies to obtain stuck with flat paint, due to the fact that the repair collaborate with flat paint is really much easier. Right here, it is very important to keep the void or 24 hours before two layers and also make sure that wall is entirely dry prior to you go for the next layer. It is generally observed that drywall looks completely different once the paint dries out off.Fiberglass to avoid mold and mildew growth The sheet of drywall is generally constructed from paper but nowadays it is changed by fiberglass. Fiberglass prevents the development

of mold and mildew, which is typical with paper drywall. It has been observed a number of times that when paper drywall was exposed to water through leakage or floodings, it causes the growth of mold and mildew. Mold and mildew not only impacts the neighborhood health however likewise decreases the total charm of the space.

How to Remove Drywall Texture

Drywall patching needs patience and determination. I am mosting likely to break the procedure down quickly so you will be a lot more educated before you begin your next dry wall patch.One point you have to consider when collaborating with drywall is the DUST. If you are delicate to the drywall dust or gypsum you could want to obtain a fragment mask, security goggles or handwear covers as well as put on a lengthy sleeve tee shirt for protection. Remember to safeguard any type of decor that you wish to maintain dirt cost-free, too!Step1: prep the

hole or area to be patched.If the hole or location to be covered has loose wall board paper you will have to get rid of the loose paper and also gypsum. Currently if the wall board paper intends to continue tearing up the side of the wall, a method to quit this is the take a razor knife as well as cut down from the loose location about an inch or two. What you are doing is racking up the wall so when you tear of the loose paper it will involve the racked up line and not tear additional triggering a larger location to require spot job. If after you have eliminated the loosened paper and the gypsum board below is crumbled and barely hanging to the wall surface, you have to knock out all the loosened gypsum. Loosened paper as well as gypsum will create the drywall substance to not bond strongly and also may produce a bubble you will certainly see only after coating with compound. As part of the prep, you could wish to make even up the hole so you could extra quickly cut the item of sheetrock that will load the void.OK so the area is prepped and currently we will certainly need to transfer to step 2, which will advise you on

ways to appropriately attach a piece of sheetrock cut to load the hole in your wall surface or ceiling.Step 2: back framing the hole to connect the sheetrock you will certainly reduce to load the void.Just like with brand-new construction you will certainly should have timber mounting to screw the sheetrock right into. To describe, I will certainly make use of an example

spot area of one foot by one foot. You will require to cut a 2x4 into 2 16 "lengths. You will certainly need to collect a cordless or electric drill and also concerning a lots 1 1/4" wood screws. Take one of the 2x4's you have actually reduced as well as slide it in the hole and behind the existing sheetrock, along one side of the opening. The factor the 2x4 is much longer(16 ")compared to the 12"opening is because we will certainly expand it a couple of inches past the top as well as bottom. So now you have a 2x4 inside the wall surface on one side, the 2x4 should be laying flat against the within of the wall, it will not be turned so the 4 "width of the 2x4 is flat against the within, this will give us a bigger surface area for accessory as apposed to the standard way of mounting which would certainly be with the 2"size dealing with the sheetrock. You will certainly wish to eyeball, best as possible the 2x4 as well as split the distinction of the board size in between the existing sheetrock as well as where you will certainly affix the item of sheetrock you will reduce for the patch. Now that the 2x4 is kept in the right placement you will certainly should screw the 2x4 right into the existing drywall by holding snugly to the board and also screwing into it through the face of the existing sheetrock. You will certainly place 2 screws along the side and one on the top as well as base of the existing sheetrock to strongly secure the 2x4 to accept piece of sheetrock you will cut. Once you have actually completed one side, repeat the same procedure beyond. So when you have actually ended up back framing you now have a strong frame to affix the patch item of sheetrock. * Note-if you have an opening to patch where there are mounting, electric or mechanical issues in the manner in which keep you from sliding the 2x4 behind the wall to screw down the side, you can screw in the top as well as base of the 2x4 as well as this will certainly suffice. You could likewise consider connecting the 2x4 back framing throughout the top and also base of the hole as apposed to affixing the 2x4's on the sides, simply utilize the same directions of add-on for the sides or leading and also bottom.Now that the prep and also framing are total next we will cut a piece of sheetrock to place right into the framed hole in step 3. Action 3: take a measurement of the hole and also reduced a piece of sheetrock to

fit as well as protect it.It does not need to fit very tight but it will should fit and also be screwed to the

back framing you installed. You must place 2-3 screws down each side attaching the piece of sheetrock you reduced to the framework. * Note-all the screws will have to be "established"listed below the surface area of the sheetrock however not deep enough that the screw head rips the paper face on the sheetrock, unset screws will reveal as well as interfere with the following step. ** Note sheetrock comes in 2 densities for most property construction -1/ 2" and 5/8 ". 1/2"is generally on the interior walls/ceilings and 5/8"is used on bottom of stairways as well as in the garage.Well you're making progression and you have filled the void with sheetrock, currently we will go on to the

finishing or completing stage of the dry wall surface substance(mud )described symphonious 4. Tip 4: finishing the patch with drywall substance (mud). As I was stating symphonious 3 the item of sheetrock you cut to load the hole does not need to fit very limited. If the sheetrock you reduced has a void around the

border/joint of it as well as where it meets the existing wall surface board, you need to pre fill the area prior to using the drywall tape. So simply take a little compound as well as fill in the edges as well as smooth the excess level wit the wall surface, enable to dry. Next is to apply the drywall tape to ensure that after we are all finished there will not be a fracture around the joint of the covered hole. For patch job I like to utilize a"mesh "or "fiber" tape, it offers a more powerful hold and also the mesh tape is far more forgiving compared to regular drywall tape, in the since you do not have to pre mud the wall surface to adhere the tape. The mash tape has a sticky backing, so all you do is reduced the mesh tape to the size you require, stick it on the wall surface with the middle of the mesh tape running right according to the joint or split. The mesh tape need to constantly run past the joint at the very least an inch. Repeat this procedure for all four sides of the patch. Next use a coat of compound around the border of the spot, over the mesh tape. The mesh will certainly be somewhat noticeable after just one coat. * Note-If you relate to much compound(mud )you will certainly have a hump in the surface. Allow this layer to dry, sand lightly, mostly to knock of any type of knife edges that dried out in the compound and might trigger the following layer to develop to a lot. You do not want to try and also mud the patch in just 1 layer, it is far better to apply a moderate/thin layer allow to dry, sand and also coat again. Nevertheless the layers( at the very least 2) have actually dried out and also you are pleased that the surface area is layered evenly, sand the mud to also the surface area. * Note -a less than ideal finish work could be smoothed out with sanding. Fining sand along the outdoors edge of the mud too, will blend the patched area much better right into the existing surface area. An actually cool method is after you have actually sanded the spot, take a damp sponge or dustcloth and also"wash" the outdoors mud of the patch mixing it even better into the existing surface area, this trick will help you prevent seeing a mud line around the spot when it is finished. If your house has a smooth appearance, this is the last action, your all set to painting. If you do not have a smooth appearance you will require to review on.Only one more step and the drywall component of your spot will certainly be complete, texture. We will discuss various appearances and the best ways to use the in step 5. Step 5: there are several structures as well as you should first know ways to determine your existing appearance prior to going forward.Older homes might have a swirl, crows foot, hand or smooth texture. Newer houses essentially make use of smooth, orange peel, knockdown as well as hand textures. For a crows foot you will need a crows foot or trample appearance brush. For swirl appearance you might have to get in touch with a completely dry wall distributor shop for the proper texture brush or trying out a few different brushes. For a hand texture you can make use of a completely dry wall surface knife or trowel. All of the above pointed out appearances require a device or brush to apply drywall substance to attain the texture. The following 2 appearances could be purchased in a spray can, orange peel and tear down. * Note- with all textures it is good to obtain an old item of plywood or cardboard and also experiment initially to discover the right amount of stress, thickness of mud, technique and also established time to produce the right appearance to finest hide that a repair was ever before made. As always if you texture the wall surface and also are not satisfied with the outcomes you could was the structure of promptly with a damp sponge of rag, permit to dry as well as attempt texturing once more or sand of a bad appearance if you are not happy with it after it has actually been enabled to dry. * Note- Knockdown appearance dimension can be controlled by letting the splashed on structure established or dry for less or even more time relying on the desired look.We have actually gone over the 5 actions required to expertly fix a drywall patch. 1 )effectively prep the area to be patched. 2)back mount the opening. 3 )size and also cut the sheetrock to load the opening. 4 )use mesh tape and mud to smooth the surface. 5)select and use proper texture.So head out and also" obtain your drywall on". You could have a look at my write-up on painting walls if you need help with the painting. Feel cost-free to leave a remark about other subject you would certainly like me to write on relating to drywall. Please take a look at our web site, dennardbloss.com, it

is everything about our building and construction coatings. drywall repair quick dry

Drywall Mudding and Taping - A Simple Process For Do-It-Yourself Homeowners

drywall patch

Best Drywall Repair Services Florida

Drywall repair Starke – how to repair drywall

[post_name sheetrock prices 

Drywall Repair Tips

drywall repair franchise

Drywall imitates a sponge, soaking up wetness at every chance. When drywall gets wet, it swells and distorts, jeopardizing the honesty of your wall. This permits the underlying frameworks to experience extended exposure to dampness and starts the decay process, eventually decaying the entire framework. Drywall is a functional building product, though. Drywall that has splashed could be repaired with a little recognize how.In order to fix wet drywall, comply with the listed below steps:

o Eliminate around the affected drywall with a drywall saw. These handsaws are offered reasonably at any local equipment shop. Ensure that you reduce away all impacted drywall by maintaining wide margins around the defect.o Determine the reason for the water. This step is rather very easy if your drywall was influenced by an outside pressure like rainfall, flooding, or a busted hot water heater, yet may be a little bit much more elusive if you have a roof or pipes problem. If you can not ascertain the root cause of the water, see to it you call a professional.o Replace the damp

drywall with dry. On a new item of drywall, define a spot of new drywall in the same measurements as the old and reduced out with a razor blade or drywall saw and screw into the open hole. If there is no wall surface stud behind the open area, removed the existing drywall up until there is a subjected stud on either side of your repair.o Apply drywall mud. Joint substance of drywall mud is used in layers. Make the first layer the thickest, covering all of the joints thoroughly as well as enable to dry. Do not stress way too much concerning making the compound entirely smooth as there will be several layers of mud and fining sand before you reach your finished layer. All the mud to dry and afterwards sand smooth. Run your hand over the joints, feeling for reduced or high areas and also mark with a pencil. Continue fining sand high places then include a brand-new layer of mud over the whole fixing, focusing on including substance to the low spots. Repeat this procedure till your fixing is level with the existing wall.o Idea: Take your time with this step, as your mud work is the crucial to having a smooth

wall later.o Paint-Repaint your entire wall surface to ensure that the color suits. Also if you have the paint tinted to match your

existing wall, the colors could not match 100 %, offering you an obviousing pointer of where the fixing took place. While you don't need to, you may choose to paint the entire space to make sure color evenness.This technique functions well for little drywall fixing works, but in scenarios where there are large areas of drywall to replace, such as a flooding situation, it may be recommended to get in touch with a professional.http:// www.rightwayrestoration.com

How to Repair Popped Nails in Drywall

To repair and area of drywall that has been damaged you will need sheet rock, an utility knife, fast dry-low dirt joint substance, mesh tape for drywall, one inch galvanized drywall screws, a drill, drywall knife as well as a drywall fining sand block. When working with joint compound wear handwear covers and also comply with handling instructions for the product when using it for any layout ideas.Holes To repair a hole or tiny to

tool anxiety in the drywall, take out the anxiety as well as remove any loose items of particles thoroughly. To obtain behind the wall you might need to utilize a cord rod to pull it out. A rod could be made from a heavy duty clothing hanger aligned out with a bend at the base in the form of an L. When the clinical depression has actually been carefully drawn ahead use the mesh tape throughout the location gently. Use one layer of joint substance in smooth even strokes with spackling device. Enable the joint compound to dry according to product suggestions. Repeat this application till the tape and also damages surface area is totally covered. If it looks beefy in locations, that's OKAY you can ravel the unequal locations with a moist cloth once it's entirely dried out. After the location has cured for at least 24 Hr make use of the sanding block to carefully smooth as well as out the surface area, brush away joint compound dust with a dry cloth as well as use paint. The ideal repair work for room and restroom styles where the doorknob strikes the wall.Sections Remove harmed areas of

sheet rock with an energy blade to reveal the framing stud inside the wall. Complete the raw sides or even them out with the blade or sanding block. Utilizing an item of paper, eliminated a pattern of the location needing replacement or conserve the remove as this will certainly make it less complicated to gauge as well as reduce out the new piece of drywall. As soon as the brand-new item has actually been determined as well as reduced, place it in the opening and also meticulously adjust the edges for a snug fit. Install brand-new drywall with screws slowly regarding not damage the drywall. Apply mesh tape around the raw edges of the joints as well as start using joint substance in smooth even strokes as advised above. Apply a little bit of joint compound to the screw goes to cover them up. Again after the joint compound has healed, smooth the surface area with sanding block and paint with a level primer layer and afterwards apply last matching paint for the ultimate repair in the bathroom, bed room or living space designs.Dings as well as Dents To resurface small spots of wall surface that have been slightly

damaged initially, lightly"harsh"the location with a fining sand block, then with a completely dry towel, brush away the dirt. Cut a piece of mesh tape to cover only the broken location. Apply joint substance in smooth even strokes, enable treatment time and paint. This repair works fantastic in youngster's bed rooms and recreation room layouts. drywall repair dent

How to Remove Drywall Texture

sheetrock prices

Best Drywall Repair Services Florida

Best Drywall Repair Services Florida

It's Time to Fix That Hole in the Wall

Florida

Repairing broken drywall joints can be discouraging at ideal. If there is only a really, really little crack present, you might be able to scrape out the split to a larger dimension then simply apply new spackling substance. Utilizing a sharp, pointed device such as an old fashioned could opener (church secret), scratch placed a groove wider and also somewhat longer than the fracture. It has to go to least 1/8" deep however further is much better. There are patching substances offered today made just for patching cracks but are not planned for huge areas. If this is a repainted wall some quantity sanding will additionally be needed. Spackle will certainly not adhere to a smooth paintinged finish. Sand the area around the crack at least a few inches larger than the crack and then go on as well as use the patching compound making certain you compel the spackle down right into the crack. Right after using the spackle, re-wipe the location with your blade to get rid of any kind of excess spackle from the area leaving a level surface area. Relying on what kind of substance you purchased the drying times differ a fair bit from minutes to hrs. After the spackle is entirely dry usage a 100 or 120 grit drywall fining sand paper to smooth area so it is flush with the existing wall surface. Prime the drywall as well as mount the final paint.In an instance

where the splits are a lot larger along the joints, it may triggered by the drywall tape pulling loose, physical damage or possibly also excess dampness. Carefully get rid of any kind of as well as all loosened materials at taped locations. You can not and also I repeat, could not re-spackle old tape. The drywall tape has minute openings that enables the spackle to travel through as well as secure the tape to your seams. The spackle "damps" the tape aiding it not just to adhere to the drywall however permits the spackle to develop a bond on both sides to the drywall. Once it is made use of, the openings are loaded therefore making the tape ineffective. Trying to route will only create the joint to re-crack later.After removing all loose materials, lightly sand the damaged locations bewaring not to tear or sand with the paper layer of the drywall below. Once the area is smooth to the touch make certain you have sanded equally into the surrounding location so as not to leave a side that will certainly show via the ended up job. Using a 6 inch wide spackle knife, install an also coat of new spackle over the seam. Place your new drywall tape over the joint and also using the blade, push the tape securely into the drywall removing all excess spackle as it squeezes out from under the tape and also sides of the blade. Do not remove excessive spackle so as to leave the paper completely dry. Once the location is as smooth as you could make it, apply a 2nd lighter coat over the very same location seeing to it the new tape is entirely embedded in fresh spackle.After drying out for one day to ensure all the spackle is dry, re-sand the

entire location to again obtain a smooth feel to the entire repaired location. Utilizing your twelve inch blade, spread out a second coat to the entire repair ensuring you mix smoothly onto the adjacent wall surface areas. Do not leave any type of ridges or sharp edges where you satisfy the old wall finish.Once this second coat of spackle is dry, which will be much less than the skim coat as it is much thinner, use, utilizing your twelve inch knife, a 3rd really thin layer of fresh spackle. You will virtually have the ability to translucent this layer as it is used to fill up little indents or scrapes left by fining sand the 2nd coat. Once again after the third layer dries out, very gently sand the repair work for the last time to ensure a totally smooth completed location. Apply a coat of drywall primer to seal the freshly repaired drywall location and also then repaint your wall.If the drywall seams have actually totally cracked or split open there may be a structural problem that requires to be re-mediated prior to you repair the drywall seams. Building settlement, foundation troubles or various other things might impact the drywall finishes so be certain they are fixed first.Once you make certain there are nothing else troubles existing, as in a small fixing, eliminate all loosened or damaged products. If the drywall itself is fractured, cut the drywall back to a stud and also mount a new item of drywall. The fixing coincides as a minor fracture only on a much larger scale.Installing tiny items of drywall for patching produces just what are called butt joints which are much more challenging to hide. You will be forced to spread your spackle over a much larger area to

acquire a smooth appearance and also not a bump in the wall. With method you could do this job and also conserve yourself a large amount of money.If you are in a hurry and the fixing is relatively small, there fast drying materials available such as Durobond 90 which when added to spackle makes the spackle rock hard in ninety minutes. There is likewise a forty-five min kind available yet only masters need to try and use it. Forty-five mins zips really fast. When I say it dries out rock hard, it is almost difficult to sand when dried out so any kind of little defects left in the surface area with your blade will certainly reveal later on. Be careful.Remember to keep your tools tidy, do not pry open cans or covers with your blades as it will dent or chip the sides of the blades and work as tidy as you can to stay clear of tedious cleaning later. drywall repair large section

How to Repair a Large Hole in a Sheetrock Wall

It is not uncommon to locate splits in a concrete structure of a residence. This opts for brand-new houses in addition to older ones. While some fractures could show a major problem with the home, several are thought about typical shrinking splits. Let's review the problem of fractures in a foundation and just what it indicates to you.Minor shrinkage cracks are usual in new as well as older house structures. Poured concrete shrinks as it treatments, or works out. As the concrete shrinks, tiny upright or 45 degree fractures may develop gradually at cellar home windows, door openings, or edges. We call these tension or surface fractures. These fractures are 1/4"broad or much less and do not influence the structure of the building. If you see small fractures in a new foundation, or an old foundation for that issue, do not panic. The concern right here is moisture breach into the basement or crawlspace. This is a relatively very easy fix with epoxy insertion or concrete caulk. On older residences these cracks could return, specifically if the walls are made of lath and also plaster. However, don't be distressed, it's just the residence continuing to settle.The same could be real of fractures in the drywall of the house. Stress and anxiety or resolving cracks will be little in size, regarding a 1/4 inch, and also address a 45 degree angle from the edge of the door framework or window. Once more, do not panic as this is not an architectural issue but even more cosmetic. Fixing of the split entail easily performed drywall repair work, which could be achieved in extremely little time.More extreme cracks in the foundation or wall surfaces do need the focus of a qualified service provider to explore and also deal with. The sort of fracture that regards interest is the straight crack. These cracks are usually come with by bowing, structure, or leaning of the structure wall surface. These sorts of cracks might suggest a foundation problem, which might be pricey to remedy or if it could be corrected.There are additionally extra kinds of cracks that could be connected to architectural movement. Included in the extreme crack group are fractures that have deflection. By this we suggest that one side of the fracture is greater or beyond the other side of the split. Additionally fractures that run diagonally throughout a wall, or in a stair step style. As well as lastly, cracks on the indoor finish (drywall or turret and also plaster )that remain in the exact same area as fractures on the outside of the home.Repair of these structural motion or structural damages fractures can consist of several various avenues. A lot of them will certainly include repair service of the outside in addition to to the interior part of the

home.That in short is a conversation of structure or wall fractures in a house. If you see these sorts of fractures, it could be best to have actually a certified professional inspect

the cracks. The professional could after that provide you a concept if they are regular settling fractures or ones of an extra serious nature. drywall repair or replace

Is It Time To Do Some Repair Work On Your Drywall?

Drywall repair Pompano Beach – sheetrock prices

[post_name drywall texture 

How to Repair a Large Hole in a Sheetrock Wall

drywall repair average cost

There's a catch to drywall repair that everyone should understand before attempting to "do-it-yourself" for the very first time. Drywall fixing is simple, however it is additionally easy to do a greatly poor work. Because of this, an easy introduction to drywall fixing materials and also tools is an excellent place to start on your course towards patching and paint your home's interior structural damages. However keep in mind, it's not simply practice that makes excellent, it is also expertise, particularly in regards to drywall repair service. So proceed your study and learn all that you can around drywall job prior to getting started on your personal projects. Continue analysis to examine some usual market expertise for drywall repair.Drywall Substance Additionally called drywall"mud ", there are 2 usual sorts of joint substance used to fix and spot: light-weight as well as all-purpose. Both are simple to deal with and also retain a room-temperature shelf-life of 9 months. The most crucial pointer for buying drywall compound is to get sufficient. For big projects, expect to buy 4.5 gallon bucket of material.For smaller sized projects, you could obtain away with a one gallon pail, however you might be paying near to the same

amount for a larger bucket. If you assume you could have future work in the next 9 months, it is much more cost-efficient to choose the larger bucket. Otherwise, select the smaller sized quantity so to not waste any kind of material.Spackle and also Plaster Several individuals are confused regarding the difference among drywall compound, spackle, as well as plaster. The differences are refined, and rarelyvisible to the average layman,

however they do exist. Compound, joint compound, or drywall mud all refer to the very same item, as well as utilized primarily for bigger drywall as well as gypsum board projects that require more resilience, particularly to cover joints in between panels.Spackle is very similar to joint compound, but utilized primarily for small home fixings for plaster as well as drywall. Plaster is a kind of wall surface product discovered mainly in older or historical structures.

It is an extra taxing technique to wall repair service in comparison to spackle.Drywall Repair work Devices You can purchase drywall fixing kits that include virtually all the fundamentals for drywall patching as well as repair work. Packages vary in amount, dimension, as well as price, however typical ones typically consist of 2-3 adaptable knives, an utility knife, an insider-corner knife, hammer, screwdriver, saw, drill, nails, and also screws. However drywall repair works likewise need added materials relying on the needs of the task, consisting of: Substance Self-Adhering Mesh Tape Paper Tape Drywall 1x4 Block of Pine Timber Hand Sander Toenail Bar Degree Hack Saw Sandpaper Miter Box Guide Repaint Painting Brush or Roller You can buy all of the above-listed materials at any local hardware or residence renovation store. Ask a shop attendant to

  • direct you
  • in the best direction
  • , as well as give suggestions on
  • one of the most
  • trusted products. Talk
  • to an accredited drywall contractor for
  • experienced guidance on household drywall
  • fixings, drywall
  • jobs,
  • drywall substitute, and also
  • more. They could also take
  • the weight off your shoulders by finishing the job much faster, much better, as well as at a rate that won't make you reconsider!

    DIY Versus Professional Drywall Installation and Repair

    Drywall patching requires patience and also persistence. I am mosting likely to damage the process down easily so you will be much more notified prior to you begin your next completely dry wall surface patch.One point you have to take into consideration when dealing with drywall is the DIRT. If you are delicate to the drywall dust or gypsum you might wish to obtain a particle mask, security goggles or handwear covers and also use a long sleeve shirt for protection. Do not forget to safeguard any kind of residence furnishings that you wish to maintain dirt complimentary, too!Step1: prep the

    hole or area to be patched.If the hole or area to be covered has loose wall surface board paper you will certainly should get rid of the loose paper and gypsum. Currently if the wall board paper wishes to continue destroying the side of the wall, a way to stop this is the take a razor knife and also reduced from the loosened location regarding an inch or so. What you are doing is scoring the wall so when you tear of the loosened paper it will certainly pertain to the racked up line and also not tear additional creating a larger location to require patch work. If after you have actually gotten rid of the loose paper as well as the gypsum board below is crumbled as well as barely hanging to the wall, you need to knock senseless all the loosened plaster. Loosened paper and also gypsum will create the drywall substance to not bond highly as well as could develop a bubble you will certainly see just after finish with compound. As part of the prep, you may desire to make even up the opening so you could a lot more conveniently cut the piece of sheetrock that will certainly fill the void.OK so the area is prepped and currently we will certainly have to relocate to tip 2, which will advise you on

    just how to appropriately affix an item of sheetrock cut to fill the opening in your wall surface or ceiling.Step 2: back framing the opening to affix the sheetrock you will certainly cut to load the void.Just like with brand-new construction you will need to have timber framing to screw the sheetrock into. To explain, I will use an example

    spot area of one foot by one foot. You will certainly should cut a 2x4 into 2 16 "lengths. You will have to gather a cordless or electric drill as well as concerning a loads 1 1/4" wood screws. Take one of the 2x4's you have actually cut and also slide it in the red as well as behind the existing sheetrock, along one side of the opening. The reason the 2x4 is longer(16 ")compared to the 12"hole is because we will certainly expand it a few inches beyond the top and also base. So currently you have a 2x4 inside the wall on one side, the 2x4 has to be laying flat versus the within of the wall surface, it will certainly not be transformed so the 4 "width of the 2x4 is flat against the in, this will certainly give us a bigger surface for accessory as apposed to the standard way of mounting which would be with the 2"size facing the sheetrock. You will certainly wish to eyeball, best as feasible the 2x4 as well as split the distinction of the board size between the existing sheetrock and also where you will connect the item of sheetrock you will certainly reduce for the spot. Now that the 2x4 is held in the appropriate position you will require to screw the 2x4 into the existing drywall by holding firmly to the board and also screwing right into it through the face of the existing sheetrock. You will certainly place two screws along the side and also one on the top and bottom of the existing sheetrock to strongly safeguard the 2x4 to approve item of sheetrock you will reduce. Once you have actually finished one side, repeat the same treatment on the other side. So when you have completed back mounting you currently have a solid framework to attach the patch item of sheetrock. * Note-if you have an opening to spot where there are framing, electric or mechanical issues in the means that keep you from gliding the 2x4 behind the wall surface to screw down the side, you can screw in the top and base of the 2x4 and this will suffice. You could also think about affixing the 2x4 back framing across the top as well as bottom of the hole as apposed to connecting the 2x4's on the sides, simply use the same instructions of attachment for the sides or leading and bottom.Now that the preparation and also framing are full next we will cut a piece of sheetrock to insert into the mounted hole symphonious 3. Action 3: take a dimension of the hole and reduced a piece of sheetrock to

    fit and also protect it.It does not need to fit very tight yet it will require to fit as well as be screwed to the

    back framing you installed. You must put 2-3 screws down each side connecting the piece of sheetrock you cut to the framework. * Note-all the screws will have to be "established"below the surface of the sheetrock but not deep enough that the screw head tears the paper face on the sheetrock, unset screws will certainly show and also interfere with the following action. ** Note sheetrock is available in 2 thicknesses for most property building -1/ 2" and 5/8 ". 1/2"is typically on the interior walls/ceilings as well as 5/8"is made use of on underside of stairs and in the garage.Well you're making progression as well as you have loaded deep space with sheetrock, currently we will certainly proceed to the

    finish or finishing stage of the dry wall surface compound(mud )explained symphonious 4. Step 4: finishing the spot with drywall compound (mud). As I was claiming symphonious 3 the item of sheetrock you cut to fill up the hole does not have to fit super limited. If the sheetrock you reduced has a void around the

    border/joint of it and where it satisfies the existing wall surface board, you need to pre fill the location prior to using the drywall tape. So simply take a little compound and fill in the edges and also smooth the excess flat wit the wall surface, enable to dry. Next is to use the drywall tape to ensure that after we are all completed there will not be a split around the joint of the covered opening. For spot work I prefer to use a"mesh "or "fiber" tape, it provides a more powerful hold and also the mesh tape is a lot more flexible than regular drywall tape, in the because you do not have to pre mud the wall to adhere the tape. The mash tape has a sticky backing, so all you do is reduced the mesh tape to the length you need, stick it on the wall with the center of the mesh tape running right in accordance with the joint or split. The mesh tape should always run past the joint at the very least an inch. Repeat this procedure for all four sides of the spot. Following apply a coat of compound around the border of the patch, over the mesh tape. The mesh will be somewhat visible after just one coat. * Note-If you apply to much compound(mud )you will have a bulge in the surface. Enable this coat to completely dry, sand lightly, primarily to knock of any kind of knife borders that dried out in the substance and also can trigger the following layer to develop to a lot. You do not wish to try and mud the patch in simply 1 coat, it is better to apply a moderate/thin layer enable to completely dry, sand as well as coat once more. After all the layers( a minimum of two) have actually dried out and also you are satisfied that the surface area is layered evenly, sand the mud to also the surface area. * Note -a much less than perfect layer task could be smoothed out with sanding. Sanding along the outdoors edge of the mud as well, will blend the patched area much better into the existing surface. An actually neat technique desires you have fined sand the spot, take a damp sponge or cloth and also"wash" the outdoors mud of the patch blending it also better right into the existing surface, this method will certainly help you prevent seeing a mud line around the patch when it is completed. If your house has a smooth appearance, this is the last action, your prepared to painting. If you do not have a smooth appearance you will should check out on.Only another action and the drywall part of your patch will be total, structure. We will certainly discuss various textures and also how you can apply the symphonious 5. Tip 5: there are several textures and you have to first recognize the best ways to identify your existing appearance before going forward.Older homes might have a swirl, crows foot, hand or smooth texture. Newer residences for the a lot of component make use of smooth, orange peel, knockdown and hand appearances. For a crows foot you will need a crows foot or stomp structure brush. For swirl texture you could need to speak with a completely dry wall provider shop for the proper structure brush or trying out a couple of different brushes. For a hand appearance you could make use of a completely dry wall surface knife or trowel. All the above pointed out textures require a device or brush to use drywall compound to accomplish the structure. The next 2 textures could be acquired in a spray can, orange peel as well as tear down. * Note- with all textures it readies to obtain an old item of plywood or cardboard and experiment first to find the correct amount of pressure, thickness of mud, technique as well as established time to produce the right look to finest hide that a repair work was ever made. As always if you texture the wall surface and also are not delighted with the results you could was the appearance of right away with a wet sponge of cloth, permit to completely dry and attempt texturing once again or sand of a poor structure if you are not happy with it after it has actually been permitted to dry. * Note- Knockdown structure size could be adjusted by letting the sprayed on texture established up or dry for less or even more time depending upon the preferred look.We have actually gone over the 5 actions had to expertly repair a drywall spot. 1 )correctly prep the area to be covered. 2)back frame the opening. 3 )size and also cut the sheetrock to fill up the opening. 4 )use mesh tape as well as mud to smooth the surface. 5)pick as well as apply suitable texture.So go out and" get your drywall on". You can look into my short article on paint walls if you require assistance with the painting. Don't hesitate to leave a remark concerning other subject you would like me to write on pertaining to drywall. Please examine out our site, dennardbloss.com, it

    is everything about our building finishes. drywall repair near me

    Drywall Water Damage Ceiling Repairs

    drywall texture

    Best Drywall Repair Services Florida

    Drywall repair Daytona Beach – sheetrock prices

    [post_name how to repair drywall 

    Sheetrock - What Is It?

    drywall repair on textured wall

    Should you attempt to diy or employ a drywall service provider? The solution depends upon the size as well as kind of the needed repair. If the task is large and requires specialized understanding, equipment as well as a significant investment of your time, you could wish to hire a drywall specialist. Nonetheless, scratches, damages and also small to tool sized hole fixings can be quickly understood by even the beginner.Drywall is absolutely one of the best developments to come along within the last 80 years. As well as for some excellent reasons; it is a low-cost wall covering that increases swiftly. It is neutral and could be enhanced to individual taste. The development of drywall saved contractors and also property owners thousands of bucks in building and construction expenses and also repairs.Drywall, or gypsum board, is made from a brittle fire immune compound that is covered in a thick paper covering. It is really resilient and also can be quickly cut, sawed, drilled, curved, toenailed, glued, screwed, painted on as well as papered over. It also aids to seem evidence and also shield a space. Yet even as resilient as it is, eventually, you'll should spot some location of drywall in you home or business.Commonly, you will be dealing with several of 3 different types of wall surface holes-nail openings and also damages, little doorknob size openings as well as larger holes created by clenched fists as well as furnishings. In this post I'll describe a really simple repair work technique for a tiny drywall openings. This will certainly function excellent on openings much less compared to 6 inches, such as doorknob holes.THE "HAT PATCH"REPAIR SERVICE APPROACH Utilizing a keyhole saw, reduced a square around the hole(the hole is currently square ). Keep it as little as possible. Sand the sides to the hole lightly to remove burrs from the sawing. From a brand-new piece of drywall, cut a square piece of drywall regarding 3 inches larger compared to the hole that you're trying to cover. (Now follow me closely here, since in this next step you're mosting likely to remove several of the drywall backing from your brand-new patch.)TRANSFORM THE NEW PATCH OVER as well as reduce 1-1/2 inches on each side with a razor knife. Be really cautious not to cut completely through the face paper (you intend to leave the dealing with paper intact). Now meticulously peal the 1-1/2 inch items off the face paper and discard. Clean the back of the face paper on the patch to get rid of small little bits still attached.Place joint substance around the edges of the opening for a minimum of 2 inches on each side. Make sure to mud the raw sides of the old drywall. Place the patch right into the hole as well as drag mud down each side. Currently cover the entire area with an extremely thin coat of mud and also let it completely dry. When totally dry sand the location extremely lightly.If required, use a 2nd coat and also enable it to dry. Sand the location gently and also you prepare to paint.If this seems extra complicated that you 'd like, your neighborhood hardware store will certainly sell you a drywall repair set. The sets can be found in various sizes and types for various applications. Just comply with the manufacturer's directions as well as you must be prepared.

    Does Your Concrete Foundation or Drywall Have Cracks?

    By the time you end up reading this write-up, you will certainly be able to do basic fixings to harmed drywall. There are some basic tools that you need to keep around the home, if you have an active family members and are susceptible to get dings in the walls. This write-up will certainly not provide adequate information to do significant repair services to drywall. Major repair services are easy, but you need to learn the basics first.Here is a listing of some devices you will certainly require. Your local huge box could supply you with some basic tools. They run in rate range from low-cost to professional high quality. They have plastic putty blades for much less compared to a buck all the means approximately stainless steel that with care, will last a life time. If you expect a really little number of repairs, the plastic will be sufficient. Also, obtain a carriage screw, a little hammer, a canister of drywall joint compound, 150 to 220 grit sandpaper and also a paint brush. These fundamental devices will certainly repair most little dings and dents in drywall.An example of a ding would certainly be where the locking

    switch on a door knob has actually left an impact in the wall behind it. This is common of a quick and also very easy repair. Check out the damages. Is there anything sticking out over the wall surface area? If so, utilize the carriage bolt to push the outcropping below the wall surface. Utilize the hammer to help encourage the outcropping to go listed below the surface area of the wall and also round the edges. Next, take the putty knife as well as some joint substance or as it is generally called, drywall mud, as well as fill up the hole. Wait till the mud dries out, sand lightly and also fill up the hole once more to bring the material to the exact same degree as the wall surface. Sand the surface again up until the wall surface is smooth and also level. Do not over sand. This will rough up the drywall allowing the paper to battle royal and calling for even more mud to secure the harsh surface. There should not be any kind of differences in the surface. Numerous little applications will last much longer compared to one big application and also provide you far better results.Is whatever smooth? If not, apply some more drywall mud to also the wall surface surfaces. Sand again. When the wall surface is smooth, apply the paint primer. When the paint primer is completely dry, use your routine wall surface paint. The paint guide is to seal the wall so the new paint does moist as well quickly allowing the spot to be visible.That is the fundamental method of repairing harmed drywall. drywall repair self adhesive wall patch

    Introduction to Drywall Repair Materials

    how to repair drywall

    Best Drywall Repair Services Florida

    Drywall repair Bradenton – wall patch

    [post_name drywall mud 

    DIY Versus Professional Drywall Installation and Repair

    drywall repair tape

    I uncommitted exactly what your drywall water damage in fact is, the first point that were going to should do is to figure out where the water damages is really originating from. The most usual perpetrator, will certainly be a roofing leak or a plumbing water system pipe that is leaking. Let's get down to the bottom, literally. That's where a lot of the drywall water damage repairs will certainly require to be done.If you have water dripping from your roof, there's a great opportunity that the drywall ceiling will be harmed and if it has an acoustical or popcorn kind ceiling appearance on it, a large area of the ceiling appearance will should be removed or gotten rid of then re-sprayed after the water damages fixings have actually been made.If your ceiling is smooth, this will certainly be the most convenient ceiling repair service that you could make, a lot of the moment. Occasionally people obtain the illusion that a smooth water harmed ceiling from a roof leak, will be less complicated to deal with and their right. The problem is, after the repair work has been made, if it isn't really done properly, the fixing will stand out like a sore thumb.Now what about a water damage ceiling that has a light appearance or a heavy appearance. This will generally be the hardest ceiling repair making. It's challenging to match some kinds of ceiling appearances. The larger the texture, the more challenging it will be to fix. If you have actually a gently sprayed orange peel type texture, you could count yourself lucky. This repair service will generally be less complicated to finish than a smooth ceiling repair.You repair work the water damage ceiling, and you don't such as how it looks. Right here's the most effective method to fix this problem. You will certainly should ravel the whole ceiling, using drywall joint compound, up until it is entirely level or smooth or scratch all the acoustic old ceiling structure off and begin with scratch.Once the entire ceiling is smooth, you can apply your new texture or acoustic ceiling. Some professionals will really figured the task that means, simply to conserve themselves a sight of migraines later.If there is various other water damages to the ceiling, you could also think of removing every one of the drywall, replacing it as well as re-texturing the entire ceiling.

    Drywall Issues at Home: DIY Fixes Vs Professional Drywall Repair

    Fixing a big opening in your sheetrock wall is not as intimidating as one may think. Adhering to is a fast and very easy means to do the repair work without a large headache.First, you'll desire to

    make the hole square if it isn't already. It only has to huge sufficient to cover the broken area.The best method to do this is to make use of a 2 foot level and also make both upright lines as well as 2 horizontal lines with a pencil to develop the square, no measuring is necessary. If you don't have a degree, than simply measure with a leader or measuring tape equivalent ranges to form the square.The next step is to remove along the lines to eliminate the harmed

    piece. An inexpensive keyhole saw is the best tool for this job. An energy knife could likewise be used by making regular passes up until you have reduced via the sheetrock. If you discover on your own cutting over a stud, proceed the cut until you have actually cut out the entire square. See out for any kind of circuitry that could be in the wall, particularly along studs. With the opening now reduced, put an item of scrap timber, ideally one inch thick product such as a 1x3 or 1x4 in the red on the back side of the sheetrock and also long enough to surpass each edge about 4 inches.So if I made an 8 inch by 8 inch hole the piece would be 16 inches long.

    It can be put up and down or horizontally in the opening. If the cut overlooked a stud, the stud could be used as a support factor as well as the scrap put on the opposite side. If the stud is in the center, location 2 scraps on either side. Screw the wood items in area with a cordless screwdriver from the face of the sheetrock till the screw head is slightly below the surface area. One on each end of the scrap should do.Next cut an item of sheetrock to fit the opening. Making the piece one eighth of an inch smaller generally will certainly help in setting it in. Screw this in position as well with drywall screws. The following step is to apply joint compound to the joints to receive joint tape. Put sufficient to cover the width of the tape and also a little over. Press the tape in the plaster with a 6 inch plaster blade. Make certain the tape remains in complete contact with the plaster or else the tape might bubble. Wherever the tape overlaps, position a percentage of joint compound over the hidden tape. When this is dry, put a 2nd coat of compound. It's always best to utilize a 8 inch plaster blade however a six inch will certainly do.Spread the compound over the joints as well as feather it out additionally than before. Hereafter is dry, lightly sand the area to remove any kind of ridges or imperfections. The repair service could currently be keyed with a drywall primer and a layer of paint to match the wall surface. drywall repair on textured wall

    How to Remove Drywall Texture

    drywall mud

    Best Drywall Repair Services Florida