[post_name drywall texture How to Repair Drywall Or Plasterboard Walls

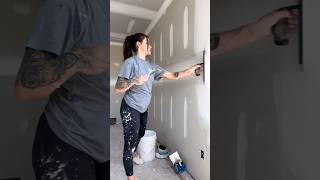
The introduction of drywall has entirely changed the method interior wall finishing was done. It completes indoor wall as well as minimizes building and construction time significantly. Drywall is popularly known as wall surface board, plaster board or plasters board and is used to earn interior walls as well as ceilings. The most essential parameter which is taken right into factor to consider while setting up drywall is its dimension and also density. In the field of interior wall designs, a drywall is a revolutionized method.Drywall Installment The recommended density dimensions
utilized for installing drywall are 3/8 inch (0.952 cm), 1/4 inch(0.635 cm), 1/2 inch (1.27 cm), and 5/8 inch(1.59 cm). Here, your design and also your contractor are the most effective people to speak with for selecting suitable drywall thickness. When the drywall setup is total the next step is to paint it. Drywall setup makes up of different steps such as preparing the site for drywall, installing drywall, mounting edge bead, taping as well as mudding, using the 2nd layer of mud, using the final layer of mud and also Sanding.Drywall Cracks Drywall could be conveniently harmed when revealed
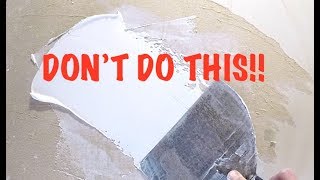
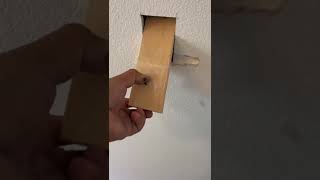
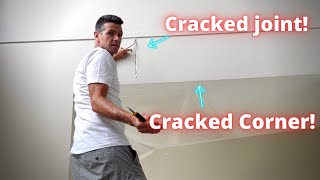
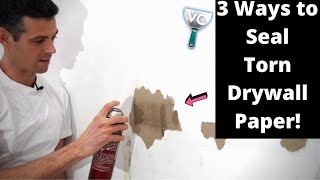
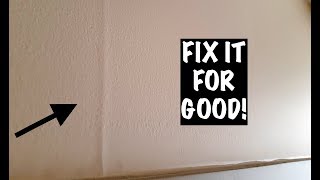
to water. The crack in the securing is very much annoying for the residence owners. The numerous sources of drywall cracks include temperature adjustment, seepage of water, as well as physical damage because of force or shock.It requires a lot of patience to take care of the drywall fractures. The procedure is really straightforward and the tools called for is putty knife, sandpaper, paint brush, paint, seam tape, mud pan, mud trowel, as well as safety glasses.Procedure for repairing drywall Step-1: Getting rid of all the particles as well as paint hanging around the fractured portion.Step- 2: In instance, crack is lengthening you have to remove weak particles by force.Step-3: Currently, use sandpaper to smooth out the split portion.Step-4: Mix the plaster combination, utilizing the mud pan.Step-5: Now utilize putty
blade to apply the plaster.Step-6: Make a tiny strip as well as cover the split Tip -7: Now use coat of plaster over the seam tape.Mould Development Drywall sustains the development of mould since
it is porous and light-weight material. Nowadays in order to stop mould development, the sheet of drywall is made from fiberglass, rather of paper. The development of mould occurs due to moisture as well as
dampness. In prone people, mould could set off allergies like bronchial asthma, sneezing,
or cold like symptoms.Key Advantages The installment of drywall is very easy. Its vital advantages are Adaptability: It could be made use of in all interior areas.Flexibility: You can create and divide the space according to your needs.Dry Building: The workplace is clean, dry and also dust free.Excellent Performance: The result is fruitful in regards to fire ranking, thermal and audio insulation.Aesthetic appeal: It enables simplicity of decor with floor tile, paints or wall surface
paper.Speed of installment: When contrasted to standard stonework system, it
is 3 to 4 times faster.Lightweight: When compared with the traditional masonry systems, it is 8 to 10 times lighter.Partitioning: Drywall is additionally chosen for doing area partitioning.
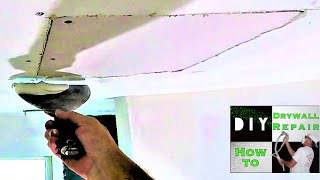
DIY Versus Professional Drywall Installation and Repair
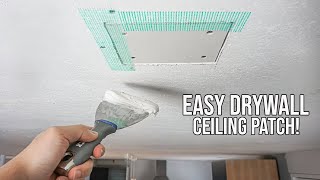
Do it on your own drywall installment is among the more practical jobs you can take on as a home owner. Whether you've obtained a ceiling that's been damaged by a leaking roof or air conditioning unit frying pan, or some new wall surfaces that are part of a redesigning task, eventually, you'll require drywall service your residence. The excellent point is; with the best knowledge, the appropriate devices, as well as some technique; almost anyone can do it. The standard point you have to know include:
Materials-This might appear very apparent, but there are a few different choices.
- Thickness-Drywall or sheetrock can be found in 1/4", 1/2", as well as 5/8" thicknesses. The most common in domestic is 1/2". 5/8" is a lot more typically utilized in business work and also is a requirement of structure codes in numerous areas as a result of it's greater fire immune rating. 1/4" is mainly made use of over various other products such as paneling or plaster when a various kind of wall surface area is preferred. If you're doing a patch or repair service; check the density of the existing drywall prior to acquiring your new material to insure that it matches.
- Application-Most walls and ceilings will have common gray sheetrock. Nevertheless, in high dampness areas, such as shower rooms and cooking areas; use the extra water resistant environment-friendly rock. There is also, currently, a drywall which contains the exact same kind of cement fiber materials utilized in tile backer boards for usage on walls that will completed with ceramic tile.
- Joint Compound-Likewise called sheetrock mud, this is the key aspect to a successful do it on your own drywall installation. This will come in pre-mixed paste like kind in boxes or containers or powdered, in bags, that need to be combined with water. There are likewise quick drying kwikset materials that could be made use of for spots as well as repairs.
- Joint Tape-This could be purchased in the typical paper form, which need to be applied with joint compound or in fiber tape, which is commonly made use of in repair works due to the fact that it eliminates one action of the process.
- Nails or Screws-Commonly, nails have been utilized in property job and also screws in business (as a result of making use of metal studs. However, screws have become more in household due to the speed of screw weapons.
- Drywall Knives-These kinds of knives are not utilized for cutting, yet for spreading out the mud, taping the joints, and also drifting as well as skimming; and also, really look like a spatula a lot more than a blade. They are available in a range of widths from about 3" (used for taping seams) approximately 12" (for drifting and also skimming). You will, most likely, need at the very least 3 dimensions for any kind of job, as each skim layer gets a little bigger.
- Mud Pan-These lengthy rectangle-shaped pans been available in steel or plastic and also are utilized for holding the joint compound. They're slim enough to accept one hand, while making use of the knife with the other.
- Energy Knife/Sheetrock Saw-Most of the cutting of sheetrock is now finished with utility blades with interchangeable blades. Adjustment them as typically as needed for a tidy simple cut. Sheetrock saws are lengthy (regarding 10") triangular saws with tiny deals with and are used mostly for cutting openings for pipes as well as electrical.
- High Powered Drill & & Paddle Bit-If you're doing a small repair; you could mix the mud by hand with a drywall knife. However, for bigger do it yourself drywall installation projects, it's vital that you have a strong enough drill to mix the mud with a paddle for the correct consistency and also to remove swellings.
- Protect it Great-Don't stint nails or screws. You don't want motion when someone leans versus the wall surface. Stopping working to appropriately attach it will certainly lead to fractures in the mud.
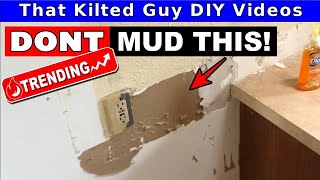
- Look for Cutouts-Keep a close eye on buttons, plugs, and phone jacks. They're very easy to cover as well as hard to find later on.
- Have Enough Aid-Sheetrock is heavy. Make certain you have someone to assist you hold it while you get the screws or nails in. This is particularly real when hanging ceilings.
- Countersink the Bolts-See to it the nails or screws pass through beyond the surface to ensure that they can be covered with mud.
- Tape the Seams-This can be finished with either the paper or fiber tape. With paper, spread a thin layer of mud over the joint, the, utilizing a drywall knife; press the tape right into the mud and also over the seam. After that utilize the blade to remove the excess mud. When this procedure is completed; you should await the mud to completely dry before using the very first skim layer. The advantage of the fiber tape is; it sticks to the sheetrock without the demand for mud. So, you could right away use a skim layer.
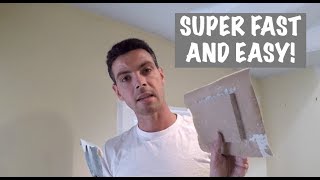
- Drift and Skim-This may be carried out in one layer or it may take 2 or 3. The suggestion is to have an even surface without rises, bumps, and dips. Among the secrets to a successful do it yourself drywall setup is blending the mud to the right consistency so it spreads out quickly. The other is simply good old made technique. Some individuals take to it quicker compared to others. However, the extra you do it, the better you'll be.