[post_name drywall mud DIY Versus Professional Drywall Installation and Repair

Sheetrock is a kind of drywall as well as is made and also a trademarked item by United States Gypsum Company, one of the leading providers of drywall worldwide. It is additionally described as plaster wallboard. Sheetrock is a blend of natural plaster, water, as well as sand that is pushed in between 2 hefty sheets of paper. It is a building product that is made use of around the world to develop architectural components like ceilings and also wall surfaces. It was developeded in 1916 yet it took another thirty to forty years before it caught on with building contractors, that had actually typically created wall surfaces from plaster.Benefits of sheetwork vs plaster & bull; It is faster to set up sheetrock compared to it is to
• install plaster & bull; Sheetrock can be painted or primed promptly after• it has actually been installed so the building of the residence or office can be proceeded with no hold-up. With plaster it needs days or even weeks to entirely dry & bull; Plaster evaluates even more than sheetrock so there is much less damage on the
• building's foundation and architectural systems & bull; There is a higher degree of fire-resistance with sheetrock compared to there is with platter. This can give the ones in the building more time to exit the structure safely in an emergency like a fire.Size of sheetrock The typical sheet of sheetrock measures four feet by eight feet yet for buildings with specialty requirements
or have high ceilings the building contractor could get larger areas. Typically, the interior walls of a building are built from drywall that is one-half inch thick. If the structure's walls are going to go through even more damage, the home builder can discover thicker sheets of five-eights thick. If there is a rounded wall, a home builder could use sheetrock that is quarter inch thick. The sheets of sheetrock can be shaped since they are moderately flexible.Types of sheetrock There are several types of sheetrock that can be utilized for different applications. & bull; Traditional-it is normally fireproof but the builder can choose Type-X,
which is fire-rated sheetrock. This sheetrock is enhanced with vermiculite and perlite to raise its resistance to fires and heat.
• Home builders utilize Type-X drywall in business buildings, which has fire-rated ratings from twenty to one hundred eighty minutes. & bull; Greenboard-this gets its name from its eco-friendly paper layer, which is a product that is moisture-proof and also is made use of in shower rooms and also kitchen areas. & bull; Blueboard-this is the kind that a builder would pick if the owners want the wall surfaces to have the appearance of plaster. & bull; Soundboard-this sort of sheetrock is built to obstruct the transmission of sound between different areas.
• It can be set up in numerous layers to make certain that the degrees of noise can be kept.
Drywall Repair Considerations
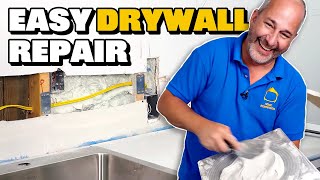
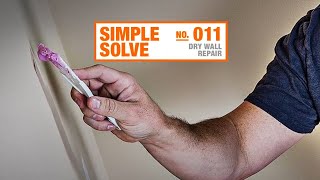
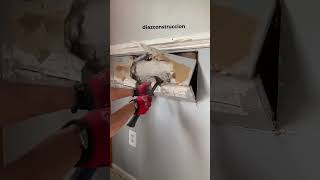
Repairing fractured drywall seams could be annoying at best. If there is just a very, extremely tiny split existing, you could be able to scratch out the fracture to a broader size and after that simply use new spackling compound. Utilizing a sharp, pointed device such as an old fashioned could opener (church trick), scrape placed a groove larger and slightly longer compared to the split. It should go to the very least 1/8" deep but deeper is much better. There are covering substances readily available today made simply for patching cracks however are not planned for huge locations. If this is a paintinged wall surface some amount sanding will additionally be called for. Spackle will certainly not stay with a smooth painted surface. Sand the area around the crack at the very least a couple of inches larger than the fracture then go in advance and use the patching substance ensuring you require the spackle down right into the fracture. Right after applying the spackle, re-wipe the location with your blade to eliminate any type of excess spackle from the location leaving a level surface. Relying on what type of compound you bought the drying out times differ fairly a bit from mins to hours. After the spackle is completely dry usage a 100 or 120 grit drywall fining sand paper to smooth area so it is flush with the existing wall. Prime the drywall and also install the last paint.In a case
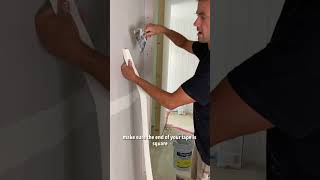
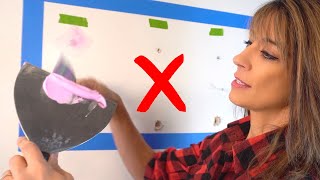
where the splits are a lot bigger along the joints, it might triggered by the drywall tape drawing loose, physical damages or possibly also excess moisture. Meticulously eliminate any kind of and also all loosened materials at taped locations. You could not and I repeat, can not re-spackle old tape. The drywall tape has minute holes that allows the spackle to travel through and also anchor the tape to your joints. The spackle "damps" the tape assisting it not only to stick to the drywall but allows the spackle to create a bond on both sides to the drywall. Once it is utilized, the holes are filled up thereby making the tape worthless. Attempting to short cut will only trigger the joint to re-crack later.After eliminating all loose products, gently sand the harmed locations being cautious not to tear or sand with the paper layer of the drywall below. As soon as the area is smooth to the touch see to it you have actually sanded equally onto the surrounding location so as not to leave a side that will show with the ended up job. Using a six inch large spackle blade, install an even layer of brand-new spackle over the joint. Place your new drywall tape over the joint and utilizing the knife, press the tape strongly into the drywall removing all excess spackle as it ejects from under the tape as well as sides of the knife. Do not get rid of way too much spackle so about leave the paper dry. As soon as the area is as smooth as you could make it, apply a second lighter layer over the same area seeing to it the new tape is entirely embedded in fresh spackle.After drying for one day to guarantee all the spackle is completely dry, re-sand the
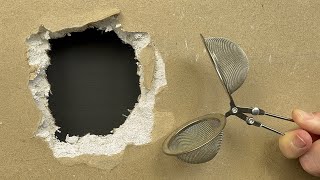
whole location to as soon as again get a smooth feeling to the whole repaired area. Utilizing your twelve inch blade, spread out a 2nd layer to the whole repair work making certain you mix efficiently onto the adjacent wall surfaces. Do not leave any kind of ridges or sharp sides where you satisfy the old wall finish.Once this 2nd coat of spackle is dry, which will be much less than the base coat as it is much thinner, use, using your twelve inch knife, a 3rd very slim coat of fresh spackle. You will virtually have the ability to translucent this coat as it is utilized to fill up tiny indents or scratches left by fining sand the 2nd coat. Once more after the 3rd layer dries, really gently sand the repair service for the last time to assure a totally smooth ended up location. Apply a layer of drywall guide to seal the freshly repaired drywall area then paint your wall.If the drywall joints have actually entirely broken or split open there might be a structural problem that requires to be re-mediated prior to you fix the drywall seams. Structure negotiation, foundation problems or other products could effect the drywall ends up so be certain they are repaired first.Once you are certain there are no other problems present, as in a small repair work, remove all loosened or damaged products. If the drywall itself is split, cut the drywall back to a stud and also install a new item of drywall. The repair work is the same as a minor crack just on a much larger scale.Installing little items of drywall for patching produces what are called butt joints which are much harder to hide. You will be forced to spread your spackle over a much larger location to
acquire a smooth appearance and also not a bump in the wall surface. With technique you could do this job and also save on your own a fantastic deal of money.If you are in a hurry and the repair service is fairly tiny, there are quick drying products readily available such as Durobond 90 which when added to spackle makes the spackle rock hard in ninety minutes. There is additionally a forty-five min type readily available yet just masters ought to try and also use it. Forty-five minutes flies by really fast. When I state it dries rock hard, it is nearly impossible to sand when dried so any small issues left in the surface with your blade will show later on. Be careful.Remember to maintain your tools clean, do not tear open containers or covers with your blades as it will dent or chip the edges of the knives and also job as clean as you can to avoid tiring cleaning later.