[post_name drywall installation How to Remove Drywall Texture

I don't care just what your drywall water damages in fact is, the initial thing that were going to should do is to learn where the water damage is in fact coming from. One of the most typical culprit, will certainly be a roof leak or a pipes water pipeline that is leaking. Let's come down to the bottom, literally. That's where many of the drywall water damages repair services will certainly should be done.If you have water dripping from your roof, there's an excellent chance that the drywall ceiling will certainly be damaged and if it has an acoustical or snacks type ceiling appearance on it, a big location of the ceiling appearance will certainly have to be scuffed off or gotten rid of then re-sprayed after the water damage fixings have actually been made.If your ceiling is smooth, this will certainly be the simplest ceiling repair that you could make, most of the time. Occasionally people get the impression that a smooth water damaged ceiling from a roofing system leakage, will certainly be easier to fix as well as their right. The problem is, after the fixing has been made, if it isn't really done appropriately, the repair service will protrude like a sore thumb.Now what regarding a water damages ceiling that has a light structure or a heavy appearance. This will generally be the hardest ceiling fixing to make. It's hard to match some kinds of ceiling structures. The larger the appearance, the harder it will be to fix. If you have a gently sprayed orange peel kind structure, you can count yourself fortunate. This repair work will typically be much easier to finish than a smooth ceiling repair.You fixing the water damages ceiling, and you do not such as just how it looks. Below's the very best means to repair this trouble. You will certainly require to smooth out the entire ceiling, using drywall joint compound, till it is totally flat or smooth or scrape all the acoustic old ceiling appearance off and also begin with scratch.Once the whole ceiling is smooth, you could apply your brand-new structure or acoustic ceiling. Some specialists will in fact figured the job by doing this, simply to save themselves a view of headaches later.If there is other water damages to the ceiling, you might even think of getting rid of all the drywall, replacing it and also re-texturing the entire ceiling.
Does Your Concrete Foundation or Drywall Have Cracks?
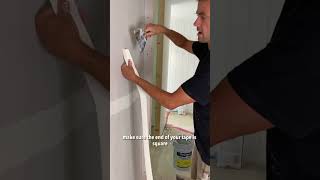
Should you attempt to diy or hire a drywall professional? The solution depends on the size as well as kind of the needed repair service. If the task is big and requires specialized expertise, devices as well as a significant investment of your time, you may intend to employ a drywall specialist. Nonetheless, scratches, damages and also tiny to tool sized hole fixings can be easily understood by also the beginner.Drywall is genuinely one of the greatest inventions to come along within the last 80 years. And also for some great factors; it is a low-cost wall covering that increases rapidly. It is neutral as well as can be enhanced to private taste. The invention of drywall conserved service providers as well as home owners countless bucks in building and construction costs and also repairs.Drywall, or gypsum board, is constructed from a brittle fire immune material that is covered in a thick paper finish. It is very sturdy and can be quickly cut, sawed, pierced, curved, toenailed, glued, screwed, paintinged on as well as papered over. It even assists to seem proof and insulate a space. But even as long lasting as it is, eventually, you'll require to patch some area of drywall in you house or business.Commonly, you will be managing several of 3 different types of wall surface openings-nail holes and also dents, tiny doorknob dimension holes and larger openings triggered by fists and furnishings. In this short article I'll discuss a very simple fixing strategy for a tiny drywall holes. This will function fantastic on holes less than 6 inches, such as doorknob holes.THE "HAT SPOT"FIXING APPROACH Making use of a keyhole saw, reduced a square around the hole(the hole is currently square ). Keep it as small as possible. Sand the sides to the hole lightly to remove burrs from the sawing. From a new item of drywall, reduced a square piece of drywall regarding 3 inches bigger compared to the hole that you're attempting to cover. (Currently follow me carefully right here, because in this next step you're going to remove some of the drywall support from your brand-new patch.)TRANSFORM THE NEW SPOT OVER and also cut 1-1/2 inches on each side with a razor knife. Be very careful not to reduce completely through the face paper (you intend to leave the dealing with paper undamaged). Now carefully peal the 1-1/2 inch items off the face paper and also dispose of. Tidy the back of the face paper on the spot to eliminate little bits still attached.Place joint compound around the edges of the opening for at the very least 2 inches on each side. Make certain to mud the raw sides of the old drywall. Put the spot into the opening as well as drag mud down each side. Now cover the whole area with a really thin layer of mud as well as let it dry. When entirely dry sand the location very lightly.If essential, apply a second coat as well as enable it to completely dry. Sand the location lightly and you prepare to paint.If this sounds a lot more complex that you would certainly like, your regional hardware store will market you a drywall repair service set. The kits come in different sizes as well as kinds for various applications. Merely follow the supplier's guidelines and you must be ready.

Drywall Issues at Home: DIY Fixes Vs Professional Drywall Repair
Drywall repair North Miami Beach - drywall patch