[post_name drywall installation Drywall Repairs

There countless reasons that somebody would be looking for drywall repair services. Just today I was getting a sandwich at a neighborhood restaurant and also a team of young adults were extoling how they had actually just ended up repairing the wall surfaces from an event that got out of hand as well as were really hoping that their moms and dads would not discover when they returned; I wonder who will be a lot more surprised.Doors are well-known for having a grudge against drywall. Individuals have actually been recognized to jab, punch or also fail sheetrock at numerous phases of life. If you have actually decided to rent a property, you might be getting a tough education in simply how several weird as well as sundry damages could occur to wall surfaces. Possibly you have bought your initial home as well as are seeing some breaking or nail pops -check your agreement, a great part of that should be covered in your preliminary warranty.Regardless of the resource of the damages to your drywall, you currently have to
choose whether it is worth spending your time to repair these locations or if you will certainly hire another person to complete the job for you. Whether you are doing the repair services on your own or reviewing the expense with specialists, you might locate these factors helpful:1)Nothing is best, mainly you are developing the understanding of perfection
, when repairing even a tiny damage you will wish to flare your repair area so about get a better surface area absorbing the repair service. This will certainly assist to divert the eye from incongruities that also the very best fixing can leave.2)If the sheetrock is damaged, heavily split or visibly uneven you probably will need to get rid of as well as re-inforce a section behind the wall board. I have actually discovered that 1"x3"yearn is an excellent resource in providing a firm support and also a lot of area to secure the repaired section to existing drywall. There are some re-inforced surface patching products, yet unless you are utilized to collaborating with these they could be tough to texture.3)Hot muds (joint substances that have a set drying time)as well as aerosol appearances are wonderful for smaller areas.
When collaborating with hot mud, examine the label and also offer on your own a lot of time before the material hardens because they often tend to be a little harder to tool as well as hard to sand. The aerosol structures are excellent for small fixings as they conserve you from needing to get your texturing tools out and also completely dry much faster than standard appearance.
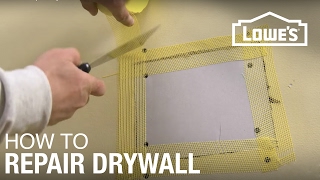
Introduction to Drywall Repair Materials
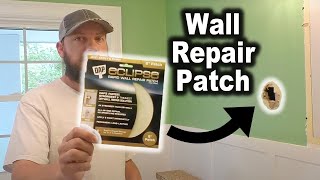
Difficult as it is, drywall can just hold up against minimal misuse. A door flung open with great force can make a doorknob-size hole in your wall surface. This damages looks negative. Nevertheless, also huge holes can be very easy to fix.The easiest means to repair holes in dry wall is to get a drywall repair work package by measuring the opening as well as check out your neighborhood equipment store or residence enhancement shop to purchase a package. There are various kinds and also sizes for numerous applications. As an example, a drywall patch for ceiling is thicker compared to for the wall. Prior to using the kit, ensure to eliminate any type of loosened plaster or paper around the opening edges.
For taking care of little drywall hole, adhere to the tips below:1. Prepare a tin could lid at the very least one and a half inches in size compared to the opening in the drywall. Utilize a keyhole saw in eliminating a slim straight slit in each side of the hole. Make sure that your measurements of the opening ought to be equal in diameter or cover to be able to insert cover right into the opening.
2. Make use of an awl to punch two openings in the cover facility and after that string a 12-inch item of string or cable through the holes.
3. While holding the ends of wire, slide the cover through and pull it in the direction of you up until it is flat versus the within the wall. Establish stick or scrap wood over the opening to hold it in area and also twist the cable tight over the stick. The could cover ought to be securely held against the within the wall surface.
4. Make use of a putty blade when applying pre-mixed drywall-patching compound over the patch by complying with manufacturer's instructions. You might also mix plaster of paris with water to produce a thick paste. Load the substance or plaster to the opening versus the backing and also behind stick. Maintain the compound inside the drywall hole and cover the support and also load the slits. However, do not spread it on the wall surface. Permit the patch completely dry till it transforms intense white, at least for 24 hrs. When it is dry, cut the string or cord and also remove the stick.For taking care of
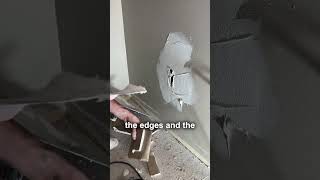
big drywall hole, comply with these tips:1. Cut a square location larger than the opening making use of a keyhole saw or energy blade.
2. Cut 2 backer boards so they are 2 or three inches wider than the drywall opening.
3. Place a backer board inside the opening at the top edge and secure it with a one and also 1/4 drywall screws and also holding it on location as you work. Tighten up until the screw heads are listed below the surface, place a 2nd backer board inside the lower side of the opening, as well as secure with screws.
4. Cut the patch to fit in the opening, screw the patch to the backer and also tighten with screws up until the screw heads are below the surface.
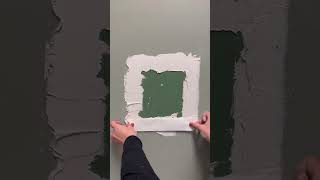
5. Apply items of fibreglass tape over the seams.
6. Cover tape making use of a thin layer of substance and sand lightly when dry. You can then use 2 even more layers. Sand as well as plume every coat till the surface is smooth.