[post_name how to repair How to Find the Perfect Drywall Repair Services

By the time you complete reviewing this post, you will be able to perform basic fixings to harmed drywall. There are some fundamental devices that you ought to maintain around your home, if you have an energetic family members and also are vulnerable to get dings in the wall surfaces. This short article will certainly not provide enough details to do significant repair works to drywall. Significant repair works are basic, yet you have to find out the essentials first.Here is a listing of some tools you will need. Your neighborhood big box can supply you with some fundamental tools. They run in cost range from inexpensive to specialist quality. They have plastic putty blades for much less than a buck completely as much as stainless-steel that with care, will certainly last a lifetime. If you anticipate an extremely little number of fixings, the plastic will be sufficient. Also, get a carriage screw, a small hammer, a could of drywall joint compound, 150 to 220 grit sandpaper and a paint brush. These basic devices will certainly fix most small dings and also damages in drywall.An example of a ding would certainly be where the locking
button on a door knob has left a perception in the wall behind it. This is typical of a quick as well as very easy repair work. Take a look at the damages. Exists anything extending above the wall surface? If so, utilize the carriage screw to push the outcropping listed below the wall surface area. Make use of the hammer to aid encourage the outcropping to go below the surface of the wall surface as well as round the edges. Next off, take the putty blade as well as some joint compound or as it is generally called, drywall mud, and fill up the opening. Wait until the mud dries, sand lightly and also load the opening again to bring the material to the exact same level as the wall. Sand the surface area again until the wall is smooth and also degree. Do not over sand. This will certainly rough up the drywall allowing the paper to fray and calling for more mud to seal the rough surface area. There need to not be any distinctions in the surface. A number of small applications will last a lot longer than one big application as well as offer you much better results.Is everything smooth? If not, use some even more drywall mud to also the wall surfaces. Sand once again. When the wall is smooth, use the paint guide. When the paint guide is completely dry, use your normal wall paint. The paint primer is to seal the wall surface so the new paint does moist as well quickly permitting the patch to be visible.That is the standard technique of fixing harmed drywall.
DIY - How to Repair Drywall Seams
Drywall is the most typical wall lining of the the modern house. The drywall is glued as well as nailed/screwed to the lumber frame of your house and also after that the signs up with are after that glued and also sander. Throughout the life of any type of home damages to the drywall will occur often when the moving furnishings or playing indoors. There are 2 means to repair this damage - ring a professional and pay them to fix it or find out ways to repair it on your own. A lot of repairs are quick and simple with a few devices to do the task
Plaster Kinds
The first point you need to know is the kinds of plaster that are made use of to do the Job. There are three primary kinds:
- Base Coat - A powder that is blended with clean water to make a paste and made use of in joints and also filling openings - sets hard as well as is hard to sand.
- Cornice Cement - A powder that is blended with water making a paste to adhesive on cornice - smooth gaudy paste that established really hard and also is tough to sand.
- Completing Substance - This is premixed in pails as well as prepares to utilize directly from the pail - dries (does not established) as well as is very easy to sand.
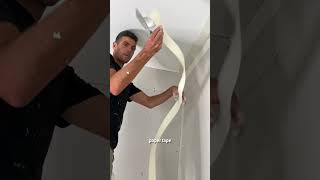
- Glass fiber tape - This tape is self glue and also provides toughness to the filling plaster or skim coat - just required on larger openings
To fix an opening of damage to a wall surface you Will only need skim coat as well as completing compound.Tools: There a couple of devices that you will certainly require
to get to do the work nevertheless these are easy as well as affordable --One broad blade 250mm(10inch)wide
( resembles a vast paint scarper), one 100mm( 4inch) wide knife, one 100mm (4inch) x 250mm (10inch )towel.You will certainly likewise should blend the skim coat for bigger
openings so an electrical drill and also paint mixing attachment is best. Nonetheless the skim coat can be mixed manually yet this is slow.For Example: An opening concerning the size of a tennis sphere was made while
relocating furniture.Step one: Make certain the opening in the drywall is clean (no extending drywall or paint)
mix your skim coat power with clean faucet water to a paste similar to toothpaste. Keep in mind: if the skim coat is too wet the base layer will certainly fall out of the opening. If you find the base layer constantly comes under the wall tooth cavity fill the behind the hole with paper to support the skim coat while it sets. Fill the opening using the smaller wide knife making certain the hole is filled as well as the base layer is flush with the drywall.Step 2: When the initial layer of skim coat is established, Cut a small amount of glass fiber tape to just cover the opening as well as thoroughly put into place. Mix up a percentage of skim coat and spread over the tape ensuring that you spread the base layer beyond the tape. The smoother as well as flatter the second layer is the better the result will be. Let it set from 45 -60 Min's. Tip 3: Spread a thin coat of ending up substance with the big wide knife as well as let this dry.
The ending up substance has to be spread out a minimum of 100mm (4inches )beyond the base coat.Step 4: Sand your collaborate with 180 grit sand paper seeing to it you feather or mix the sides with the existing repainted wall surface to ensure that the repair service will certainly not be seen when painted. The purpose is to sand the repair work as flat as you can and blend in the sides. Then your repair work is finished as well as all set to paint.Tip: Bear in mind to wash you devices off with tidy water between actions so the plaster does not set on your devices.
It's Time to Fix That Hole in the Wall
Drywall repair Marco Island - hanging drywall