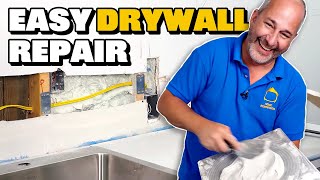
[post_name how to fix a hole in the wall

The technique for the best ways to eliminate drywall appearance relies on the material being removed as well as the condition of the wall. One of the most typical method for getting rid of appearance from painted drywall requires sanding off the high parts of the texture as well as loading it in with at the very least 2 thin layers of joint compound - called skim finishing. An additional method for unpainted distinctive wall surfaces and also ceilings, consisting of popcorn ceilings, is spraying water on the surface area to loosen up the appearance so you can scratch it off.When a wall has
extensive fractures, peeling paint or water damages, it may be much easier to cover the existing wall with 1/4 -inch drywall or remove the existing wall surface totally and also change it.Whatever technique you make use of to get rid of a textured surface from drywall, secure on your own from exposure to building and construction dust, lead and also asbestos.Removing distinctive wall surface surfaces is an exacting process that takes patience.
Here's exactly how to tackle some common troubles so your walls will be smooth and also your job, profitable.How to eliminate drywall appearance by skim finish Problem: Unequal surface.Solution To avoid producing an unequal wall surface when you're getting rid of the structure, do not use a belt sander. It will dig up the structure.
Rather, get rid of high tops in the textureutilizing a post sander with 120 grit or a 5-inch flooring scraper.Problem: Bulgy looking patches.Solution Eliminate any type of loosened material with a stiff brush, scuff high locations and wipe with a damp fabric. To apply the very first layer of joint substance, start on top as well as work across as well as down.
"One of the most vital point is not to make use of as well much
material
,"claims Ivan Solis, president of Chicago-based Solis Building."If you utilize way too much joint substance, it will certainly be tough to achieve a smooth surface area. You'll need to do a whole lot of sanding.
"Do not worry concerning ripples, just aim to cover the appearance and obtain an also layer on the wall surface. Hold the joint blade at a 30-degree angle and press it in. "Maintain it tight as well as smooth,"claims Solis, who suggests making use of a 10 -or 12-inch joint knife.Alternate the direction of the skimming strokes with each new layer of mud. If you apply the initial layer flat, apply the second layer up and down. Return excess mud from the surface area to the rim of the pan, keeping the blade of the blade clean.When the initial layer is dry, apply the 2nd coat to complete the ripples. Once more, begin on top in the edge and work throughout as well as down. As you work, blade off any kind of big portions of the very first layer, utilizing your blade. If there are still reduced and high areas, you may require a 3rd coat. When the layer is dry, surface
with a last sanding.Problem: Joint substance that sets too quickly or is as well difficult to sand.Solution Choose the appropriate substance for the task. When a wall texture will need a number of layers of joint substance to smooth the surface area, make use of a setup substance like Sheetrock Easy Sand for the first coat."Easy Sand 90 is a chemically establishing compound that will give you approximately
90 minutes to work before it sets,"states Jeff Hartin, product supervisor for
USG's Ready Mixed items. The item is ideal for heavy fills and also sands easily."The great point concerning a setting compound is that you can apply the very first coat and start a 2nd coat as soon as the first one has set,"states Solis.For the 2nd or final coat, Hartin and Solis recommend a ready-mixed joint compound, such as Sheetrock Plus 3. The lightweight product is easier to spread out, enables a thinner application, and also is less complicated to sand.Problem: Spots leach via the joint compound.Solution These issues are often as a result of inappropriate attachment as well as are common on numerous Do It Yourself paint tasks. If the textured wall surface is peeling or plaster and distinctive joint substance are diminishing,
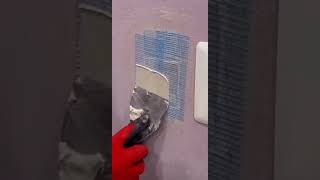
eliminate loosened material with a scrape, sand as well as coat the surface area with primer/sealer prior to skim coating.Problem: Fractures and damages reappear.Solution Repair splits and dents before skim layer. To fix them, tape over the splits with drywall tape and safeguard them with joint substance. When the wall surface is smooth, a drywall primer and sealant will seal the
wall and help prevent cracks and dents from coming back. Guide also reduces the effects of the pH of the wall surface for a more even appearance.Problem: Peeling off paint and also gurgling in the paint finish.Solution These troubles are often due to incorrect attachment. If the distinctive wall surface is peeling or plaster as well as textured joint compound are dropping off, eliminate loose material with
a scraper, sand and layer the surface area with primer/sealer prior to skim coating.Problem: Pitting.Solution Pits on thesurface area of the drywall are air bubbles that were not appropriately filled up or that were exposed during fining sand. Air gurgles result from over -or under-mixing the joint compound. Apply stress to the bubbles with the joint blade, up until the pits are gone. If you do not discover them till the wall is completely dry, cover them with joint compound and sand.Problem: Over-sanding; missing out on low and high
spots.Solution Sand excessive as well as you run the risk of harming the surface area paper. If that
happens,
cover the location once more with joint substance. To avoid missing high as well as reduced areas, use a clamp-light or other source of light close to the wall surface to find problem locations. Sand systematically, functioning from the ceiling to the floor in narrow sections.How to get rid of a distinctive surface area from drywall by scraping
Problem:
Wall surface damaged by water and scrapers.Solution Experts advise wetting wall appearances with a spray bottle to loosen up the material. Then utilize a scraper with a level, broad blade to eliminate the appearance. Usage just adequate water to loosen the product or you could damage the drywall. If you note the sheetrock with the edge of your scuffing blade, patch it with joint compound.How to eliminate a textured surface area from drywall by covering walls with drywall Issue: Reinstalling trim.Solution "One point to bear in mind when applying 1/4-inch drywall over an existing
wall is that not just will your wall, windows and door housing look a 1/4- inch thinner yet all of the "joints"will certainly have to be full of joint compound and caulked, "claims Solis. You might have to get rid of trim and re-install it, and electric outlets might require extensions to bring them flush to the wall surface.
If you have been a home painter for long you have actually undoubtedly entered into some kind of drywall fixing on every interior paint job. In fact, if you do not obtain good at mastering drywall repair work, your paint tasks will certainly not be as professional as they might be.In this short article I intend to reveal exactly how tiny drywall repair service works can imply big revenues for you. I am speaking about making $350 to $500 usually for just 7 - 10 hrs of work. Each job is various of training course as well as may end up being just a $200 repair work or maybe a $1,500 repair.The truth is that when it involves drywall repair service individuals constantly call someone to do the job. As a house painter I recognize that most individuals assume they understand ways to painting and the key phrase here is "think ". But when it comes to things like drywall repair they go running house to momma.And this is why you can make good money doing little fixing jobs like plumbings and also electricians do. The important things that many people are inexperienced to do themselves are straightforward and easy for us that choose to concentrate on them.Some individuals have the cash but lack the time and would certainly rather have somebody else do the job anyhow. 99 %of the moment though, people simply do not know the trade. Drywall repair service is a secret art. As for the ones that try to fix their very own drywall themselves, the job constantly ends up lousy.Where is the target market for getting service? The response is property, light industrial, rental buildings, etc. As a home painter you can be limited to a greater end market if you desire to make specialist painters incomes. However no so with drywall repair service. Your market could be reduced end to high-end simply since of the incredible revenues in smaller tasks that the majority of people could afford.Most of the time you get telephone calls from people when they have water damages. Often it is from reckless teenagers roughhousing.
I had one work where ate an opening in the ceiling. I would certainly claim that 95 %of drywall repair work is from water damages and also half of that could be from negative plumbing, a leaky shower that needs to be re-grouted, etc. A dripping roof covering is usually the other reason.Sometimes you can obtain tasks hanging as well as taping small projects like a garage or part of a basement. You don't need to take on these larger projects though. Lot of times people want to offer their house so they are motivated to repair their walls or ceilings finally.You may ask on your own, if drywall repair works are so basic how can I get good at doing them? First, You have to find out the best ways to duplicate a few typical structures, which is easy once you figure out which
tool was made use of to make it. You will certainly likewise obtain repair services for typical drywall openings of all sizes, that includes plaster( slim collection and lathe). As well as you will need to understand how to fix loose tape seams.And believe it or not, that's regarding all there is to effective drywall repair. These techniques are concealed to the public yet easy for you and also I. If you ever have actually seen what homeowners attempt to do to fix their own drywall you will certainly recognize instantaneously that this is a simple profitable business.Here is the fantastic part. A lot of drywall repairs that I see look dreadful. Yet the property owner seems pleased with it. The task looks like someone can be found in as well as spilled a little mud on the ceiling as well as left. Yet the repair service person ran off with something like$200 and also the property owner for some weird reason generally thinks the work was done O.K. I have seen this as well often.On a severe note though, doing great professional looking job at budget friendly rates will certainly give you bunches of references and repeat organisation. If you could find out the basics of correct drywall fixing and also do a little retouch paint afterward you will certainly do just great. You can without a doubt gain$30 -$70 per hr because of the nature of the work.How can I obtain business? Consumer guides, classified ads in areas like Craig's List, regional online ads, small Telephone directory advertisements, word-of-mouth, and so on. Why should I begin a little drywall repair organisation? Exists a large future in it? Yes for 2 reasons. First, self-employment is ending up being the new job pressure
and also secondly, home fixing will constantly be with us.Who can do this kind of work? Any individual who enjoys to bring back things can do well. People who are talented in your home fixings, home painters, drywall, and so on. Anybody that discovers a couple of secrets to successful drywall repair.

how to fix a hole in the wall
Best Drywall Repair Services Florida