[post_name general labor Dry Wall Patching - 5 Steps to Successfully Repairing a Hole in the Wall

These days screws are thought about better for connecting drywall, yet there are still places where nails are mainly used. This article defines exactly what you can do to repair the issue when nails begin to pop out of the surface.The most common areas to find popped nails are along the bordered of ceilings on outside walls. The factor is that temperature level distinctions tend to twist materials despite whether it's metal or timber. Likewise, condensation on the top of nails can cause discoloring of the material utilized to cover them and in many cases it will certainly also drop off completely.In various other instances nails might stand out if the home has actually resolved to some degree gradually. Homes can often clear up as well fast and also way too much, and also if you assume this might be the case with your home it's a great suggestion to speak to a home examiner and have that individual examine it out and see if they could see what the problem is. Undoubtedly, if there is an architectural issue in your house, it truly doesn't make much feeling to attend to cosmetic concerns such as stood out nails.Merely tapping a stood out nail into the wood once again will not repair the problem. The reason the nail popped in the initial
location won't go away and also it's only an issue of time prior to the nail pops right back out once more. Commonly, the nail opening has actually raised as well as you need something to maintain the nail strongly safeguarded. Commonly, the very best way is using an additional nail.This is how you can do it: point the new nail at the timber behind the drywall and drive it in alongside the old nail. Make sure the new nail overlaps the top of the other nail as well as drive the nail until it develops a tiny dimple. Examine to see that the nail has actually been driven in adequately by dragging a stiff things across the surface area( maybe anything truly-a ruler, a putty blade, as long as it's rigid). If the nails hasn't already been owned in far sufficient you'll really feel a pull and also the nail need to be owned in further till there's no resistance.With today's color-changing filler it has actually become extremely simple to fill out the dimple that you made
. Intense pink is a popular choice as it changes to white when it dries out. You more than likely won't require more than a couple of layers, perhaps three, with just a light as well as fast sanding in between applications.Of training course, you could decide to use a screw alongside the old nail and also if you intend to go in this direction make certain to
countersink the screw sufficient that the nail becomes covert listed below the surface area. Besides that the steps are the very same as currently explained.
Drywall Repair Tips
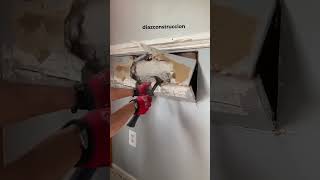
Drywall acts like a sponge, taking in dampness at every chance. When drywall splashes, it swells and bends, compromising the honesty of your wall. This permits the underlying frameworks to experience extended direct exposure to moisture and also starts the decomposition process, ultimately rotting the entire structure. Drywall is a versatile structure product, however. Drywall that has actually splashed could be repaired with a little know how.In order to repair wet drywall, adhere to the below actions:
o Eliminate around the affected drywall with a drywall saw. These handsaws are offered reasonably at any kind of local equipment store. Ensure that you cut away all affected drywall by preserving vast margins around the defect.o Determine the reason for the water. This step is rather very easy if your drywall was impacted by an outside force like rain, flooding, or a damaged water heating unit, yet may be a bit a lot more elusive if you have a roofing system or plumbing problem. If you can not identify the reason of the water, make certain you call a professional.o Change the damp
drywall with dry. On a new piece of drywall, mark out a patch of new drywall in the same measurements as the old and eliminated with a razor knife or drywall saw and also screw into the open hole. If there is no wall surface stud behind the open location, cut out the existing drywall until there is a revealed stud on either side of your repair.o Apply drywall mud. Joint compound of drywall mud is applied in layers. Make the very first layer the thickest, covering all of the joints thoroughly as well as allow to dry. Do not fret way too much concerning making the substance completely smooth as there will be several layers of mud as well as fining sand before you reach your completed layer. All the mud to completely dry as well as then sand smooth. Run your turn over the joints, really feeling for low or high spots and mark with a pencil. Continue sanding high places and after that include a brand-new layer of mud over the entire repair service, concentrating on adding compound to the reduced areas. Repeat this procedure until your fixing is level with the existing wall.o Tip: Take your time with this step, as your mud job is the essential to having a smooth
wall surface later.o Paint-Repaint your entire wall surface to make sure that the shade suits. Also if you have actually the paint tinted to match your
existing wall surface, the shades may not match 100 %, offering you an obviousing suggestion of where the repair work happened. While you don't have to, you may choose to repaint the whole space to make sure shade evenness.This technique functions well for tiny drywall repair work tasks, but in scenarios where there are large locations of drywall to change, such as a flooding situation, it could be a good idea to get in touch with a professional.http:// www.rightwayrestoration.com

Drywall Repairs
Drywall repair Leesburg - wall patch