[post_name general labor Drywall Mudding and Taping - A Simple Process For Do-It-Yourself Homeowners

Before selecting a drywall service provider here are a few response to questions I commonly obtain asked in the drywall industry.Question: I have water damage to my drywall, is it still excellent? Does it have to be replaced?Answer: Water can come from various resources in your house. Roofing leaks, air trainers, dishwashing machines you name it. Drywall is a remarkably resistant product when it pertains to water and can stand up to a large amount of water before overall item failing happens. Once it is dried damages is normally only cosmetic. Normally a dark stain or hairline crack appears along a joint line where the drywall compound has been dissolved by the water as well as the tape has unleashed. Not to fear, a drywall expert can usually fix the damages in a couple of hours with little to no mess. Also if the area has actually gotten wet for months, water will certainly always locate the path of least resistance and also come out all in one area. In this situation all that is required is removing the affected location, usually only a 3' -4'location as well as patching it in. In either situation price is typically under$300. Inquiry: Need to I be bothered with mold and mildew on my drywall?Answer: The most important point to bear in mind, without moisture mold could not endure.
So first and also leading remove the water source and the mold is history.
Although legal representatives and also supposed mold elimination professionals would like you to believe otherwise as well as open your checkbook, mold and mildew is seldom unsafe to people as well as could be easily eliminated. Spraying a little bleach on it will certainly also work. If it has gotten so poor where the paper on the drywall has actually been in fact gnawed by the mold and mildew, then a small spot job to eliminate and also remove the damaged area is in order. Price most likely around$ 250. Question: Do I have Chinese drywall in my home?Answer: Although significantly even more serious than mold and mildew as well as definitely in requirement of full elimination, my suggestions is to not overreact if your worried you might have it. It's unnecessary to spend
a large amount of money for one more professional that is trying
to profit on somebody else's miseries. Depend on me; if you have Chinese drywall in your residence you will understand it, no doubt about it. The metal burning experience in your eyes and throat will swiftly provide it away. It is obvious within months of setup as well as distinct. My finest advice is to call a respectable drywall or structure professional who can guide you in the ideal instructions. Recent legal rulings are very specific in the elimination of the item and failing to follow them specifically can result in future resale problems.Question: What does it take to eliminate popcorn structure from my ceiling?Answer: As long as the ceiling has not been paintinged, which most have not been, a drywall specialist can remove and also re-texture a typical sized ceiling for as low as $500 -$600. The only catch is what sort of problem the existing ceiling is in. Snacks( acoustic)texture
can hide an impressive amount of defects, thus the reason for its popularity years ago. Some ceilings could not have actually been finished to normal criteria and may require a complete surface coat before using a lighter texture. Huge dips, droops, and even splitting could be concealed with this structure so care must be taken prior to removal to completely recognize how huge a job you are obtaining yourself into.Question: What sort of appearance ought to I pick?Answer: I assume this is most likely among the greatest concerns my clients have problem with and it is possibly one of the least important. I've located most people seldom also see just what texture is on the wall surfaces of a residence they stroll into. The only time it shows up if it's a very vibrant or heavy structure. These textures are usually trendy and also have a tendency to put on out their welcome after only
a couple of years. My advice is to maintain it on the lighter side. Recognize drywall specialists aiming to speak you right into hefty appearances, it's likely they do not have the capability to do a high enough top quality of work without heavy structures to hide the flaws.Question: What textures are available?Answer: The most usual texture and also most universal is orange peel. It's sprayed on with a maker to offer a light, cleanable, as well as very patchable coating that few people really see on the wall. It's made use of to reduce the labor as well as therefore the price of a perfectly smooth surface which can get quite expensive. It shows up much like the texture of an amplified orange peel as soon as paintinged, therefore the name. To spruce up ceilings and likewise provide extra
hide, knock down appearance is typically used. It is sprayed on too, however much thicker, with bigger dots. It's an extremely affordable texture which primarily replaced snacks structure in the past. When the spray has actually tacked a huge paddle is utilized to squash or tear down the dots which provide it its name. This texture will give a substantial quantity of conceal on a ceiling or wall surface and also many people feel its dresses up an area, but the drawback is it's very hard to spot as well as challenging to clean.The last of the usual textures is miss trowel. It is a hand texture applied with a trowel with a backward and forward activity. It can be used hefty or light depending upon your choice. Due to its labor intensity it is frequently utilized on the ceilings of greater end residences. It could give a vintage or Spanish kind of want to a house as well.Question: Exactly how do I pick a drywall service provider I can rely on to do a good job?Answer: This is a really tough question to respond to, yet here are a couple of things to see for that could assist guide you in the ideal instructions. The greatest warning to keep an eye out for is a drywaller who wants money in advance prior to
they get the job done. In this line of work it usually means the min they leave your sight there gone never ever to be seen again. It's unfortunate, however unfortunate. Take a look at their cars, are they maintained in a practical state. Messy, damaged, or untidy lorries have the tendency to emulate their owners level of craftsmanship. Every person wants to listen to great news, however anyone that informs you whatever you wish to hear can be somebody to look out for. An example could be a structure like knockdown, which is just difficult to spot perfect. For 9 from 10 people it will look sufficient, however not IDEAL. The only method making it ideal is to skim out the whole ceiling smooth as well as re-spray it all. More costly, but at the very least you have that choice up front prior to its painted and prior to you have actually shelled out the cash to fix it once currently. I prefer to be sincere and also let individuals recognize there are restrictions to exactly what can be done than have an unhappy customer.Hopefully this post has actually responded to a few of the more generally asked questions to help better inform you on picking a top quality drywall specialist.
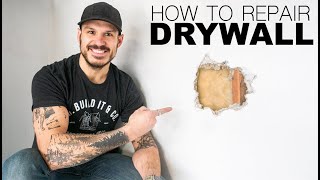
How to Repair a Drywall Hole
Wall holes are unpreventable. The drywall might just stand up to limited misuse and also youngster's play or even a flinging the door open a little as well hard may create damage. Some holes are nondescript yet some could be an eye sore. Restoring your drywall opening is not something hard. It can easily be done by amateur homemakers if the complying with very easy steps are followed.The things that you
will need are a replacement drywall, a keyhole saw, self glue wire mesh, joint compound, a putty blade as well as sandpaper.
- Clean away dirt or debris from the damage. See to it no hanging loosened drywall is still affixed on the surface area.
- Cut a section of self glue cable mesh. The size ought to be 2 to 3 inches larger than the opening that has to be patched up. Area the cord mesh over the damaged portion as well as press it strongly to maintain it in location. You could also use fiberglass fit together tape instead of a cord mesh. Merely stretch the tape over the opening until it is covered completely.
- Patch the wire mesh with drywall patching substance or joint compound till completely covered. Blend in the edges of the substance with the wall surface making it unnoticeable. Smoothen the entire layer and eliminate rough edges with the putty blade. You could apply and also smooth out the drywall joint substance to the area two to 3 times till your wanted covering is attained.
- For bigger openings to load, stand up a section of new drywall over the hole as well as puncture both parts of the drywall utilizing a keyhole saw.
- Glide the drywall spot right into area and also secure it with the glue cable mesh. Apply joint compound with a putty blade to completely cover the patch as well as adhesive cord mesh. Mix the joint substance to the will y blurring the edges and allow it completely dry entirely.
- Allow the substance dry totally and sand the final layer using sand paper to make it smooth and also also. Clean the dust that came from the sanding and repair the patch with wall paint. You may repeat including joint option to the wall surface until you are pleased.
- Sand the sides and rough surface areas with sand paper. Clean away any kind of dust or debris from the sandpaper and also cover the spot with guide and also paint that matches your wall or get a wall surface paper additional to position it straight in addition to the hole.
- Apart from getting all the products individually in hardware store, look for a drywall fixing kit right now to make points simpler. Because instance, you should adhere to supplier's directions in operation this collection of drywall repair service materials.Patching up your residence
and also maintaining it clean and in order will certainly always make a perception to your site visitors. Offer time to examine your residence for the continuous house improvements that you have to do. You might also consult your neighborhood hardware employees to present to you brand-new items on drywall repair service.

How to Install Your Own Drywall
Drywall repair Leesburg - wall patch