[post_name how to fix a hole in the wall Drywall Water Damage Ceiling Repairs

The technique for the best ways to get rid of drywall structure depends upon the material being gotten rid of and the condition of the wall surface. One of the most usual method for eliminating texture from repainted drywall requires fining sand off the high parts of the structure and loading it in with at the very least two slim layers of joint substance - called skim coating. An additional strategy for unpainted textured walls as well as ceilings, including popcorn ceilings, is spraying water on the surface area to loosen the structure so you can scratch it off.When a wall surface has
extensive splits, peeling off paint or water damages, it might be less complicated to cover the existing wall surface with 1/4 -inch drywall or get rid of the existing wall completely as well as change it.Whatever method you make use of to eliminate a distinctive surface area from drywall, safeguard on your own from exposure to building and construction dust, lead and also asbestos.Removing textured wall surface areas is a demanding process that takes persistence.
Right here's the best ways to take on some usual problems so your walls will certainly be smooth and also your job, profitable.How to eliminate drywall appearance by skim finish Issue: Uneven surface.Solution To prevent producing an irregular wall surface when you're removing the structure, do not make use of a belt sander. It will certainly dig up the structure.
Rather, eliminate high peaks in the texture utilizing a pole sander with 120 grit or a 5-inch flooring scraper.Problem: Bulgy looking patches.Solution Remove any type of loosened product with a stiff brush, scuff high locations and also clean with a wet fabric. To apply the very first coat of joint compound, begin at the top as well as work throughout and also down. "The most essential thing is not to utilize also much material ,"says Ivan Solis, head of state of Chicago-based Solis Construction."If you use way too much joint compound, it will certainly be difficult to achieve a smooth surface. You'll need to do a whole lot of sanding. "Do not fret regarding surges, simply attempt to cover the appearance and get an also coat on the wall surface. Hold the joint knife at a 30-degree angle as well as press it in. "Keep it tight and also smooth,"claims Solis, that advises utilizing a 10 -or 12-inch joint knife.Alternate the instructions of the skimming strokes with each new coat of mud. If you apply the first coat flat, use the second layer up and down. Return excess mud from the surface to the edge of the pan, keeping the blade of the knife clean.When the initial coat is dry, use the 2nd layer to fill out the surges. Once again, start on top in the edge as well as work throughout and also down. As you function, blade off any type of huge pieces of the very first layer, utilizing your blade. If there are still low and high places, you may need a 3rd layer. When the coat is dry, finish with a last sanding.Problem: Joint substance that establishes as well rapidly or is too hard to sand.Solution Pick the right substance for the task. When a wall surface structure will certainly need several coats of joint substance to smooth the surface, utilize a setup compound like Sheetrock Easy Sand for the first layer."Easy Sand 90 is a chemically setting substance that will certainly offer you roughly 90 mins to function before it sets,"states Jeff Hartin, product manager for USG's Ready Mixed products. The item is ideal for hefty fills up as well as sands conveniently."The wonderful aspect of a setup compound is that you could use the first coat as well as begin a 2nd coat as quickly as the first one has set,"claims Solis.For the 2nd or last coat, Hartin and also Solis suggest a ready-mixed joint compound, such as Sheetrock And also 3. The light-weight product is easier to spread out, allows a thinner application, and also is simpler to sand.Problem: Stains seep with the joint compound.Solution These problems are frequently as a result of inappropriate bond and also are common on numerous DIY paint jobs. If the textured wall is peeling off or plaster and also textured joint substance are dropping off, get rid of loose material with a scraper, sand as well as layer the surface with primer/sealer before skim coating.Problem: Fractures as well as damages reappear.Solution Repair splits and damages prior to skim coating. To fix them, tape over the cracks with drywall tape and also protect them with joint compound. When the wall surface is smooth, a drywall primer and sealer will seal the
wall as well as aid stop splits as well as damages from reappearing. Primer also neutralizes the pH of the wall surface for a much more also appearance.Problem: Peeling paint and also bubbling in the paint finish.Solution These issues are typically due to improper adhesion. If the distinctive wall surface is peeling off or plaster and textured joint compound are falling off, get rid of loose material with
a scrape, sand and also coat the surface with primer/sealer prior to skim coating.Problem: Pitting.Solution Pits on the surface area of the drywall are air bubbles that were not correctly filled or that were revealed during fining sand. Air bubbles result from over -or under-mixing the joint substance. Apply stress to the bubbles with the joint knife, till the pits are gone. If you do not see them up until the wall is dry, cover them with joint substance and also sand.Problem: Over-sanding; missing out on low and high spots.Solution Sand also much and you take the chance of harming the surface area paper. If that happens, cover the area again with joint substance. To prevent missing high and also reduced places, make use of a clamp-light or other light resource close to the wall surface to discover issue locations. Sand systematically, working from the ceiling to the floor in slim sections.How to eliminate a distinctive surface area from drywall by scuffing
Issue:
Wall surface damaged by water as well as scrapers.Solution Specialists advise wetting wall textures with a spray container to loosen up the product. After that make use of a scraper with a flat, wide blade to remove the structure. Use just sufficient water to loosen up the material or you can damage the drywall. If you note the sheetrock with the edge of your scuffing blade, patch it with joint compound.How to get rid of a distinctive surface area from drywall by covering walls with drywall Problem: Reinstalling trim.Solution "One thing to bear in mind when applying 1/4-inch drywall over an existing
wall surface is that not just will your baseboard, windows and door housing look a 1/4- inch thinner but all of the "joints"will certainly need to be filled with joint compound and caulked, "claims Solis. You might need to get rid of trim and re-install it, and electrical outlets may need extensions to bring them flush to the wall.
DIY - How to Repair Drywall Seams
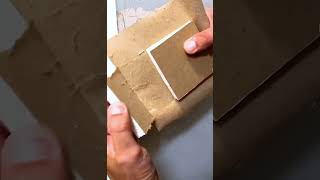
Repairing cracked drywall joints could be frustrating at best. If there is just a really, really small crack existing, you may have the ability to scratch out the fracture to a larger dimension and after that just use new spackling substance. Utilizing a sharp, sharp device such as an old made could opener (church trick), scrape placed a groove bigger and also a little longer than the split. It has to be at the very least 1/8" deep but much deeper is much better. There are patching compounds offered today made simply for patching fractures however are not intended for huge areas. If this is a painted wall surface some amount sanding will additionally be required. Spackle will not stick to a smooth paintinged surface. Sand the location around the fracture a minimum of a pair of inches broader compared to the fracture and after that go on and also apply the patching substance seeing to it you compel the spackle down into the fracture. Right after applying the spackle, re-wipe the location with your blade to get rid of any excess spackle from the location leaving a flat surface. Depending after just what kind of substance you bought the drying times vary rather a bit from mins to hrs. After the spackle is totally dry use a 100 or 120 grit drywall fining sand paper to smooth location so it is flush with the existing wall. Prime the drywall and also set up the last paint.In a case
where the cracks are a lot larger along the seams, it could brought on by the drywall tape pulling loose, physical damage or perhaps also excess dampness. Meticulously eliminate any kind of and also all loose products at taped areas. You can not as well as I repeat, can not re-spackle old tape. The drywall tape has minute holes that permits the spackle to travel through and also anchor the tape to your joints. The spackle "damps" the tape assisting it not just to adhere to the drywall but enables the spackle to develop a bond on both sides to the drywall. Once it is utilized, the holes are filled up therefore making the tape pointless. Aiming to route will only trigger the joint to re-crack later.After removing all loosened products, lightly sand the damaged areas bewaring not to tear or sand via the paper layer of the drywall below. As soon as the area is smooth to the touch see to it you have fined sand uniformly onto the surrounding location so as not to leave an edge that will show through the ended up work. Making use of a 6 inch broad spackle blade, set up an also layer of new spackle over the seam. Place your new drywall tape over the seam and using the knife, push the tape firmly onto the drywall getting rid of all excess spackle as it presses out from under the tape as well as sides of the blade. Do not get rid of excessive spackle so regarding leave the paper dry. When the area is as smooth as you can make it, apply a second lighter coat over the very same location making sure the brand-new tape is totally installed in fresh spackle.After drying out for one day to assure all the spackle is dry, re-sand the
whole location to again acquire a smooth feel to the entire fixed location. Using your twelve inch knife, spread out a 2nd layer to the entire repair service ensuring you blend smoothly into the adjacent wall surfaces. Do not leave any kind of ridges or sharp edges where you satisfy the old wall surface finish.Once this second layer of spackle is completely dry, which will be much less than the skim coat as it is much thinner, apply, utilizing your twelve inch knife, a 3rd really slim coat of fresh spackle. You will certainly nearly have the ability to see with this coat as it is used to fill up small indents or scratches left by sanding the 2nd coat. Again after the 3rd coat dries out, extremely gently sand the fixing for the last time to ensure a completely smooth finished location. Apply a coat of drywall guide to secure the newly fixed drywall area and afterwards painting your wall.If the drywall joints have actually totally fractured or split open there may be an architectural problem that should be re-mediated before you deal with the drywall seams. Structure settlement, foundation troubles or other items could impact the drywall completes so make certain they are repaired first.Once you make certain there are nothing else issues present, as in a small fixing, get rid of all loose or damaged materials. If the drywall itself is fractured, reduced the drywall back to a stud as well as install a new item of drywall. The fixing is the same as a small split only on a much bigger scale.Installing tiny pieces of drywall for patching develops what are called butt joints which are much tougher to hide. You will certainly be forced to spread your spackle over a much larger location to
obtain a smooth appearance and not a bump in the wall. With practice you could do this job and also save on your own an excellent bargain of money.If you remain in a hurry as well as the repair service is reasonably little, there fast drying out products offered such as Durobond 90 which when included in spackle makes the spackle rock hard in ninety minutes. There is likewise a forty-five minute kind offered but just real pros should try as well as use it. Forty-five minutes flies by truly rapid. When I say it dries rock hard, it is practically difficult to sand when dried so any kind of tiny issues left in the surface with your knife will certainly reveal later on. Be careful.Remember to keep your devices tidy, do not pry open containers or lids with your blades as it will certainly dent or chip the sides of the knives and also work as tidy as you can to stay clear of exhausting clean-up later.
Drywall Installation and Repair Mechanism
Drywall repair Belle Glade - hanging drywall