[post_name drywall prices Drywall Water Damage Ceiling Repairs

Sheetrock is a sort of drywall and also is produced and also a trademarked item by United States Gypsum Firm, among the leading providers of drywall in the globe. It is additionally referred to as gypsum wallboard. Sheetrock is a blend of all-natural gypsum, water, as well as sand that is pushed between two heavy sheets of paper. It is a building material that is made use of around the world to build architectural components like ceilings and also wall surfaces. It was created in 1916 however it took an additional thirty to forty years before it caught on with contractors, who had actually commonly built wall surfaces from plaster.Benefits of sheetwork vs plaster & bull; It is much faster to mount sheetrock than it is to
• set up plaster & bull; Sheetrock could be repainted or keyed immediately after• it has actually been mounted so the building of the office or home can be proceeded without any type of delay. With plaster it requires days and even weeks to entirely dry & bull; Plaster considers even more than sheetrock so there is much less deterioration on the
• building's foundation and also structural systems & bull; There is a higher degree of fire-resistance with sheetrock compared to there is with platter. This can give the ones in the building more time to leave the building securely in an emergency like a fire.Size of sheetrock The conventional sheet of sheetrock actions 4 feet by 8 feet however, for structures with specialty needs
or have high ceilings the building contractor could obtain bigger sections. Usually, the indoor wall surfaces of a building are created from drywall that is one-half inch thick. If the structure's wall surfaces are going to go through even more deterioration, the building contractor can locate thicker sheets of five-eights thick. If there is a bent wall surface, a home builder can utilize sheetrock that is one-fourth inch thick. The sheets of sheetrock could be formed since they are moderately flexible.Types of sheetrock There are several different kinds of sheetrock that can be used for various applications. & bull; Traditional-it is normally fireproof but the builder could choose Type-X,
which is fire-rated sheetrock. This sheetrock is boosted with vermiculite and also perlite to boost its resistance to flames and also warm.
• Builders use Type-X drywall in business buildings, which has fire-rated scores from twenty to one hundred eighty mins. & bull; Greenboard-this gets its name from its green paper covering, which is a product that is moisture-proof as well as is used in restrooms as well as cooking areas. & bull; Blueboard-this is the type that a contractor would choose if the owners want the wall surfaces to have the appearance of plaster. & bull; Soundboard-this kind of sheetrock is created to obstruct the transmission of sound between different spaces.
• It could be installed in numerous layers making certain that the levels of sound could be maintained.
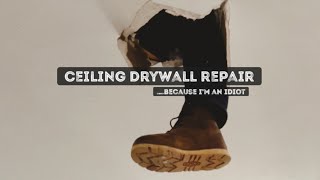
Repairing a Hole in Drywall
Wall surface openings are inevitable. The drywall might just endure minimal abuse and also child's play or also a flinging the door open up a little also hard might cause damages. Some holes are nondescript yet some can be an eye sore. Restoring your drywall hole is not something hard. It can quickly be done by amateur homemakers if the following simple steps are followed.The points that you
will certainly require are a substitute drywall, a keyhole saw, self adhesive cord mesh, joint compound, a putty knife and sandpaper.
- Clean away dust or particles from the damage. Ensure no hanging loose drywall is still connected on the surface.
- Cut an area of self sticky wire mesh. The dimension ought to be 2 to 3 inches larger than the opening that has to be repaired. Area the cable mesh over the damaged portion as well as press it securely to keep it in position. You can also use fiberglass harmonize tape instead of a wire mesh. Simply stretch the tape over the hole until it is covered completely.
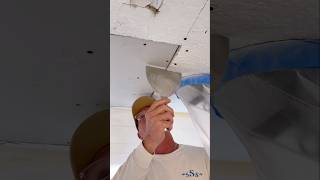
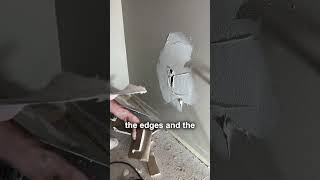
- Spot the cord mesh with drywall patching compound or joint substance until completely covered. Mix in the sides of the compound with the wall to make it inconspicuous. Smooth the whole layer as well as do away with harsh sides with the putty knife. You might use and smoothen out the drywall joint compound to the location 2 to 3 times till your preferred covering is accomplished.
- For bigger openings to fill up, hold up a section of new drywall over the opening as well as puncture both sections of the drywall using a keyhole saw.
- Move the drywall spot into area and protect it with the adhesive wire mesh. Apply joint compound with a putty blade to totally cover the spot and also adhesive cable mesh. Mix the joint substance to the will y obscuring the edges as well as allow it dry totally.
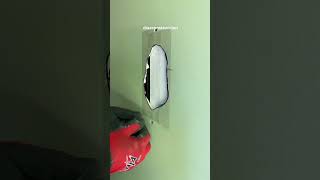
- Allow the compound completely dry completely and also sand the final layer using sand paper to earn it smooth or even. Wipe the dust that originated from the sanding and retouch the patch with wall surface paint. You might repeat adding joint solution to the wall surface till you are completely satisfied.
- Sand the sides and harsh surface areas with sand paper. Clean away any dirt or debris from the sandpaper and also cover the patch with primer as well as paint that matches your wall or obtain a wall surface paper additional to position it straight on top of the opening.
- Other than acquiring all the materials independently in equipment store, search for a drywall dealing with kit immediately making points simpler. Because instance, you need to adhere to supplier's guidelines in utilizing this set of drywall repair service materials.Patching up your residence
and keeping it clean as well as in order will certainly constantly make an impression to your site visitors. Give time to inspect your residence for the constant home enhancements that you should do. You might also consult your local equipment personnel to introduce to you new items on drywall repair.