[post_name drywall mud DIY - How to Repair Drywall Seams

So you have a brand-new house and also every little thing looks fantastic. Eventually, late in the mid-day, you are late to fulfill a buddy. You hurriedly throw your layer on as well as begin towards the door. Coming down the long hallway you discover that the sun is establishing as well as the light is coming via the window that makes you so thankful you have such a good home, however you also discover something that you haven't noticed prior to; the wall surfaces look rougher and also irregular in some locations. On your means house you start to assume concerning what you had actually seen as you were leaving for your conference, as well as you want to take a closer consider it when you obtain back.As you get back and also try to find the rough areas of wall that you had actually observed, to your amazement, you cannot find them.Were you picturing things?Not actually;
these are issues that newer houses have currently. With the more recent larger home windows situated often from floor to ceiling, and even more and also brighter illumination, the possibilities of this happening is much greater.Welcome to the world of
drywall completing as well as important lighting issues. A developer may create a wall or ceiling surface area for a specific style effect, or just by coincidence you may find sections of your office or home that come under just what is called extreme essential illumination locations. These areas lie in areas such as a lengthy hallway, an entrance hall wall, or smooth ceiling where the light from any type of resource comes streaming across the face of the wall or ceiling at simply the ideal angle.The combination of any type of gloss paint and smooth wall surfaces will make these imperfections even extra overstated. This may make the perceived appearance undesirable to the customer, or property owner, after the very best craftsmanship. Light, texture of wall surface, as well as luster of paint are vital factors impacting the look of drywall and also surface area. Just like any kind of framework male constructs, with a high quality installment and also appropriate painting procedures the end result typically transforms out penalty, but allow's assume regarding this.The whole nature of drywall installment is crude at finest. 4 foot large areas of drywall are butted together over the timber framing participants, then nailed and also screwed to the framework, then drywall mud is related to fill out all the nails as well as joints. All this as well as the wall surfaces are intended to wind up looking like one constant smooth wall surface sections, devoid of aesthetic issues. As we mentioned previously, in many instances you will not see issues, but we are speaking about important lights locations, in which instance you will see some issues, also from the most effective drywall coating work.So now we recognize that walls are not perfectly directly, and there is truly no way we could make them ideal in some lighting scenarios.
What can we do making them look as smooth and flat as we can? 1. Move any kind of lights found in the ceiling at the very least 3 feet away from any type of intersecting walls.2. Walls and ceiling in vital light areas need to have a percentage of texture on the surface such as orange peel, or brocade. This will separate the representation of light right into various instructions, enabling the walls to look smoother and straighter.3. Wall surfaces should never be repainted with any kind of gloss paint, not even velvet, or eggshell luster.4. Include drapes that can restrict, or transform the instructions of light can be found in from large windows.5. Usage plants to separate long wall surfaces.6. Utilize a cozy beige flat shine paint on ceilings. Paint manufactures make especially made level luster
paints for ceilings.7. Usage lights from lots of locations in the space to combat one big light source.These are
just a couple of tips.
You will have to play about with the best ways to breakup the lighting in these areas. Keep in mind many resources of light in a room will be better that a person source. John Howell House Painting Vancouver, WA
How to Find the Perfect Drywall Repair Services
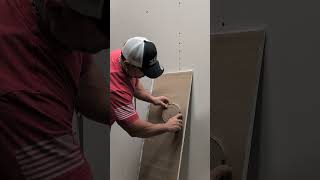
Drywall is one of the most usual wall surface cellular lining of the the contemporary house. The drywall is glued and nailed/screwed to the hardwood framework of your home then the signs up with are then plastered and sander. During the life of any kind of house damages to the drywall will occur usually when the removaling furnishings or playing indoors. There are two ways to fix this damages - ring an expert and pay them to fix it or find out the best ways to fix it on your own. The majority of fixings fast as well as easy to do with a few tools to do the job
Plaster Kinds
The first thing you need to know is the kinds of plaster that are utilized to do the Job. There are three major types:
- Skim coat - A powder that is blended with tidy water to earn a paste and also used in joints and filling up openings - sets difficult and also is difficult to sand.
- Cornice Concrete - A powder that is mixed with water to make a paste to adhesive on cornice - smooth tacky paste that established very tough and is tough to sand.
- Completing Substance - This is premixed in buckets and prepares to use straight from the container - dries (does not set) as well as is very easy to sand.
- Glass fiber tape - This tape is self adhesive and also provides toughness to the filling plaster or skim coat - just needed on bigger openings
To fix a hole of damages to a wall surface you Will only require base coat and ending up compound.Tools: There a few devices that you will require
to get to do the work nonetheless these are easy and low-cost --One broad knife 250mm(10inch)broad
( resembles a vast paint scarper), one 100mm( 4inch) wide blade, one 100mm (4inch) x 250mm (10inch )towel.You will certainly additionally should blend the base layer for bigger
openings so an electrical drill and paint mixing accessory is best. Nonetheless the skim coat can be blended by hand yet this is slow.For Example: A hole concerning the dimension of a tennis ball was made while
relocating furniture.Step one: See to it the hole in the drywall is clean (no extending drywall or paint)
mix your base layer power with clean faucet water to a paste much like tooth paste. Note: if the skim coat is also damp the base coat will certainly drop out of the opening. If you discover the base coat continuously falls under the wall surface cavity fill up the behind the opening with newspaper to support the base layer while it sets. Fill up the hole using the smaller sized wide blade seeing to it the hole is filled and also the base coat is flush with the drywall.Step two: When the first layer of skim coat is set, Cut a small quantity of glass fiber tape to simply cover the hole as well as carefully took into place. Mix up a percentage of skim coat and spread over the tape making sure that you spread out the base layer past the tape. The smoother as well as flatter the 2nd layer is the far better the outcome will certainly be. Let it established from 45 -60 Min's. Step three: Spread a thin layer of ending up substance with the huge wide blade as well as allow this dry.
The ending up compound needs to be spread a minimum of 100mm (4inches )beyond the base coat.Step 4: Sand your work with 180 grit sand paper ensuring you feather or blend the edges with the existing repainted wall surface so that the fixing will not be seen when repainted. The purpose is to sand the repair work as flat as you could and blend in the edges. Then your fixing is completed and prepared to paint.Tip: Bear in mind to wash you tools off with clean water in between steps so the plaster does not established on your tools.

Drywall Repair Tips
Drywall repair Key West - drywall finishing