[post_name drywall finishing Does Your Concrete Foundation or Drywall Have Cracks?

The method for the best ways to remove drywall structure depends on the product being eliminated and the problem of the wall surface. One of the most typical technique for removing texture from repainted drywall calls for sanding off the high portions of the appearance and loading it in with a minimum of 2 thin layers of joint substance - called skim coating. One more method for unpainted textured walls and ceilings, including popcorn ceilings, is spraying water externally to loosen the texture so you can scratch it off.When a wall has
considerable splits, peeling off paint or water damage, it could be simpler to cover the existing wall surface with 1/4 -inch drywall or get rid of the existing wall surface entirely as well as replace it.Whatever method you use to get rid of a textured surface from drywall, protect on your own from direct exposure to construction dust, lead as well as asbestos.Removing textured wall surfaces is a demanding procedure that takes persistence.
Below's the best ways to tackle some common problems so your walls will be smooth and your job, profitable.How to get rid of drywall texture by skim covering Problem: Uneven surface.Solution To prevent developing an unequal wall when you're eliminating the appearance, don't use a belt sander. It will dig up the texture.
Rather, eliminate high optimals in the appearance making use of a post sander with 120 grit or a 5-inch floor scraper.Problem: Bulgy looking patches.Solution Eliminate any type of loosened product with a rigid brush, scratch high areas as well as clean with a moist fabric. To use the first coat of joint substance, begin on top as well as work across and also down. "The most essential point is not to make use of also much product ,"says Ivan Solis, president of Chicago-based Solis Construction."If you use too much joint substance, it will be difficult to attain a smooth surface. You'll need to do a lot of sanding. "Don't worry about ripples, simply attempt to cover the appearance as well as get an even coat on the wall. Hold the joint blade at a 30-degree angle and also press it in. "Keep it tight as well as smooth,"claims Solis, who recommends utilizing a 10 -or 12-inch joint knife.Alternate the direction of the skimming strokes with each brand-new layer of mud. If you apply the very first layer horizontally, use the second coat vertically. Return excess mud from the surface to the edge of the pan, maintaining the blade of the knife clean.When the first coat is dry, use the second coat to fill up in the surges. Once again, begin on top in the edge as well as work throughout and down. As you function, knife off any kind of big portions of the first layer, utilizing your blade. If there are still low and also high areas, you may require a third coat. When the coat is dry, finish with a last sanding.Problem: Joint substance that sets as well rapidly or is also tough to sand.Solution Choose the best compound for the work. When a wall structure will need a number of coats of joint compound to smooth the surface, utilize a setup compound like Sheetrock Easy Sand for the first coat."Easy Sand 90 is a chemically setting substance that will certainly offer you about 90 minutes to work prior to it establishes,"states Jeff Hartin, product supervisor for USG's Ready Mixed products. The product is perfect for heavy fills up and also sands quickly."The nice aspect of a setup substance is that you can apply the initial coat and start a 2nd layer as quickly as the very first one has actually hardened,"states Solis.For the second or last layer, Hartin and Solis recommend a ready-mixed joint compound, such as Sheetrock Plus 3. The lightweight item is easier to spread out, enables a thinner application, as well as is easier to sand.Problem: Stains seep via the joint compound.Solution These issues are usually as a result of inappropriate bond and also are usual on lots of DIY painting tasks. If the distinctive wall is peeling or plaster and distinctive joint substance are falling off, eliminate loose product with a scrape, sand and also coat the surface area with primer/sealer before skim coating.Problem: Cracks and damages reappear.Solution Repair cracks as well as dents prior to skim finishing. To repair them, tape over the fractures with drywall tape and secure them with joint compound. When the wall is smooth, a drywall guide and sealer will secure the
wall surface and also aid avoid cracks and dents from re-emerging. Guide also neutralizes the pH of the wall surface for a much more even appearance.Problem: Peeling paint and bubbling in the paint finish.Solution These troubles are commonly due to incorrect attachment. If the textured wall surface is peeling off or plaster and also textured joint substance are diminishing, get rid of loose product with
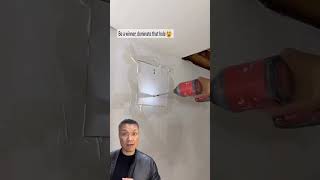
a scrape, sand and also layer the surface area with primer/sealer before skim coating.Problem: Pitting.Solution Pits on the surface area of the drywall are air bubbles that were not properly filled up or that were subjected during fining sand. Air bubbles arise from over -or under-mixing the joint compound. Apply pressure to the bubbles with the joint blade, up until the pits are gone. If you do not discover them up until the wall surface is dry, cover them with joint compound as well as sand.Problem: Over-sanding; missing high as well as low spots.Solution Sand also much as well as you take the chance of damaging the surface area paper. If that occurs, cover the location once again with joint compound. To avoid missing out on low and high spots, use a clamp-light or various other source of light near the wall surface to find trouble areas. Sand carefully, functioning from the ceiling to the flooring in slim sections.How to get rid of a textured surface from drywall by scraping
Trouble:
Wall damaged by water and also scrapers.Solution Specialists suggest wetting wall structures with a spray bottle to loosen up the product. Then utilize a scraper with a flat, large blade to eliminate the texture. Use just adequate water to loosen the material or you can harm the drywall. If you mark the sheetrock with the edge of your scuffing blade, patch it with joint compound.How to eliminate a textured surface area from drywall by covering wall surfaces with drywall Problem: Re-installing trim.Solution "One point to maintain in mind when using 1/4-inch drywall over an existing
wall is that not only will your baseboard, door as well as window case look a 1/4- inch thinner but all of the "joints"will certainly have to be loaded with joint substance and also caulked, "says Solis. You could need to get rid of trim and reinstall it, as well as electric outlets could need extensions to bring them purge to the wall.
Is It Time To Do Some Repair Work On Your Drywall?
The introduction of drywall has completely changed the method interior wall ending up was done. It finishes indoor wall surface as well as reduces construction time substantially. Drywall is widely understood as wall surface board, gypsum board or plasters board and also is made use of to earn indoor walls as well as ceilings. The most important parameter which is taken into consideration while setting up drywall is its size and thickness. In the field of indoor wall surface designs, a drywall is a changed method.Drywall Installation The favored thickness sizes
used for setting up drywall are 3/8 inch (0.952 centimeters), 1/4 inch(0.635 centimeters), 1/2 inch (1.27 cm), as well as 5/8 inch(1.59 cm). Here, your design as well as your contractor are the most effective people to get in touch with for picking ideal drywall density. When the drywall setup is complete the following step is to painting it. Drywall installment consists of different actions such as preparing the site for drywall, mounting drywall, mounting corner bead, taping as well as mudding, using the second layer of mud, applying the final layer of mud and also Sanding.Drywall Cracks Drywall could be quickly harmed when exposed
to water. The split in the securing is significantly irritating for the property owner. The numerous sources of drywall cracks include temperature level change, infiltration of water, as well as physical damages due to require or shock.It requires a great deal of persistence to deal with the drywall fractures. The treatment is really simple as well as the devices needed is putty blade, sandpaper, paint brush, paint, seam tape, mud frying pan, mud trowel, as well as safety glasses.Procedure for repairing drywall Step-1: Getting rid of all the debris and paint spending time the cracked portion.Step- 2: In instance, fracture is lengthening you need to eliminate weak particles by force.Step-3: Now, use sandpaper to smoothen out the broken portion.Step-4: Mix the plaster blend, using the mud pan.Step-5: Currently utilize putty
knife to use the plaster.Step-6: Make a little strip as well as cover the fracture Tip -7: Currently use coat of plaster over the seam tape.Mould Development Drywall sustains the growth of mould due to the fact that
it is permeable and also light-weight compound. Nowadays in order to protect against mould growth, the sheet of drywall is made from fiberglass, as opposed to paper. The growth of mould occurs as a result of humidity and also
wetness. In prone people, mould can activate allergies like asthma, sneezing,
or cold like symptoms.Key Perks The setup of drywall is very simple. Its crucial benefits are Convenience: It can be utilized in all internal areas.Flexibility: You could produce and also split the room according to your needs.Dry Building: The work environment is clean, completely dry and dirt free.Excellent Efficiency: The outcome is worthwhile in terms of fire ranking, thermal and sound insulation.Aesthetic allure: It enables ease of design with ceramic tile, paints or wall
paper.Speed of installment: When as compared to traditional stonework system, it
is 3 to 4 times faster.Lightweight: When compared with the traditional masonry systems, it is 8 to 10 times lighter.Partitioning: Drywall is additionally chosen for doing area dividing.

Drywall Water Damage Ceiling Repairs
Drywall repair Bay Harbor Islands town - drywall finishing