[post_name how to repair drywall Repairing Chips and Scratches in Dryall and Wood Work

Repairing cracked drywall seams can be discouraging at finest. If there is only an extremely, really tiny crack present, you might be able to scrape out the crack to a larger dimension and afterwards just use brand-new spackling substance. Using a sharp, sharp tool such as an old fashioned can opener (church trick), scrape placed a groove wider and somewhat longer compared to the split. It needs to be at the very least 1/8" deep however much deeper is better. There are patching compounds readily available today made simply for covering splits yet are not meant for big areas. If this is a painted wall surface some amount sanding will certainly also be called for. Spackle will not adhere to a smooth paintinged coating. Sand the area around the split at least a few inches bigger than the crack then go on and apply the patching substance making sure you compel the spackle down right into the crack. Right after using the spackle, re-wipe the area with your knife to remove any type of excess spackle from the area leaving a flat surface. Depending upon exactly what kind of substance you bought the drying out times vary quite a little bit from minutes to hours. After the spackle is completely dry usage a 100 or 120 grit drywall sanding paper to smooth area so it is flush with the existing wall. Prime the drywall and set up the final paint.In a case
where the splits are a lot larger along the joints, it may triggered by the drywall tape pulling loose, physical damage or probably also excess moisture. Carefully eliminate any as well as all loosened products at taped areas. You could not and I repeat, could not re-spackle old tape. The drywall tape has minute openings that permits the spackle to pass through and secure the tape to your joints. The spackle "wets" the tape aiding it not only to stay with the drywall yet allows the spackle to form a bond on both sides to the drywall. Once it is utilized, the openings are loaded thereby making the tape pointless. Aiming to brief cut will only create the seam to re-crack later.After removing all loosened materials, gently sand the damaged areas bewaring not to tear or sand through the paper layer of the drywall beneath. As soon as the area is smooth to the touch make certain you have sanded evenly onto the bordering location so as not to leave an edge that will certainly show through the completed job. Using a six inch vast spackle blade, set up an also coat of new spackle over the seam. Place your new drywall tape over the joint as well as using the knife, press the tape strongly into the drywall eliminating all excess spackle as it ejects from under the tape as well as sides of the blade. Do not get rid of excessive spackle so about leave the paper completely dry. As soon as the location is as smooth as you could make it, apply a 2nd lighter layer over the very same area ensuring the new tape is entirely embedded in fresh spackle.After drying out for someday to guarantee all the spackle is dry, re-sand the
entire area to again get a smooth feel to the entire fixed location. Using your twelve inch knife, spread out a 2nd layer to the entire fixing seeing to it you mix efficiently onto the adjacent wall surfaces. Do not leave any ridges or sharp sides where you satisfy the old wall finish.Once this 2nd layer of spackle is completely dry, which will be much less than the base coat as it is much thinner, apply, utilizing your twelve inch knife, a 3rd very thin layer of fresh spackle. You will almost have the ability to translucent this layer as it is made use of to load little indents or scratches left by fining sand the second coat. Once again after the third coat dries, really gently sand the repair for the last time to guarantee a completely smooth completed area. Apply a layer of drywall guide to seal the freshly repaired drywall location and after that painting your wall.If the drywall seams have actually totally split or split open there may be an architectural issue that needs to be re-mediated prior to you deal with the drywall seams. Building settlement, foundation issues or various other items may effect the drywall finishes so make certain they are repaired first.Once you make certain there are no various other troubles present, as in a small repair work, eliminate all loosened or damaged products. If the drywall itself is fractured, reduced the drywall back to a stud and also install a brand-new item of drywall. The repair work is the exact same as a minor crack just on a much larger scale.Installing little items of drywall for patching produces exactly what are called butt joints which are much tougher to hide. You will certainly be required to spread your spackle over a much bigger location to
get a smooth look and not a bump in the wall. With method you could do this work as well as conserve yourself a large amount of money.If you are in a hurry as well as the repair work is reasonably little, there are quick drying out materials readily available such as Durobond 90 which when included in spackle makes the spackle rock hard in ninety mins. There is also a forty-five minute type offered however just real pros must try as well as use it. Forty-five mins flies by truly fast. When I state it dries out rock hard, it is almost impossible to sand when dried so any little defects left in the surface area with your knife will certainly reveal later. Be careful.Remember to maintain your tools tidy, do not tear open containers or lids with your blades as it will certainly damage or chip the edges of the knives as well as job as tidy as you could to stay clear of strenuous clean-up later on.
How to Remove Drywall Texture
Drywall patching needs perseverance as well as determination. I am going to damage the process down conveniently so you will certainly be extra informed before you start your next completely dry wall surface patch.One thing you have to consider when dealing with drywall is the DIRT. If you are delicate to the drywall dirt or plaster you may wish to get a fragment mask, security goggles or handwear covers as well as use a lengthy sleeve t-shirt for protection. Don't fail to remember to safeguard any kind of home furnishings that you intend to keep dust cost-free, too!Step1: prep the
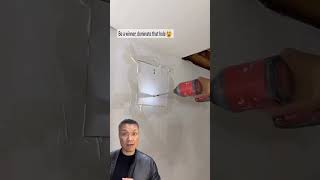
hole or area to be patched.If the hole or area to be patched has loosened wall board paper you will certainly need to eliminate the loose paper and also gypsum. Currently if the wall board paper wishes to continue tearing up the side of the wall surface, a method to quit this is the take a razor blade and also reduced back from the loosened area concerning an inch or two. What you are doing is scoring the wall so when you tear of the loosened paper it will concern the racked up line as well as not tear further causing a larger location to require patch work. If after you have removed the loose paper and also the gypsum board beneath is collapsed as well as barely hanging to the wall, you need to knock out all the loose plaster. Loose paper and also plaster will certainly cause the drywall compound to not bond strongly and also may create a bubble you will certainly see just after coating with substance. As part of the preparation, you might intend to settle up the hole so you can more easily cut the piece of sheetrock that will fill up the void.OK so the area is prepped as well as currently we will certainly have to transfer to tip 2, which will advise you on
how you can properly connect a piece of sheetrock cut to fill the hole in your wall or ceiling.Step 2: back framing the opening to attach the sheetrock you will certainly cut to fill up the void.Just like with new building and construction you will have to have wood mounting to screw the sheetrock right into. To describe, I will use an example
spot area of one foot by one foot. You will have to reduce a 2x4 right into 2 16 "sizes. You will certainly should collect a cordless or electrical drill and also regarding a dozen 1 1/4" timber screws. Take one of the 2x4's you have actually reduced and also move it in the red and behind the existing sheetrock, along one side of the opening. The factor the 2x4 is much longer(16 ")compared to the 12"hole is due to the fact that we will prolong it a pair of inches past the top and also base. So now you have a 2x4 inside the wall surface on one side, the 2x4 has to be laying level against the within the wall surface, it will not be transformed so the 4 "size of the 2x4 is flat versus the within, this will certainly provide us a bigger surface for accessory as apposed to the basic way of mounting which would be with the 2"width dealing with the sheetrock. You will desire to eyeball, best as possible the 2x4 and also split the distinction of the board size in between the existing sheetrock and where you will connect the piece of sheetrock you will certainly cut for the spot. Since the 2x4 is kept in the right setting you will certainly have to screw the 2x4 right into the existing drywall by holding firmly to the board and also screwing into it through the face of the existing sheetrock. You will certainly put two screws along the edge and also one on the top and also bottom of the existing sheetrock to strongly secure the 2x4 to approve piece of sheetrock you will certainly reduce. Once you have finished one side, repeat the very same treatment on the various other side. So when you have actually ended up back mounting you now have a strong structure to attach the patch item of sheetrock. * Note-if you have a hole to patch where there are mounting, electrical or mechanical issues in the method that maintain you from sliding the 2x4 behind the wall surface to screw down the side, you could screw in the top and bottom of the 2x4 and also this will certainly be sufficient. You may additionally consider attaching the 2x4 back mounting across the top and also bottom of the hole as apposed to attaching the 2x4's on the sides, simply use the exact same instructions of attachment for the sides or top and also bottom.Now that the prep and framing are full next we will certainly reduce a piece of sheetrock to place right into the framed hole in step 3. Step 3: take a measurement of the hole and also reduced an item of sheetrock to
fit and also safeguard it.It does not have to fit extremely limited but it will certainly have to fit as well as be screwed to the
back framing you set up. You need to place 2-3 screws down each side connecting the piece of sheetrock you cut to the framework. * Note-all the screws will certainly have to be "set"listed below the surface of the sheetrock yet not deep sufficient that the screw head splits the paper face on the sheetrock, unset screws will reveal as well as disrupt the next action. ** Note sheetrock comes in two thicknesses for a lot of domestic building -1/ 2" and also 5/8 ". 1/2"is generally on the interior walls/ceilings and also 5/8"is utilized on underside of stairs and also in the garage.Well you're making progress and also you have actually loaded deep space with sheetrock, now we will certainly proceed to the
finishing or finishing phase of the completely dry wall substance(mud )explained in action 4. Step 4: coating the patch with drywall substance (mud). As I was saying in action 3 the item of sheetrock you cut to fill the opening does not have to fit very limited. If the sheetrock you cut has a gap around the
border/joint of it as well as where it fulfills the existing wall board, you need to pre fill the location prior to applying the drywall tape. So just take a little substance and fill in the edges as well as smooth the excess flat wit the wall, permit to completely dry. Following is to use the drywall tape so that after we are all completed there will certainly not be a fracture around the joint of the covered hole. For patch work I want to utilize a"mesh "or "fiber" tape, it provides a stronger hold and the mesh tape is a lot more forgiving than regular drywall tape, in the considering that you do not have to pre mud the wall surface to adhere the tape. The mash tape has a sticky backing, so all you do is reduced the mesh tape to the length you require, stick it on the wall with the center of the mesh tape running right according to the joint or crack. The mesh tape ought to always run past the joint a minimum of an inch. Repeat this process for all 4 sides of the spot. Next apply a coat of compound around the border of the spot, over the mesh tape. The mesh will be slightly visible after just one layer. * Note-If you apply to much substance(mud )you will certainly have a bulge in the surface area. Permit this layer to completely dry, sand lightly, mostly to knock of any kind of blade edges that dried in the compound as well as could trigger the following layer to develop up to a lot. You do not intend to attempt as well as mud the patch in simply 1 coat, it is much better to use a moderate/thin layer permit to dry, sand and also layer again. Besides the coats( at the very least 2) have dried out and also you are satisfied that the surface area is covered evenly, sand the mud to even the surface. * Note -a less than best coating job could be smoothed out with sanding. Fining sand along the outside edge of the mud also, will mix the patched area better into the existing surface. An actually neat trick seeks you have fined sand the patch, take a damp sponge or cloth as well as"clean" the outdoors mud of the patch mixing it even much better right into the existing surface area, this method will help you prevent seeing a mud line around the spot when it is finished. If your house has a smooth structure, this is the last action, your ready to painting. If you do not have a smooth appearance you will have to check out on.Only another step and also the drywall component of your patch will be total, appearance. We will discuss different appearances and ways to use the in step 5. Tip 5: there are lots of appearances and also you need to initially understand how you can identify your existing texture prior to going forward.Older homes may have a swirl, crows foot, hand or smooth texture. Newer houses for the most part make use of smooth, orange peel, knockdown and hand appearances. For a crows foot you will certainly require a crows foot or stamp texture brush. For swirl texture you could need to speak with a completely dry wall vendor shop for the proper texture brush or explore a couple of various brushes. For a hand texture you could utilize a completely dry wall surface knife or trowel. All of the above pointed out appearances need a tool or brush to use drywall substance to achieve the appearance. The next two structures could be bought in a spray can, orange peel and also tear down. * Note- with all textures it readies to obtain an old piece of plywood or cardboard and also experiment initially to locate the correct amount of stress, thickness of mud, method and also established time to produce the appropriate want to best conceal that a repair work was ever before made. As always if you structure the wall and are not satisfied with the outcomes you can was the appearance of instantly with a damp sponge of dustcloth, permit to dry and also try texturing once again or sand of a negative structure if you are not delighted with it after it has actually been allowed to dry. * Note- Knockdown texture dimension can be controlled by allowing the splashed on appearance set up or completely dry for much less or even more time relying on the preferred look.We have actually gone over the 5 actions had to skillfully repair a drywall patch. 1 )appropriately prep the area to be patched. 2)back mount the opening. 3 )size as well as cut the sheetrock to fill the opening. 4 )use mesh tape and also mud to smooth the surface. 5)pick as well as use proper texture.So head out and" obtain your drywall on". You could take a look at my write-up on painting wall surfaces if you require help with the paint. Really feel complimentary to leave a remark about any kind of other subject you would like me to compose on referring to drywall. Please have a look at our internet site, dennardbloss.com, it
is about our building and construction coatings.

Repairing Chips and Scratches in Dryall and Wood Work
Drywall repair Fort Myers Beach town - patching drywall