[post_name drywall repair Introduction to Drywall Repair Materials

The introduction of drywall has actually entirely transformed the method interior wall surface finishing was done. It finishes indoor wall and lowers building time significantly. Drywall is popularly called wall surface board, plaster board or plasters board and is utilized to make indoor wall surfaces as well as ceilings. One of the most essential specification which is taken into account while setting up drywall is its size and also thickness. In the field of indoor wall decorations, a drywall is a revolutionized method.Drywall Installment The favored thickness dimensions
used for installing drywall are 3/8 inch (0.952 cm), 1/4 inch(0.635 centimeters), 1/2 inch (1.27 centimeters), and also 5/8 inch(1.59 centimeters). Here, your architecture and also your professional are the very best individuals to speak with for picking proper drywall thickness. When the drywall installment is full the next step is to repaint it. Drywall installment consists of various actions such as preparing the website for drywall, setting up drywall, setting up corner bead, taping as well as mudding, using the 2nd layer of mud, applying the last coat of mud and Sanding.Drywall Cracks Drywall could be conveniently harmed when exposed
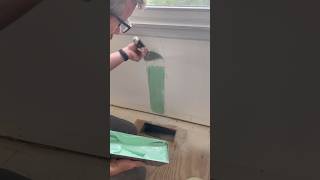
to water. The crack in the securing is quite annoying for the resident. The different root causes of drywall splits consist of temperature change, seepage of water, and also physical damage as a result of require or shock.It needs a great deal of perseverance to fix the drywall splits. The procedure is really easy and the equipment needed is putty blade, sandpaper, paint brush, paint, joint tape, mud frying pan, mud trowel, and also security glasses.Procedure for fixing drywall Step-1: Getting rid of all the particles as well as paint hanging around the fractured portion.Step- 2: In instance, fracture is extending you have to remove weak particles by force.Step-3: Now, utilize sandpaper to smooth out the cracked portion.Step-4: Mix the plaster mixture, utilizing the mud pan.Step-5: Now utilize putty
knife to apply the plaster.Step-6: Make a small strip as well as cover the fracture Step -7: Currently use coat of plaster over the joint tape.Mould Development Drywall supports the growth of mould because
it is porous and also light-weight material. Nowadays in order to protect against mould development, the sheet of drywall is made from fiberglass, as opposed to paper. The growth of mould happens as a result of moisture and also
moisture. In at risk individuals, mould could activate allergic reactions like asthma, sneezing,
or cold like symptoms.Key Conveniences The setup of drywall is really simple. Its vital advantages are Convenience: It can be utilized in all inner areas.Flexibility: You can create and split the space according to your needs.Dry Building: The job setting is tidy, completely dry as well as dust free.Excellent Efficiency: The output is rewarding in terms of fire ranking, thermal as well as audio insulation.Aesthetic charm: It allows ease of decor with floor tile, paints or wall surface
paper.Speed of setup: When contrasted to traditional masonry system, it
is 3 to 4 times faster.Lightweight: When as compared to the conventional masonry systems, it is 8 to 10 times lighter.Partitioning: Drywall is additionally preferred for doing room partitioning.
Drywall Hole Repair Made Easy!
Drywall is the most common wall surface cellular lining of the the modern-day house. The drywall is glued and nailed/screwed to the wood frame of your home and afterwards the signs up with are then smudged and sander. During the life of any kind of residence damage to the drywall will certainly take place frequently when the removaling furnishings or playing indoors. There are 2 ways to fix this damages - ring an expert and also pay them to repair it or discover how to fix it yourself. Many fixings are fast as well as simple with a couple of devices to do the job
Plaster Kinds
The first thing you have to recognize is the types of plaster that are used to do the Job. There are 3 main types:
- Base Layer - A powder that is blended with clean water to make a paste as well as used in joints as well as loading openings - sets tough and also is hard to sand.
- Cornice Concrete - A powder that is mixed with water making a paste to adhesive on cornice - smooth gaudy paste that established extremely hard and is difficult to sand.
- Completing Compound - This is premixed in containers and prepares to utilize straight from the bucket - dries (does not set) as well as is extremely simple to sand.
- Glass fiber tape - This tape is self glue and also provides stamina to the loading plaster or skim coat - just needed on bigger openings
To fix a hole of damages to a wall you Will only require skim coat and completing compound.Tools: There a couple of tools that you will certainly need
to purchase to do the work nevertheless these are basic as well as inexpensive --One wide blade 250mm(10inch)wide
( looks like a large paint scarper), one 100mm( 4inch) broad knife, one 100mm (4inch) x 250mm (10inch )towel.You will certainly likewise require to mix the base coat for bigger
openings so an electric drill and also paint blending accessory is best. However the base layer could be blended by hand yet this is slow.For Instance: A hole about the dimension of a tennis ball was made while
removaling furniture.Step one: Make certain the hole in the drywall is clean (no protruding drywall or paint)
mix your base coat power with clean faucet water to a paste just like toothpaste. Note: if the skim coat is too wet the base layer will drop out of the hole. If you discover the skim coat consistently drops into the wall surface dental caries fill the behind the opening with newspaper to sustain the skim coat while it establishes. Fill the hole utilizing the smaller wide blade seeing to it the opening is filled up and the base coat is flush with the drywall.Step two: When the initial layer of base coat is established, Cut a percentage of glass fiber tape to just cover the hole and also very carefully took into area. Blend a small quantity of skim coat as well as spread over the tape making certain that you spread the skim coat beyond the tape. The smoother and flatter the 2nd layer is the much better the outcome will be. Let it established from 45 -60 Min's. Tip three: Spread a thin layer of finishing compound with the huge broad blade and also let this completely dry.
The ending up compound should be spread a minimum of 100mm (4inches )past the base coat.Step 4: Sand your collaborate with 180 grit sand paper seeing to it you feather or mix the sides with the existing repainted wall so that the repair work will not be seen when paintinged. The purpose is to sand the fixing as flat as you can and also mix in the edges. Then your repair is ended up and ready to paint.Tip: Remember to clean you tools off with clean water in between actions so the plaster does not set on your tools.

Drywall Repair Questions Answered by a Professional
Drywall repair Palatka - hanging drywall