[post_name drywall finishing Drywall Repair Considerations

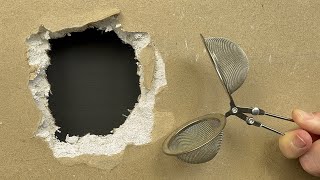
Drywall patching requires persistence and persistence. I am going to damage the procedure down easily so you will certainly be a lot more informed prior to you begin your next dry wall patch.One thing you have to consider when functioning with drywall is the DUST. If you are delicate to the drywall dust or plaster you could want to obtain a bit mask, safety and security goggles or handwear covers and also use a long sleeve t shirt for defense. Remember to protect any type of furniture that you wish to maintain dust cost-free, too!Step1: prep the
hole or location to be patched.If the hole or location to be covered has loose wall surface board paper you will have to remove the loosened paper as well as gypsum. Now if the wall board paper intends to proceed tearing up the side of the wall, a means to stop this is the take a razor blade and also cut back from the loosened location about an inch approximately. Exactly what you are doing is scoring the wall so when you tear of the loosened paper it will certainly pertain to the racked up line and not tear further causing a bigger location to require spot work. If after you have actually gotten rid of the loosened paper and also the gypsum board below is collapsed and barely hanging to the wall surface, you have to knock out all the loose gypsum. Loosened paper as well as plaster will certainly trigger the drywall substance to not bond strongly and could create a bubble you will see just after covering with substance. As part of the prep, you could wish to settle up the hole so you could much more easily cut the piece of sheetrock that will fill up the void.OK so the area is prepped as well as currently we will certainly should relocate to tip 2, which will advise you on
the best ways to properly connect a piece of sheetrock cut to fill up the opening in your wall surface or ceiling.Step 2: back framing the hole to connect the sheetrock you will certainly reduce to fill up the void.Just like with brand-new building you will certainly need to have timber framing to screw the sheetrock right into. To clarify, I will use an instance
patch area of one foot by one foot. You will should reduce a 2x4 into 2 16 "lengths. You will need to gather a cordless or electric drill as well as regarding a lots 1 1/4" wood screws. Take one of the 2x4's you have actually cut and also move it in the red and behind the existing sheetrock, along one side of the opening. The reason the 2x4 is longer(16 ")than the 12"hole is since we will certainly extend it a number of inches past the top and also base. So currently you have a 2x4 inside the wall surface on one side, the 2x4 needs to be laying flat versus the inside of the wall surface, it will not be transformed so the 4 "size of the 2x4 is level versus the within, this will certainly provide us a larger surface area for accessory as apposed to the common way of framing which would certainly be with the 2"width encountering the sheetrock. You will wish to eyeball, best as possible the 2x4 and also divided the difference of the board size in between the existing sheetrock and also where you will certainly connect the piece of sheetrock you will certainly cut for the spot. Currently that the 2x4 is kept in the proper setting you will certainly should screw the 2x4 into the existing drywall by holding securely to the board and also screwing right into it with the face of the existing sheetrock. You will put two screws along the edge and also one on the top and base of the existing sheetrock to highly safeguard the 2x4 to accept piece of sheetrock you will certainly cut. When you have actually finished one side, repeat the exact same procedure beyond. So when you have completed back mounting you now have a solid structure to attach the patch item of sheetrock. * Note-if you have an opening to patch where there are framing, electric or mechanical issues in the means that maintain you from gliding the 2x4 behind the wall surface to screw down the side, you can screw in the top and base of the 2x4 and this will suffice. You might additionally consider connecting the 2x4 back framing throughout the top and base of the opening as apposed to connecting the 2x4's on the sides, just use the same instructions of attachment for the sides or leading and also bottom.Now that the preparation and framing are total next we will certainly cut an item of sheetrock to place into the mounted hole symphonious 3. Action 3: take a measurement of the opening and also reduced an item of sheetrock to
fit and also safeguard it.It does not have to fit super limited yet it will certainly require to fit and also be screwed to the
back framework you set up. You should place 2-3 screws down each side affixing the item of sheetrock you reduced to the framing. * Note-all the screws will need to be "established"listed below the surface of the sheetrock but not deep sufficient that the screw head rips the paper face on the sheetrock, unset screws will reveal and also hinder the next step. ** Note sheetrock can be found in 2 thicknesses for many residential building and construction -1/ 2" and 5/8 ". 1/2"is normally on the interior walls/ceilings and also 5/8"is made use of on bottom of stairs and in the garage.Well you're making progression as well as you have filled up the space with sheetrock, currently we will proceed to the
layer or finishing stage of the completely dry wall surface substance(mud )clarified symphonious 4. Step 4: covering the patch with drywall compound (mud). As I was stating symphonious 3 the piece of sheetrock you reduced to load the hole does not need to fit incredibly tight. If the sheetrock you cut has a gap around the
border/joint of it and where it meets the existing wall surface board, you should pre fill the area prior to applying the drywall tape. So simply take a little compound and also fill in the edges and also smooth the excess flat wit the wall, permit to dry. Following is to use the drywall tape so that after we are all ended up there will certainly not be a split around the joint of the covered hole. For spot job I like to utilize a"mesh "or "fiber" tape, it supplies a more powerful hold and also the mesh tape is much extra flexible compared to routine drywall tape, in the because you do not have to pre mud the wall to adhere the tape. The mash tape has a sticky support, so all you do is cut the mesh tape to the size you require, stick it on the wall with the center of the mesh tape running right in line with the joint or crack. The mesh tape ought to always run past the joint at the very least an inch. Repeat this procedure for all 4 sides of the spot. Following apply a coat of substance around the border of the spot, over the mesh tape. The mesh will certainly be a little noticeable after just one coat. * Note-If you apply to much substance(mud )you will certainly have a hump in the surface. Permit this coat to completely dry, sand lightly, mostly to knock of any blade edges that dried out in the substance and could create the following coat to accumulate to much. You do not want to try and mud the spot in simply 1 coat, it is much better to apply a moderate/thin coat allow to completely dry, sand and also coat again. Besides the coats( at the very least 2) have dried out and you are pleased that the surface is covered evenly, sand the mud to even the surface area. * Note -a less compared to best coating job could be ravelled with sanding. Sanding along the outside edge of the mud also, will certainly mix the patched area better into the existing surface area. A truly neat method desires you have fined sand the patch, take a damp sponge or cloth as well as"laundry" the outside mud of the patch mixing it also better into the existing surface, this method will help you stay clear of seeing a mud line around the patch when it is completed. If your home has a smooth structure, this is the last action, your ready to painting. If you do not have a smooth texture you will certainly need to check out on.Only one even more step as well as the drywall component of your patch will certainly be total, structure. We will review numerous textures and also how you can use the symphonious 5. Tip 5: there are many appearances as well as you need to initially recognize ways to determine your existing texture prior to going forward.Older residences may have a swirl, crows foot, hand or smooth texture. More recent homes generally use smooth, orange peel, knockdown and also hand structures. For a crows foot you will certainly require a crows foot or stomp appearance brush. For swirl structure you may need to consult a completely dry wall surface provider shop for the appropriate appearance brush or explore a couple of different brushes. For a hand appearance you can make use of a completely dry wall surface knife or trowel. All of the above discussed textures need a device or brush to use drywall substance to achieve the structure. The following two structures could be purchased in a spray can, orange peel as well as knock down. * Note- with all textures it readies to obtain an old item of plywood or cardboard and also experiment first to find the ideal quantity of pressure, density of mud, strategy as well as established up time to produce the ideal want to ideal hide that a repair was ever before made. As always if you structure the wall surface and are not pleased with the outcomes you could was the structure of promptly with a damp sponge of dustcloth, permit to completely dry as well as try texturing once more or sand of a negative appearance if you are not satisfied with it after it has been allowed to completely dry. * Note- Knockdown appearance dimension could be controlled by allowing the sprayed on texture established or completely dry for less or even more time depending on the desired look.We have actually talked about the 5 actions should properly fix a drywall patch. 1 )appropriately prep the area to be patched. 2)back mount the opening. 3 )size and reduced the sheetrock to load the opening. 4 )use mesh tape as well as mud to smooth the surface area. 5)select as well as apply appropriate texture.So head out as well as" obtain your drywall on". You can have a look at my post on paint wall surfaces if you need assistance with the paint. Do not hesitate to leave a remark concerning other subject you would certainly like me to compose on concerning drywall. Please check out our website, dennardbloss.com, it
is all regarding our building and construction surfaces.
Does Your Concrete Foundation or Drywall Have Cracks?
I received a phone call today from my church's office manager stating we had to have some repair services made prior to a check out from the structure assessors next week. Among the repair works was an opening in the drywall where a door handle had actually punched through the wall. The doorstop had damaged and also following thing you know there's a fixing work for the Best Guy.Knowing ways to do a
spot similar to this comes in handy also when you're not repairing damage. The first time I did one was when I set up phone as well as cable television service into an older residence that my parents had purchased. My sibling as well as I reduced holes at the top and base of the wall surface to fish with the brand-new cord, as well as then I patched up the openings as well as painted and you 'd never ever understand the wall had been fixed. The same opts for running a new electric wire or anything else that calls for getting in the wall.If you don't currently understand, a normal wall surface is primarily air.
It is either 2 & times; 4 timber studs or metal studs that are put every 16 inches×on-center(when building wall surfaces you measure from the facility of each stud and also not the sides.)The surface area is covered with drywall( a plaster board covered with a heavy layer of paper )which is screwed or fingernailed to the studs. It's quick to construct as well as looks wonderful, however could be quickly damaged- especially when the builder uses 1/4 inch thick drywall as opposed to 1/2 inch or 3/4 inch(these are the standard thicknesses.) When you have actually a damaged wall you should replace the broken area with new drywall and afterwards spot the seams and paint.The materials you'll need for this project are: Drywall Saw Energy Knife Drywall piece big sufficient to load
the opening 1 & times; 3 inch Lumber or items of Scrap Plywood for supports Drywall Screws Joint Substance Mesh Fiberglass Drywall Tape 6 inch or bigger Spreader Fine Grit
Drywall repair Cocoa Beach - general labor

Introduction to Drywall Repair Materials