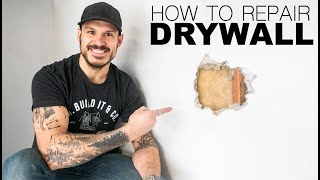
[post_name how to repair drywall How to Repair Wet Drywall

Fixing a large hole in your sheetrock wall surface is not as frightening as one may assume. Following is a quick and easy method to do the repair service without a huge headache.First, you'll desire to
make the opening square if it isn't already. It only has to allow enough to cover the broken area.The ideal method to do this is to utilize a two foot degree as well as make both vertical lines as well as 2 horizontal lines with a pencil to form the square, no measuring is required. If you don't have a level, than simply gauge with a ruler or gauging tape equivalent distances to form the square.The next action is to eliminate along the lines to eliminate the damaged
item. An affordable keyhole saw is the finest tool for this task. An energy knife can likewise be used by making constant passes until you have reduced through the sheetrock. If you discover on your own cutting over a stud, continue the cut till you have removed the entire square. View out for any kind of electrical wiring that may remain in the wall, particularly along studs. With the opening now cut, put a piece of scrap timber, preferably one inch thick material such as a 1x3 or 1x4 in the red on the rear end of the sheetrock as well as enough time to exceed each side regarding four inches.So if I made an 8 inch by 8 inch hole the item would be 16 inches long.
It could be put vertically or flat in the hole. If the cut passed over a stud, the stud can be made use of as a support factor as well as the scrap put on the opposite side. If the stud is in the middle, location two scraps on either side. Screw the wood items in position with a cordless screwdriver from the face of the sheetrock up until the screw head is a little listed below the surface. One on each end of the scrap must do.Next cut an item of sheetrock to fit the hole. Making the item one eighth of an inch smaller on the whole will certainly assist in establishing it in. Screw this in position as well with drywall screws. The following action is to apply joint substance to the joints to get joint tape. Put sufficient to cover the size of the tape and also a little over. Press the tape in the plaster with a six inch plaster blade. Be sure the tape is in full call with the plaster or else the tape might bubble. Wherever the tape overlaps, position a tiny quantity of joint compound over the underlying tape. As soon as this is dry, position a 2nd layer of substance. It's constantly best to make use of an eight inch plaster knife yet a 6 inch will do.Spread the substance over the joints and also feather it out further compared to before. After this is completely dry, gently sand the area to remove any type of ridges or blemishes. The repair work can currently be primed with a drywall primer and also a coat of paint to match the wall.
Repairing Drywall Water Damage
Drywall is one of the most usual wall lining of the the contemporary residence. The drywall is glued and nailed/screwed to the lumber framework of your home and also after that the joins are after that glued and sander. During the life of any type of home damages to the drywall will certainly occur usually when the moving furnishings or playing inside your home. There are two means to repair this damage - ring an expert and also pay them to repair it or find out how you can repair it yourself. Many repair works are fast as well as simple with a few tools to do the job
Plaster Types
The initial point you should understand is the kinds of plaster that are made use of to do the Work. There are three main types:
- Base Layer - A powder that is blended with clean water to earn a paste as well as made use of in joints and also filling up openings - sets tough and is difficult to sand.
- Cornice Cement - A powder that is combined with water to make a paste to adhesive on cornice - smooth gaudy paste that set very difficult as well as is tough to sand.
- Finishing Compound - This is premixed in pails and also prepares to use straight from the pail - dries (does not established) and is really simple to sand.
- Glass fiber tape - This tape is self adhesive and provides strength to the filling up plaster or skim coat - just needed on larger holes
To fix an opening of damage to a wall surface you Will just need skim coat and ending up compound.Tools: There a couple of devices that you will certainly need
to acquire to do the job however these are easy and also low-cost --One broad blade 250mm(10inch)wide
( resembles a wide paint scarper), one 100mm( 4inch) broad blade, one 100mm (4inch) x 250mm (10inch )towel.You will likewise need to blend the skim coat for larger
holes so an electric drill and also paint mixing accessory is best. Nevertheless the skim coat could be mixed by hand yet this is slow.For Instance: An opening concerning the dimension of a tennis sphere was made while
relocating furniture.Step one: See to it the hole in the drywall is tidy (no sticking out drywall or paint)
mix your skim coat power with tidy faucet water to a paste comparable to tooth paste. Keep in mind: if the base layer is also damp the skim coat will befall of the opening. If you locate the base layer constantly drops right into the wall surface tooth cavity fill the behind the opening with newspaper to support the skim coat while it sets. Fill the opening using the smaller wide knife seeing to it the hole is filled as well as the base coat is flush with the drywall.Step two: When the very first coat of base layer is set, Cut a little amount of glass fiber tape to just cover the opening and thoroughly took into place. Blend a small amount of base layer as well as spread over the tape making sure that you spread the base coat beyond the tape. The smoother as well as flatter the second layer is the much better the outcome will be. Allow it set from 45 -60 Min's. Step 3: Spread a slim layer of completing substance with the huge wide knife and let this completely dry.
The completing compound should be spread a minimum of 100mm (4inches )beyond the base coat.Step 4: Sand your collaborate with 180 grit sand paper making certain you feather or mix the edges with the existing repainted wall surface to ensure that the repair will certainly not be seen when painted. The goal is to sand the fixing as level as you could and mix in the edges. After that your repair service is ended up as well as ready to paint.Tip: Keep in mind to clean you tools off with tidy water between steps so the plaster does not set on your tools.

Drywall Issues at Home: DIY Fixes Vs Professional Drywall Repair
Drywall repair Oldsmar - handyman