[post_name drywall texture Seven Simple Steps to Repair Drywall

Drywall texture is straightforward and also an inexpensive means for wall decoration. Drywall is widely referred to as plaster board or plasters board as well as is used making interior wall surface as well as ceilings. It readies if greater than two individuals are involved in the process of drywall installment, because it needs substantial training of heavy material.Partitioning Drywall is
really much favored for partitioning. This is since a big number of advantages are connected with it like flexibility, versatility, dry building, superb performance, visual appeal, as well as excellent speed in overall process of setup. The installation of drywall calls for technique and virtuosity. Drywall is available in large sheet with a dimension of 4'x12'.
Taping Drywall
The installation of the drywall is very simple. It is only the taping of joints between panels which call for some practice. As soon as the dangling of the drywall is total, the following action is the taping of drywall joints. There are 2 kind of tapes made use of for this function. One is the airplane paper black tape as well as the other is self-adhesive fiberglass tapes. The fiberglass tape can be directly pasted over the drywall.Materials Required
For Taping The basic devices required for the procedure of taping are: & bull; A banjo & bull; 12 inch trowel & bull; Roll of paper• tape & bull; Establishing substances & bull; Six inch flexible putty knife & bull; 4 inch versatile putty blade Sanding, Priming and Finishing The primary step while preparing the surface area of drywall is to
check the entire wall surface, since many of the moment there are tiny holes as well as lumps in the wall surface. If there is any type of nail or barrier, after that with the assistance of hammer touch them. After this procedure, you could go on with the sanding of the wall surface in order to obtain perfect drywall surface.The next off important action is priming, which is done right before paint.
Keying the drywall ensures that paint lasts for longer duration and adheres well. In order to stay clear of trickling of the paint, job from the top and also continue in the direction of the bottom. After completing this, you can continue for painting.The last step is drywall ending up. It is good to obtain stuck to flat paint, due to the fact that the retouch job with level paint is extremely easier. Here, it is essential to keep the gap or 24 hours prior to two coats and also guarantee that wall surface is completely dry prior to you choose the following coat. It is frequently observed that drywall looks entirely various once the paint dries out off.Fiberglass to avoid mold and mildew development The sheet of drywall is generally constructed from paper yet nowadays it is changed by fiberglass. Fiberglass stops the growth
of mold, which is typical with paper drywall. It has been observed a variety of times that when paper drywall was revealed to water with leakage or floodings, it triggers the growth of mold and mildew. Mold not only impacts the neighborhood health however likewise lessens the general charm of the space.
Sheetrock - What Is It?
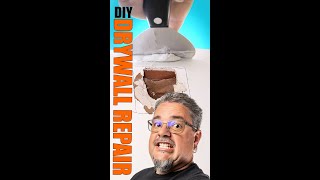
Drywall is one of the most typical wall cellular lining of the the contemporary house. The drywall is glued and nailed/screwed to the lumber frame of your house and after that the joins are after that smudged and sander. Throughout the life of any kind of house damages to the drywall will occur commonly when the moving furniture or playing inside your home. There are 2 means to repair this damage - ring a specialist and pay them to repair it or learn how you can repair it on your own. A lot of repairs fast as well as simple with a couple of devices to do the task
Plaster Types
The first point you have to understand is the kinds of plaster that are made use of to do the Task. There are three main kinds:
- Skim coat - A powder that is combined with clean water to make a paste and also used in joints and also loading holes - sets hard and is hard to sand.
- Cornice Cement - A powder that is blended with water to make a paste to glue on cornice - smooth gaudy paste that established extremely tough and also is hard to sand.
- Ending up Substance - This is premixed in buckets as well as is all set to make use of straight from the pail - dries (does not set) and is extremely simple to sand.
- Glass fiber tape - This tape is self adhesive and also provides stamina to the filling up plaster or skim coat - only needed on larger openings
To fix a hole of damage to a wall surface you Will only need base coat and finishing compound.Tools: There a couple of devices that you will certainly require
to purchase to do the task however these are basic and inexpensive --One wide knife 250mm(10inch)large
( resembles a vast paint scarper), one 100mm( 4inch) broad blade, one 100mm (4inch) x 250mm (10inch )towel.You will additionally require to blend the base coat for bigger
openings so an electric drill as well as paint mixing attachment is best. Nonetheless the base coat could be mixed manually however this is slow.For Example: An opening about the dimension of a tennis sphere was made while
removaling furniture.Step one: See to it the opening in the drywall is tidy (no protruding drywall or paint)
mix your skim coat power with clean tap water to a paste comparable to tooth paste. Note: if the skim coat is too wet the skim coat will certainly drop out of the hole. If you locate the base coat continuously comes under the wall tooth cavity fill up the behind the hole with paper to support the base layer while it sets. Load the opening using the smaller sized broad knife seeing to it the opening is filled up as well as the base coat is flush with the drywall.Step two: When the first layer of skim coat is established, Cut a percentage of glass fiber tape to simply cover the opening and also carefully placed into area. Blend a percentage of skim coat and spread over the tape seeing to it that you spread out the skim coat beyond the tape. The smoother and flatter the second layer is the far better the outcome will certainly be. Allow it established from 45 -60 Minutes's. Step 3: Spread a slim layer of finishing substance with the huge wide knife and also let this completely dry.
The ending up substance must be spread a minimum of 100mm (4inches )beyond the base coat.Step 4: Sand your deal with 180 grit sand paper seeing to it you feather or mix the sides with the existing paintinged wall to ensure that the repair will certainly not be seen when repainted. The aim is to sand the repair work as flat as you could and also blend in the sides. After that your repair is completed and also all set to paint.Tip: Keep in mind to wash you tools off with tidy water in between actions so the plaster does not set on your devices.

Sheetrock - What Is It?
Drywall repair Pompano Beach - sheetrock prices