[post_name how to repair drywall Drywall Repair Tips

It's a typical situation you're sitting down stairs enjoying the TV or checking out a book, and afterwards you listen to a loud bag from upstairs. Surprised, you run upstairs to see exactly what is taking place, as well as you see your child's leg, arm or head sticking from the wall. Besides the dust clears, you see to it that every person is alright, as well as the correct penalties are divvied out, it's time to take care of the gaping opening that is left in your wall.Now depending
on the dimension of the opening that is in the drywall. depends upon just how it is mosting likely to be taken care of. If you have a tiny door handle dimension opening it's going to be much easier to do it one way (which ill discuss later). But if you have a bigger hole it could be less complicated to install a big brand-new item of drywall that runs from one stud to another. I'll discuss that also.Now with a
smaller hole First we should reduce out the fragments that are hanging everywhere. We will do this with a drywall saw and also an utility blade. Then when we have a wonderful tidy location to collaborate with, we desire to remove about 1/2inch to 1 inch strip of paper off the drywall to ensure that it appears like torn cardboard. Then we desire to cut an item of drywall that is somewhat larger compared to the opening that is going to be repaired. Then begin to carve away at the rear end of the piece till the piece fits the opening and also the paper is left. This piece is called a "patch hat".
Now put drywall mud on the edges of the spot hat as well as area it in the red. Then once in area use a coat of mud over the patch, allow dry. Once dry, chip off any chunks and also sand smooth, then mud once again. Let that dry, and do the exact same point. Do this up until the spot is wonderful and also smooth and all set to be painted.That's ways to fix a little hole in drywall. Currently to repair a bigger opening it's basically the very same point except that we are mosting likely to intend to eliminate the hole totally. Take the drywall saw as well as cut till you struck a stud, now determine to the mark and minus & frac34; of an inch to make sure that you will be fifty percent on the stud. Make 2 marks as well as snap a line, or with a flat side draw the line with both marks, that's the line you wish to reduce. Currently that you have that done we intend to make use of the saw to reduce to the stud beyond of the hole. Take a dimension from the same place that you did for the other mark and add & frac34; of an inch to it. That will obtain you half on the various other stud. Make two marks a draw a line via it. With a mounting square, utilize the line to make a square line on top and also at the base of the hole. You must have a square opening currently. Now you intend to reduce out the piece that you have marked. Action the hole that you have and reduce a piece to fit in it. Once cut place the item in the red as well as nail to two edges where the studs are with some drywall nail. Then mud it like in the various other instance and you are prepared. These are some instances of ways to repair a hole in your wall surface.
How About That Drywall Repair?
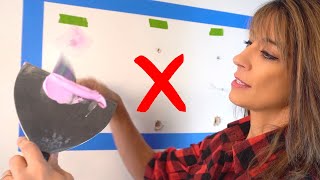
By the time you complete reviewing this write-up, you will certainly be able to perform basic repairs to damaged drywall. There are some basic tools that you must maintain around your house, if you have an active family members and also are susceptible to obtain dings in the wall surfaces. This article will certainly not supply enough info to do significant repairs to drywall. Significant repairs are easy, yet you should find out the fundamentals first.Here is a list of some devices you will need. Your local big box could provide you with some standard tools. They run in price range from inexpensive to specialist top quality. They have plastic putty blades for much less compared to a dollar completely up to stainless-steel that with treatment, will last a life time. If you anticipate a really handful of repairs, the plastic will certainly suffice. Likewise, get a carriage screw, a tiny hammer, a could of drywall joint substance, 150 to 220 grit sandpaper and also a paint brush. These basic devices will certainly fix most little dings and damages in drywall.An example of a ding would certainly be where the securing
switch on a door handle has left an impression in the wall surface behind it. This is common of a fast and simple repair. Take a look at the damages. Exists anything protruding above the wall surface? If so, utilize the carriage bolt to press the projection below the wall surface. Use the hammer to assist persuade the protrusion to go below the surface of the wall surface and also round the sides. Next off, take the putty knife and also some joint compound or as it is generally called, drywall mud, as well as fill up the hole. Wait up until the mud dries, sand gently and fill the opening again to bring the material to the exact same degree as the wall. Sand the surface once more till the wall is smooth and also degree. Do not over sand. This will rough up the drywall allowing the paper to fray as well as calling for more mud to secure the harsh surface area. There should not be any type of distinctions in the surface area. A number of tiny applications will last a lot longer compared to one big application and give you far better results.Is every little thing smooth? If not, apply some more drywall mud to even the wall surface areas. Sand again. When the wall is smooth, apply the paint primer. When the paint primer is completely dry, apply your routine wall paint. The paint guide is to seal the wall so the new paint does moist too rapidly permitting the patch to be visible.That is the basic approach of repairing harmed drywall.

Repairing a Hole in Drywall
Drywall repair Lynn Haven - hanging drywall