[post_name ceiling texture Sheetrock - What Is It?

A hole in drywall could show up to several individuals to be challenging to fix, yet in truth it is a simple repair that most of homeowners can fix themselves. The repair strategy outlined in this write-up takes a few hrs, however if done correctly will leave you with a flat, seamless wall. There are 7 actions that you should follow in order to achieve a great repair on your drywall.1.
Mark off the area to be patched. Utilize a square to mark off an area slightly larger than the hole that you are repairing.2.
Making use of a drywall knife, cut around the four sides that you have already marked off, leaving you with a square hole in the wall surface.3.
Prepare a piece of timber to enhance the spot. To do this, reduced a slim strip of 1x2 or 1x4 a little bigger than the elevation of the hole. Slip the timber into the opening as well as placement it to ensure that the wood expands just as above and listed below the opening. Connect the wood making use of drywall screws connected with the bordering drywall.4.
Produce a drywall spot for the opening. Utilizing a measuring tape, energy blade as well as a square cut an item of drywall to fit within the opening.5.
Safeguard the spot using drywall screws affixed via the support board that you have actually currently mounted. Screw down the patch up until it is flush with the surrounding wall surface.6.
Spread a thin layer of joint substance on the spot using a drywall blade. If needed, use drywall tape around the perimeter as well as spread on another slim layer of joint substance. Let the location dry and after that sand the area using a great grit sandpaper.7.
After the joint compound is totally dry, apply an additional coat of joint substance using the drywall blade, assimilating the fixed location with the surrounding wall surface. Permit to completely dry entirely as well as sand once more with great grit sandpaper. Once you have completed the steps, you ought to have a seamless patch.All that is
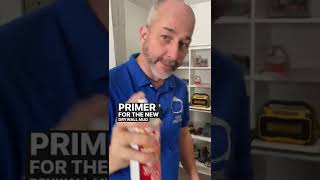
delegated do currently is paint the repaired area and also your task is total. To do this you require to prime the newly fixed location initially. You could utilize a latex based guide to do this such as Kilz or Zinsser. After primarying the fixed location as well as allowing it to dry, you are all set for the finish layer. If you have retouch paint it could not match completely since also indoor paint will discolor over a time period. If your paint does not match, there are two different choices. The first choice is to repaint the whole room which is one more job entirely or you could repaint from corner to edge of the repaired wall. I would recommend you to try and paint from edge to edge of the repaired wall surface initially as well as if it does not match with the remainder of the space you could constantly painting the entire room.So the next time you have some damages to your sheetrock, if you follow these steps you should have no worry fixing it to its original state. All the best.
Drywall Repair Tips
The strategy for how you can eliminate drywall appearance depends upon the product being gotten rid of and also the problem of the wall. One of the most typical strategy for eliminating appearance from painted drywall requires sanding off the high sections of the texture and filling it in with a minimum of 2 thin layers of joint compound - called skim finishing. An additional technique for unpainted textured wall surfaces as well as ceilings, consisting of popcorn ceilings, is splashing water on the surface area to loosen up the appearance so you can scuff it off.When a wall surface has
substantial fractures, peeling off paint or water damages, it might be less complicated to cover the existing wall with 1/4 -inch drywall or eliminate the existing wall completely and replace it.Whatever strategy you utilize to get rid of a textured surface from drywall, secure yourself from direct exposure to building dust, lead as well as asbestos.Removing distinctive wall surface surfaces is a demanding process that takes persistence.
Below's just how to tackle some typical issues so your wall surfaces will certainly be smooth and also your work, profitable.How to remove drywall structure by skim finish Issue: Uneven surface.Solution To prevent developing an irregular wall surface when you're removing the structure, don't utilize a belt sander. It will certainly collect the structure.
Rather, eliminate high peaks in the appearance using a post sander with 120 grit or a 5-inch flooring scraper.Problem: Bulgy looking patches.Solution Get rid of any kind of loosened product with a rigid brush, scuff high areas as well as wipe with a moist towel. To use the initial layer of joint compound, begin at the top and also job across and also down. "The most crucial point is not to utilize excessive product ,"claims Ivan Solis, head of state of Chicago-based Solis Building and construction."If you use as well much joint compound, it will be tough to achieve a smooth surface area. You'll have to do a lot of sanding. "Do not stress concerning surges, simply aim to cover the texture and also get an also coat on the wall surface. Hold the joint blade at a 30-degree angle and press it in. "Keep it limited and also smooth,"states Solis, who suggests making use of a 10 -or 12-inch joint knife.Alternate the direction of the skimming strokes with each new layer of mud. If you apply the very first layer flat, apply the second layer vertically. Return excess mud from the surface area to the edge of the frying pan, maintaining the blade of the knife clean.When the first layer is dry, use the second layer to complete the ripples. Again, start on top in the corner as well as work across and down. As you function, knife off any type of large portions of the first coat, utilizing your blade. If there are still reduced and also high spots, you might require a third layer. When the coat is dry, coating with a final sanding.Problem: Joint compound that sets as well swiftly or is also tough to sand.Solution Choose the ideal substance for the job. When a wall structure will need a number of coats of joint substance to smooth the surface area, make use of a setting substance like Sheetrock Easy Sand for the initial coat."Easy Sand 90 is a chemically establishing substance that will certainly provide you approximately 90 mins to work before it establishes,"claims Jeff Hartin, item supervisor for USG's Ready Mixed products. The item is ideal for heavy loads and sands easily."The great feature of a setup substance is that you can use the very first coat as well as start a 2nd coat as quickly as the first one has set,"says Solis.For the second or last layer, Hartin and also Solis advise a ready-mixed joint compound, such as Sheetrock Plus 3. The lightweight product is simpler to spread, permits a thinner application, and is easier to sand.Problem: Discolorations seep through the joint compound.Solution These issues are frequently because of incorrect adhesion and also are usual on lots of DIY painting projects. If the distinctive wall is peeling or plaster and textured joint substance are dropping off, remove loose product with a scrape, sand and also layer the surface with primer/sealer prior to skim coating.Problem: Splits and also dents reappear.Solution Repair fractures and also dents prior to skim covering. To repair them, tape over the cracks with drywall tape and secure them with joint substance. When the wall is smooth, a drywall guide and also sealant will certainly seal the
wall and aid avoid cracks and also damages from reappearing. Primer also neutralizes the pH of the wall for a more even appearance.Problem: Peeling paint and gurgling in the paint finish.Solution These troubles are often due to improper attachment. If the textured wall is peeling off or plaster and also textured joint substance are diminishing, get rid of loose material with
a scraper, sand and layer the surface area with primer/sealer prior to skim coating.Problem: Pitting.Solution Pits on the surface area of the drywall are air bubbles that were not effectively filled up or that were revealed during fining sand. Air bubbles result from over -or under-mixing the joint substance. Apply pressure to the bubbles with the joint blade, until the pits are gone. If you don't notice them till the wall surface is completely dry, cover them with joint substance as well as sand.Problem: Over-sanding; missing out on high as well as low spots.Solution Sand way too much and you run the risk of damaging the surface paper. If that happens, cover the area once again with joint compound. To avoid missing high as well as low spots, utilize a clamp-light or various other light resource close to the wall surface to find issue locations. Sand carefully, working from the ceiling to the flooring in narrow sections.How to remove a textured surface area from drywall by scraping
Trouble:
Wall harmed by water as well as scrapers.Solution Experts suggest moistening wall surface appearances with a spray bottle to loosen up the material. After that utilize a scraper with a level, vast blade to remove the structure. Usage only sufficient water to loosen the material or you could damage the drywall. If you mark the sheetrock with the side of your scuffing blade, spot it with joint compound.How to remove a distinctive surface from drywall by covering wall surfaces with drywall Problem: Re-installing trim.Solution "Something to remember when applying 1/4-inch drywall over an existing
wall surface is that not just will your wall, windows and door covering look a 1/4- inch thinner however all of the "joints"will need to be loaded with joint substance and also caulked, "says Solis. You could have to get rid of trim and reinstall it, and electric outlets may need extensions to bring them flush to the wall.

Drywall Repair Considerations
Drywall repair Key Biscayne village - sheetrock prices