[post_name how to fix a hole in the wall Repairing a Hole in Drywall

A hole in your roof covering is a great deal worse compared to one in the wall. When it comes time to fix a hole on the within your residence, relax, it's not all that negative or that tough to fix it if you have some tools and also the moment to persevere. Drywall fixing could seem out of reach to the homeowner, especially if you have actually never ever done it before. Allows placed with each other a quick check listing of products you will have to obtain this done ...
- A piece of drywall a little bigger compared to the hole itself, take notice of the density
- A drywall saw, a pointed type saw that you can push into the wall surface to reduce
- Scrap piece of thin timber or other material to screw into
- Handful naturally drywall screws
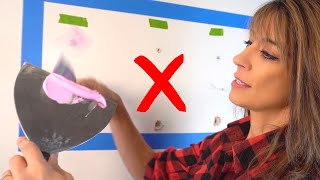
- A putty knife 2" - 4", steel or plastic
- Drywall substance or 'Mud'
- 100 grit sandpaper
Normally, repairing drywall is a multiple action process. Meaning that the primary step is getting a substitute piece of drywall to fit over the opening size depending just how large it could be. That was the initial step ... appeared like a great deal of work ...
The staying actions are utilizing drywall substance (mud) to putty blade over the screws that are sunk simply below the surface area and the seams of the repair piece. Utilize simply sufficient mud to somewhat fill the dimples because you will mud over them once more after they dry ... generally over night (maybe faster).
When you are certain the openings are filled you will certainly should sand the excess mud down flush with the wall surface. Glide your turn over your work ... does it feel smooth/ equal or does it have a bump to it? Get the surface area to match the surrounding area and also you are done with the exception of the paint to match your wall.This method
takes a couple of times to get the knack yet, it is certainly do-able by the home owner. Bigger openings are come close to similarly ... you are simply covering more location and also you will certainly have the framework in the wall surface to attach the drywall to. I hope this was reliable as though you might wish to attempt this kind of fixing by yourself one day. For an extra detailed take a look at this repair work, visit the web site listed below.
Drywall Mudding and Taping - A Simple Process For Do-It-Yourself Homeowners
Drywall setup is just one of the most common home enhancement tasks many property owners discover themselves confronted with. Whether you're changing drywall in your house or adding a brand-new wall surface as part of a larger home renovation job, you could discover on your own in a situation where you should change drywall in your house. This article covers a couple of tips for making certain the finish on your drywall repair work is done appropriately so it will certainly mix in with the rest of your home.Gather the Right Devices and Materials There are a couple of tools and also
products you'll have to tackle your drywall job. First, you desire to have adequate joint substance for the job ... roughly 1 gallon for every 100 square feed of location. Obviously, you'll also need a mud frying pan or comparable container to hold the joint compound as you apply it. Furthermore, you'll need a number of taping blades or putty blades. I recommend having a narrow one and one that's a bit wider for feathering out the joint. You'll likewise require drywall tape to run along the joint. Ultimately, you'll need sandpaper or something just like sand down the joint compound between coats after it dries.Applying the Initial Layer of Mud The initial point you intend to do is apply the drywall tape along the seam between both pieces of drywall or sheetrock. Attempt to do this so the joint leaves the center of the tap. Once the tape is in area, you can begin using joint compound using one of the putty knives. Liberally apply the joint compound as you run along the length of the joint as well as make sure the joint substance gets pressed right into the seam to fill up the gap. Additionally, be sure you cover all of the tape with joint compound. You might wish to stumble upon the length of the joint a number of times with joint substance, feathering out the mud as you proceed to do so. You can look after the corners similarly, by taping and also using joint substance to the seam that forms the edge between both pieces of drywall. Last, you'll wish to also use joint compound to any type of nails holding up the pieces of drywall. Simply use your putty blade for this while applying a liberal quantity, after that smoothing it out with the edge of the blade. After that allow the joint compound dry.Applying the 2nd and also Third Coats You'll intend to apply concerning 3 layers of joint compound. After the initial coat dries, be certain to sand down the joint substance on the joints and also the nails prior to continuing. This will certainly guarantee that the surface area is smooth asyou use the following coat. After that use a second coat of joint substance to the seams likewise as the first coat , however spreading the joint substance out wider as you leave the seam. Do the very same for the nails as well as let this layer dry . As you possibly thought, using the 3rd layer is the precise same process.Getting Ready to Repaint When you've used the 3rd layer of joint substance and allow it dry, be sure to sand around the sides of the seams as well as nails one last time to make sure the surface area is as smooth as possible. You'll also want to wipe down the wall with a dry cloth to obtain eliminate any dirt that gets on the surface.Now you prepare to prime as well as painting your walls.
Drywall repair Jacksonville Beach - patching drywall

How to Install Your Own Drywall